Build An ITX PC
Finally, I graduated with a degree in architecture and I no longer needed a high-performance rendering PC because it was so power-hungry, it was time to celebrate by building a brand new ITX PC!

As I am going to the UK soon to do a Masters in Computer Science, I need a decent computer to use. However, I can’t stand the harsh noise from my laptop’s cooling fan under high load conditions, and carrying an ATX-sized PC with me on a plane is not practical. All things considered, I decided to build an ITX-sized PC. However, the entire process was much more complicated than my previous ATX setup, as the market demand is relatively small and thus the choice of ITX-sized computer accessories is very limited and often very expensive. So, I spent a lot of effort comparing various brands of accessories (I had nothing to do after graduating anyway) and ended up with the following configuration list.
Configuration List
| Component | Model | Price(RMB) | Note |
|---|---|---|---|
| CPU | Intel Core i5-10500 @ 3.10GHz 6C12T | 1269 | |
| Motherboard | ASUS ROG STRIX B460-I GAMING | 1064 | |
| Memory | G.SKILL Trident Z RGB 16GB*2 DDR4 3000MHz | 1158 | |
| GPU | Intel UHD Graphics 630 | 0 | Integrated Graphics |
| SSD 0 | Samsung SM961 (256GB) | 0 | Migrate from my old PC |
| HDD 0 | WD Blue 2.5 (500GB) | 0 | Migrate from my old laptop |
| Wireless NIC | Intel Wi-Fi 6 AX200 160MHz | 0 | Included in the motherboard |
| PSU | CORSAIR SF450 Platinum | 585 | |
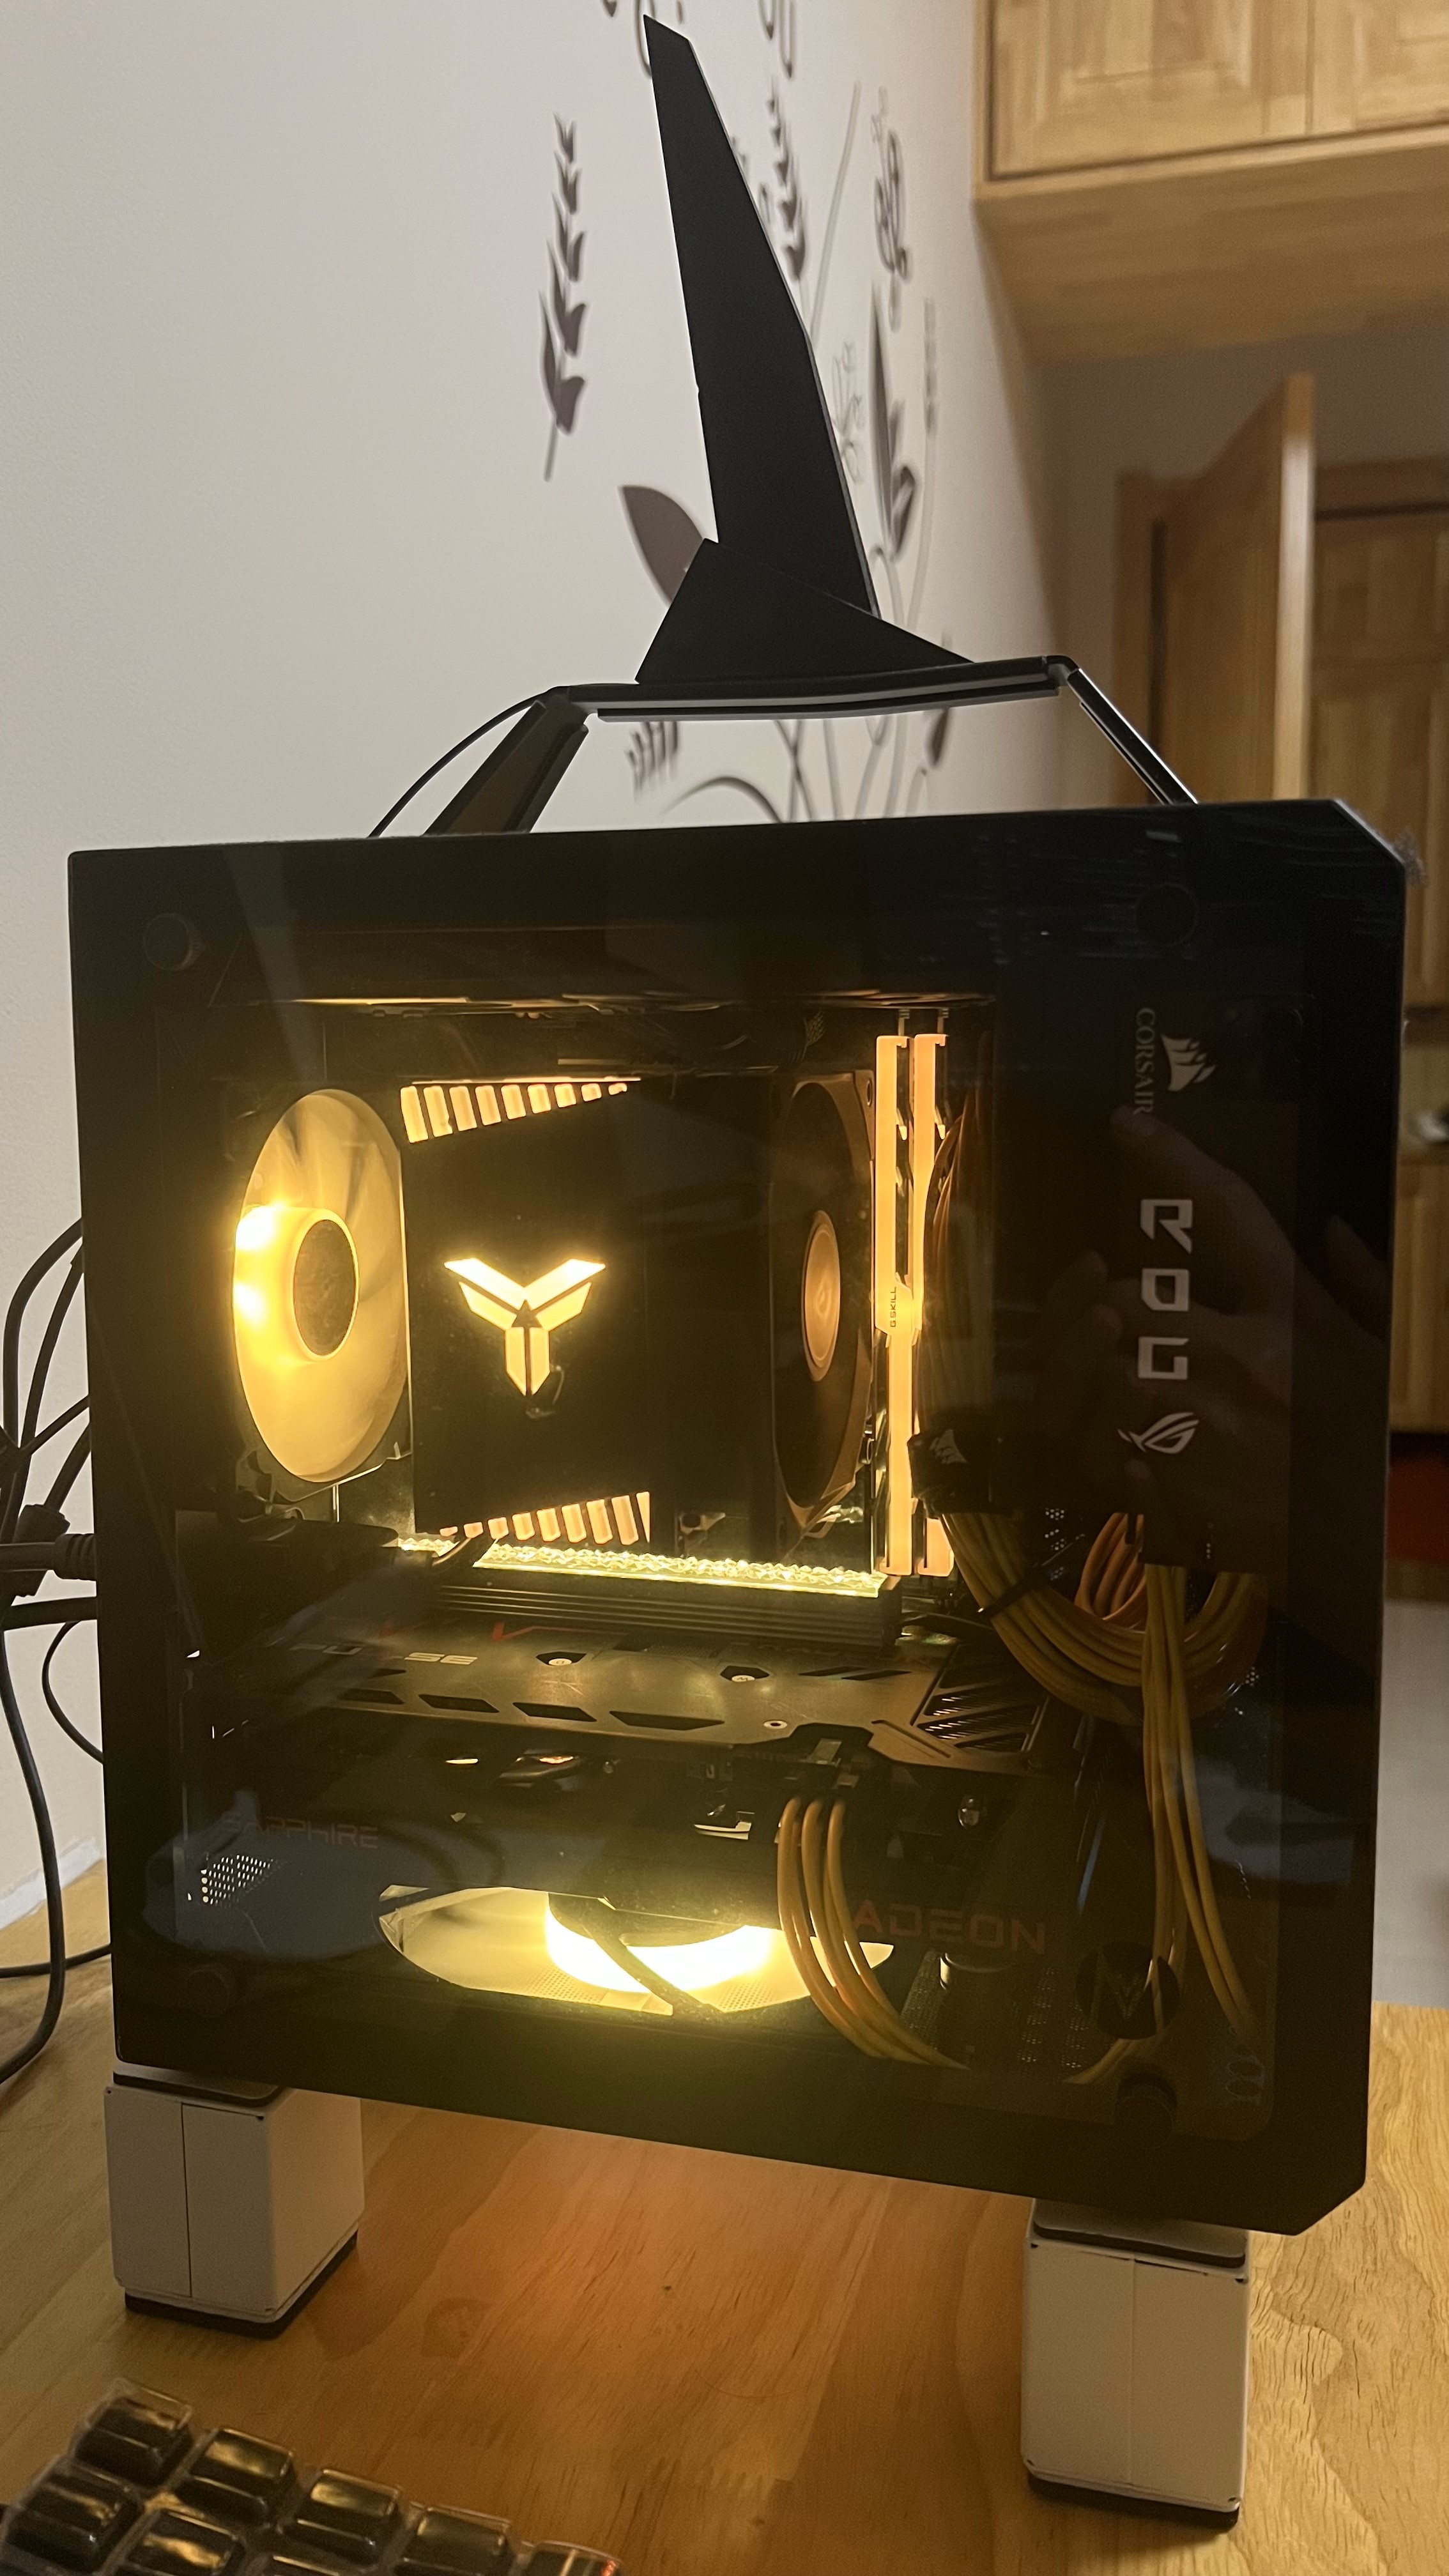
| Case | Mechanic Master C24(Oxide yellow) | 688 | With custom silicone wire |
| Side Panel | Black side-translucent acrylic (magnetic) | 50 | Custom-made |
| CPU Cooler | Jonsbo CR1400 | 69 | |
| Fans | Arctic F8 PWM *4 | 122.4 | |
| Display | DELL P2418D 2K | 1349 | |
| Others | Pikachu Stickers & Models | 47 | |
| Total | 6401.4 |
Building Process
I initially wanted to buy all the accessories on Jingdong because it has a better product warranty. However, during the Jingdong shop sale on June 18, all the accessories I wanted were out of stock and I had to go to Taobao to buy them.
CPU
This generation of Intel CPU looks a bit weak compared to AMD’s contemporaries. The 10th generation Cores are still made using the 14nm process, while AMD’s CPUs of the same era are already using TSMC’s 7nm process. But I wanted to install Hackintosh on my computer, and the current AMD CPUs lacked support for Hackintosh, so I eventually chose the Intel CPU.
The 10th generation Core restores the hyperthreading that was removed in the 9th generation, and from the specs it looks like an upgrade from the 8th generation Core, with the 8th generation i7 becoming the 10th generation i5. The 10500 is essentially the 8700 in a different shell, with the i5 price for the old i7 LOL.
The Core i5-10500 was released in 2020 with 6 cores and 12 threads. With base clock at 3.1GHz, max speed at 4.5GHz, PL1 at 65W, PL2 at 134W, and 28s Tau.
In fact, the most cost-effective CPU in the 10th generation Core processors should be the 10600K, with base clock at 4.1GHz, max speed at 4.8GHz, and the brazed thermal conductivity technology used between the CPU core Die and the top cover. Brazing does not deteriorate the thermal conductivity like silicone grease does thus resulting in better durability. However, Intel has kept the 10600k off the shelves in order to clear its 9th generation inventory, but the good news is that the i5 doesn’t produce much heat, thus a quad heatpipe tower cooler is sufficient, so I decided to buy the 10500 with silicone grease filling the CPU core Die and the top cover. If you really want a CPU with brazing technology, you can consider buying a 10400, but it’s like a gamble because there are two models of 10400, one is Q0 stepping (SRH79), which is supposed to be obtained by blocking out four cores from a non-qualified 10-core i9 CPU which uses brazing for thermal conduction; the other is G1 stepping (SRH3D), which is a native 6-core with silicone grease for thermal conduction. Only a few people in the comment section of Jingdong said they got a Q0 stepping CPU, so the probability is very low.
Motherboard
Although the Intel CPUs are reasonably priced, the matching motherboards are very expensive. In addition, ITX motherboards are already more expensive than ATX motherboards with the same chipset, which can easily lead to an embarrassing situation where the motherboard is more expensive than the CPU.
The B460I motherboard is currently only available from ASUS and ASRock, with ASRock’s model being only entry level, priced at ¥749, with only four USB ports, which is not enough. The ASUS model is part of the ROG Strix series and is priced at ¥1299. Although the motherboard has the ROG eye logo on it, the logo is just a sticker without any lighting effects, which is slightly a pity.
The H470I motherboard is only sold by Gigabyte and ASRock, but Gigabyte sells it for ¥1898, which is too expensive compared to ASRock’s better price/performance ratio, and the Z490I motherboard is even more expensive, except for ASRock, which has an entry-level motherboard for ¥1599, while all other brands sell for over ¥2000. The H470 and Z490 chipsets can support the 11th generation Core, but most people won’t change the CPU until the computer is retired, so I went for the cheap and relatively practical ROG B460I motherboard.
The ASUS B460I comes with a driver-free wireless card, which is very convenient. The motherboard will remind you to install Armoury Crate after the first boot. This software can control the AURA lighting effects but it is very tough to use, with many bugs, and it took me a long time to finally get it working properly.
Memory
The B460 chipset only supports up to 2666MHz when using an i5 and 2933MHz when using an i7, so there was no need for me to buy a high-frequency memory stick and I opted for the Illuminated Halberd for aesthetic reasons. However, the light control on the Trident conflicted with the light control on the motherboard. Initially, I didn’t install the Trident’s light control software, so the motherboard didn’t recognize the RGB lighting of the memory, but when I installed the Trident’s light control software, there was an awkward situation where the motherboard’s light control software controlled the light effect of one memory while the Trident’s light control software controlled the other. Only after exiting the Trident’s light control software was the motherboard able to control the light effect of both RAMs. There is one small inevitable issue with choosing memory with light effects, that is, the memory lights will remain illuminated when the computer is in sleep mode, as the memory will remain powered on to hold data during sleep.
GPU
For the graphics, I simply used the built-in integrated graphics card in the CPU, which supports up to 4k 60Hz output. The integrated graphics card can dramatically improve learning efficiency, as you can hardly play games with it. In addition, the performance of the integrated graphics card can be increased by 20-30% when working with dual-channel memory, which is better than nothing.
PSU
The PSU I used was from Corsair, it is the only SFX PSU using a larger 9cm diameter fan. However, you need to pay attention to the production batch when purchasing, the 1944-2011 batch is found to be defective and many people in Baidu Tieba have reported that the power supply they bought was malfunctioning, mostly in the power off state, and Corsair has just issued a recall notice. I found a shop on Taobao that sells PSU produced early last year, batch 1902. Because the computer’s overall power consumption is quite low, the power supply’s fan hasn’t even worked since I bought it.
Case
The case is the core of the ITX accessory selection process. The first thing to determine is the size of the case, as it determines the size of the power supply (SFX or 1U), the height of the CPU cooler (top-down or tower), the way the graphics card is installed (direct or use extender PCIe cable) and so on. Cases with direct plug-in solutions for graphics cards can generally support higher CPU cooler heights but at the cost of increased width. The width of the C24, for example, reaches 155mm, compared to the 130mm width of the other case with the graphics adapter solution, and the width of the case largely determines whether or not it can fit in a backpack, making it a little difficult to fit the C24 into my backpack. Most of the ITX cases on the market today are designed by individual sellers and manufactured by small workshops, making for poor quality control and the need to adjust the cases yourself if there are any flaws. There are very few cases designed for mass production by the major brands, only JONSBO has released a few, but none of them quite fit my requirements. After comparing them I chose the C24 in Yellow, the yellow color scheme was just right for a Pikachu-themed case. The side panel that came with the case was made of tempered glass and was not suitable for moving, so I ordered an acrylic side panel for around 50RMB.
CPU Cooler
The CPU Cooler I chose was the CR1400 by JONSBO, for only 69 RMB, with quad heat pipes and ARGB support for both the top cover and the fan. This cooler is suitable for 10500 and lower power CPUs, with CPU temperatures around 40°C in the summer (26.5°C room temperature). The temperature will eventually stabilize at 88°C during the benchmark test, when the CPU is running at 4.19GHz on all cores, consuming 110W and drawing a core voltage of around 1.22V. A 10700-level CPU would probably need a 6-heat pipe cooler like the Silver Arrow 130.
SSD
For the SSD I used an SM961 removed from my old computer, after all MLC consumer-grade SSDs are no longer available at all, and after 3 years of use the total write volume of the drive was only 15TB, so I guess it could be a family heirloom.
I’m going to wait until the Taobao shop sale to buy another 1T SSD for the Hackintosh. Since the second M.2 slot on this motherboard of mine is on the back, the thermal conditions are rather poor, so I basically can’t use a high-performance SSD with higher heat generation. The SSDs currently on sale with better temperature control are Western Digital’s SN550, SanDisk’s Supreme High Speed (similar to Western Digital’s, presumably the same product), and KIOXIA’s (Toshiba) RC10, depending on the price.
Tips
- It is recommended to install the CPU cooler, RAM, and SSD onto the motherboard before installing the motherboard into the case, as the ITX case is too small and the installation is inconvenient.
- It is also recommended to plug the power cable, case-control cable, and USB cable into the motherboard in advance.
- Pay attention to the compatibility of the cooler and the memory before you buy. If the cooler I have is mounted vertically, the fan will squeeze the memory stick shell and the memory stick will be slightly tilted, but it does not affect the performance of the memory stick.
- If you have enough budget, it is recommended to buy a custom silicone cable or silver-plated cable to replace the original power connection cable, as the original cable is too stiff and difficult to route.
- If you have SATA devices, it is recommended to use a soft SATA cable to connect them. The two hard drive bays on the side of the C24 are very difficult to route, and a normal SATA cable will push up the side panel.
- If you use a C24 case, you must pay attention to the choice of a screwdriver, the number of screws in the C24 is too many and it is easy to slip the wire, I recommend using a PH2 head screwdriver (I wondered for a while that the boss was selling screws as a side business)
- When screwing, use a lighter force, as the C24 can easily lose its paint.
- Don’t over-tighten the motherboard screws to prevent deformation
Latest Upgrades
2020.9 Updated: Goodbye HDD
The HDD was too noisy, so I dismantled it and added the RC10 512G from KIOXIA.
2022.12 Updated: Long live the discrete graphics card
I’ve been waiting for a long time, but the discrete graphics cards just don’t drop in price, so I finally couldn’t wait any longer and bought a Sapphire 6500xt. As for why I didn’t buy a 6600, one is because there are too many mining cards, and the other is that this case is too strict on the size of the graphics card.
The best brand in the 6500xt is Asus, but it is 132mm wide, 2mm higher than my case size limit, and the part that protrudes is the heatpipe, if the side panel is padded, it can be installed, but I am worried that the heatpipe is too close to the tempered glass and the tempered glass may blow up due to uneven heating, so I bought a compact 120mm wide Sapphire graphics card.

2022.12 Updated: Duct adjustment
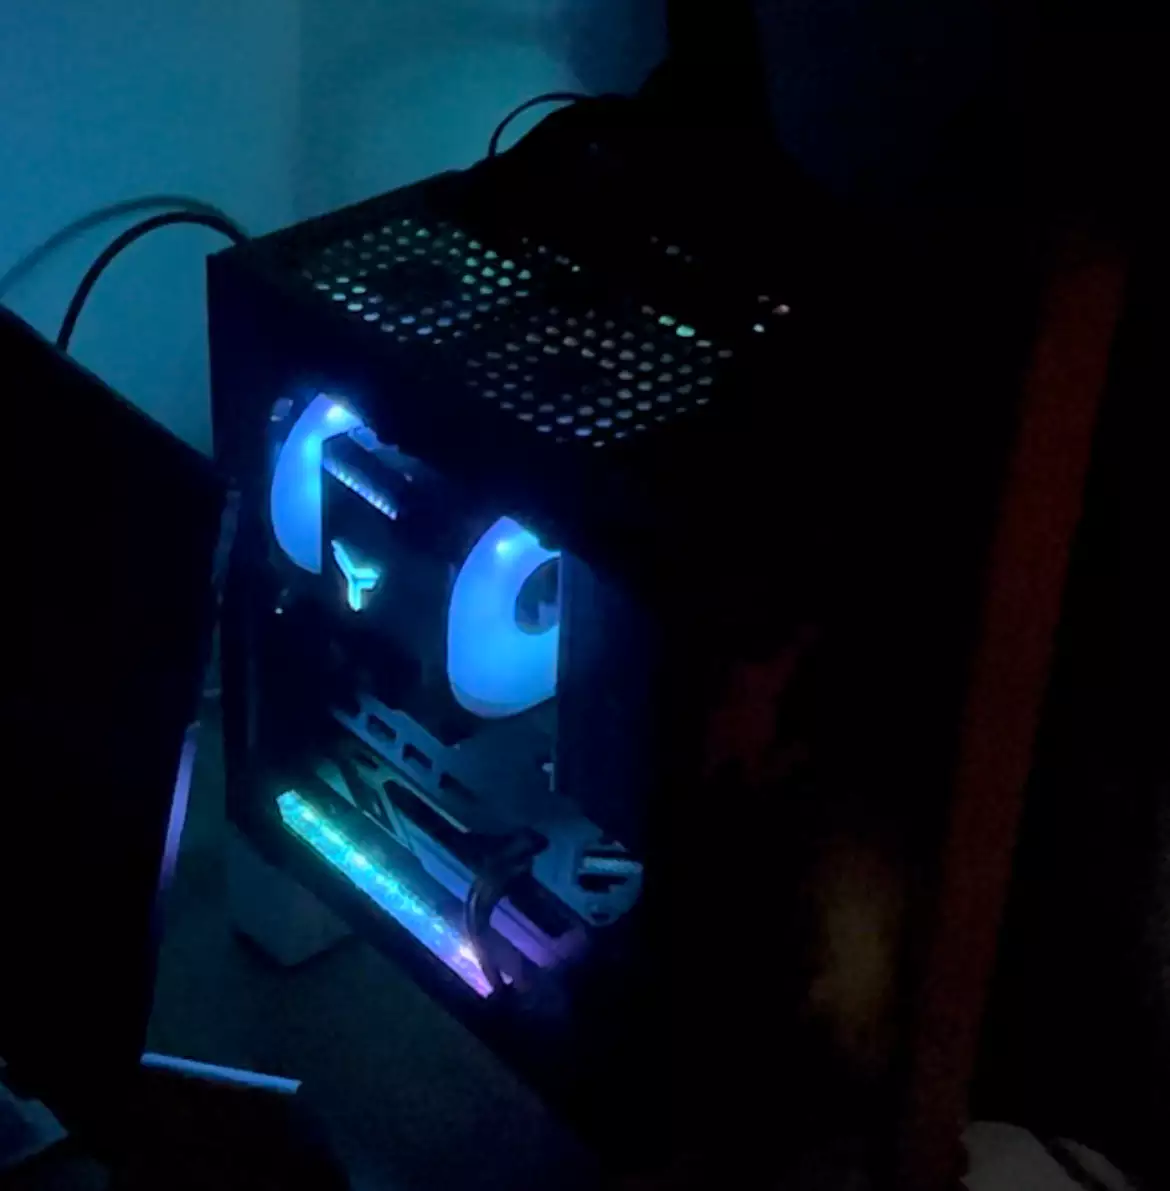
With a discrete graphics card installed in my case, there was no way to continue with the original vertical ducting solution as the CPU cooler would inhale the hot air emitted by the graphics card. In addition, my two 25mm high bottom intake fans were too close to the graphics card’s fans, which would affect airflow and create wind noise, so I replaced them with a 15mm high JOSEPH HF1215, a 12015 size fan with exactly the same airflow (62CFM) as the two 8025 size fans (31CFM*2), who also support ARGB lighting effects.
In addition, the two 8025-size fans on top of the case have been changed from 2 simultaneous exhausts to one intake and one exhaust, with the front fan supplying fresh air to the CPU and power supply and the rear one blowing out the heat generated by the CPU.
The CPU cooler fan has also been replaced with a larger air-pressure fan, the Thermalright TL-C9B, and the original fan has been moved to the rear exhaust port to continue its service.
2023.12 Updated: Poor quality fan bearings
The marketing and advertising for Dirise Thermalright is insane. Last year, I fell for their sales pitch and bought a Dirise Thermalright fan, but within less than a year, the fan bearing broke. At low speeds, there was a clattering noise from the shaft, reminiscent of a tractor, which was very annoying. At high speeds, the bearing felt like a wild dog off its leash, swinging wildly, giving the sensation of touching a jackhammer. Even the table it was attached to vibrated, and I feared it would shake my motherboard to pieces. Upon disassembly, I found oil seepage on the motor’s backside, so I just threw it in the trash.
Then there’s the JONSBO HF1215. Before buying it, I read reviews and comments, all of which spoke highly of it. When I got it, I found the airflow to be sufficient, the light bright enough, and it even came with magnetic auxiliary support, suitable for top/bottom mount. However, after a few months of use, it also turned into a tractor, with increasing shaft noise surpassing even Dirise. I found several forum threads with similar issues, indicating a decline in quality control. Before removing it, I noticed something even more peculiar: when the side panel was closed, the noise would intensify dramatically, becoming very sharp. Removing the side panel would revert it to its original tractor sound. Even propping up the side panel didn’t help. After eliminating wind shear, I speculated that a sound cavity had formed inside the case.
Seizing the opportunity to rid myself of these two “geniuses,” I made some minor modifications to the case:
- Removed the PVC dust filter and replaced it with a 60-mesh nylon mesh.
- Used captive screws and silicone pads instead of self-tapping screws to secure the fans.
- Replaced the CPU cooler with the easier-to-install Jossbor CR1400EVO.
- Added a spare SATA SSD.
- Removed the bottom intake fan.
- Added a 90-degree bend connector at the USB 3.0 19 pin port.
Modifications summary:
- After replacing the dust filter, stress test temperatures dropped by 8 degrees, proving PVC dust filters are rubbish.
- The CR1400EVO’s fasteners conflicted with the front M.2 heatsink on the motherboard, but brute force managed to get it installed. Later, upon disassembly, I found the fasteners were bent.
- The strange noise disappeared; there’s no fan noise while browsing web pages or watching videos.
- Removing the bottom fan had little effect on GPU temperature.
- The front USB 3.0 cable is truly the nemesis of ITX; it’s long and stiff, making cable management awkward. The shortest cable on Taobao is still 30cm, longer than my case.
Latest Configuration List
| Category | Model | Quantity | Total Price (CNY) | Note |
|---|---|---|---|---|
| CPU | Intel i5 10500 | 1 | 1269 | Bulk |
| Motherboard | ASUS ROG Strix B460i | 1 | 1064.86 | |
| RAM | G.Skill Trident Z RGB 16GB DDR4 3000MHz | 2 | 1158 | Total 32GB |
| GPU | Sapphire RX6500XT 4GB | 1 | 1100 | |
| SSD | Samsung SM961 256GB | 1 | 0 | MLC heritage |
| Kioxia RC10 512GB | 1 | 399 | ||
| Samsung 860 EVO 512GB | 1 | 0 | Unused for a long time | |
| Cooler | Jonsbo CR1400 EVO | 1 | 58.9 | |
| PSU | Corsair SF450 Platinum | 1 | 584.59 | |
| Case | C24 | 1 | 687.88 | Yellow oxidation + custom Corsair soft silicone cables |
| Fan | Arctic F8 PWM | 2 | 61.2 | Only kept the top two |
| Monitor | Dell P2418D | 1 | 1349 | 2K IPS 23.8-inch |
| Miscellaneous | Pikachu sticker | 1 | 9 | |
| PCI bracket | 5 | 6 | ||
| Pikachu figurine | 7 | 31.68 | ||
| Acrylic magnetic side panel | 1 | 50 | ||
| Soft magnetic strip | 1 | 9.5 | Seals gaps in the rear air outlet to prevent insects | |
| Riser blocks | 4 | 19.52 | Elevates the case | |
| RGB light strip | 1 | 24.25 | Length 142mm | |
| Jonsbo GPU bracket VC-20mini | 1 | 17.9 | Height range 15.5mm-50mm | |
| Soft magnetic strip | 1 | 9.5 | Width 10mm, Thickness 2mm, Length 10m | |
| Fingerprint recognizer | 1 | 69 | ||
| Fan captive screws | n | 38.28 | Pads + standoffs + hundreds of screws of various sizes | |
| 3M double-sided tape | 1 | 3.91 | 300LSE, 2mm width, 55m length | |
| Nylon mesh | 1 | 6.17 | 60 mesh, 1m length, white | |
| Fan vibration dampeners | 5 | 12.04 | 3mm thick, 9cm2, 12cm1, 8cm*2 | |
| Arctic MX4 thermal paste | 1 | 34.9 | 4g, thermal conductivity 8.5W | |
| Total Cost | 8074.08 | |||
| Host Only | 6383.43 |
END
2024.3: Replaced with a new case: Rider R2 5.0. This concludes the article.