How to Create a macOS Sonoma Virtual Machine in VMware Fusion
I got backstabbed by Apple! My 2017 MBP can't upgrade to Sonoma, and since XCode is tied to macOS versions, no system upgrade means no XCode upgrade. The older XCode versions don't support the latest iOS, so I can't deploy apps to my iPhone, turning my old Mac into a pretty paperweight. I agonized over installing a Hackintosh, setting up KVM passthrough, or using a virtual machine for ages. In the end, I decided to install the latest XCode on a macOS Sonoma virtual machine. It's not ideal, but hey, it works!🐶🐶
Please note: The software used in this post is VMware Fusion 13.5.2, the virtual machine system version is macOS Sonoma 14.5, and the host machine is a 2017 MacBook Pro running macOS Ventura 13.6.7. Please be aware of the timing.
This blog post is translated from my Chinese blog post, the content in the images used in the post may still be in Chinese, sorry for the inconvenience.
Download the VMware Fusion Installation Package
Ever since VMware got snatched up by Broadcom last year, their website turned into a hot mess. Downloading the installation package? Oh, it’s a whole circus act now. You get redirected to the Broadcom site, then you have to register a Broadcom account. Super annoying! And the cherry on top? After registering, clicking the “list all products” button does absolutely nothing. You can’t download a thing—just a steaming pile of frustration. I recommend finding a reliable third-party download site instead. But hey, if you want to higher your blood pressure, give the official site a whirl!
Activate VMware Fusion
In May, VMware announced that it’s free for personal use, so when the activation page pops up during installation, you don’t need to enter an activation code. Just select the Personal Use option to activate it.
Download macOS Installation Files
Before starting the virtual machine installation, please obtain the macOS installation files. For detailed instructions, refer to my previous blog post: How to Download and Create a macOS Sonoma Installation ISO Image.
Configure the Virtual Machine
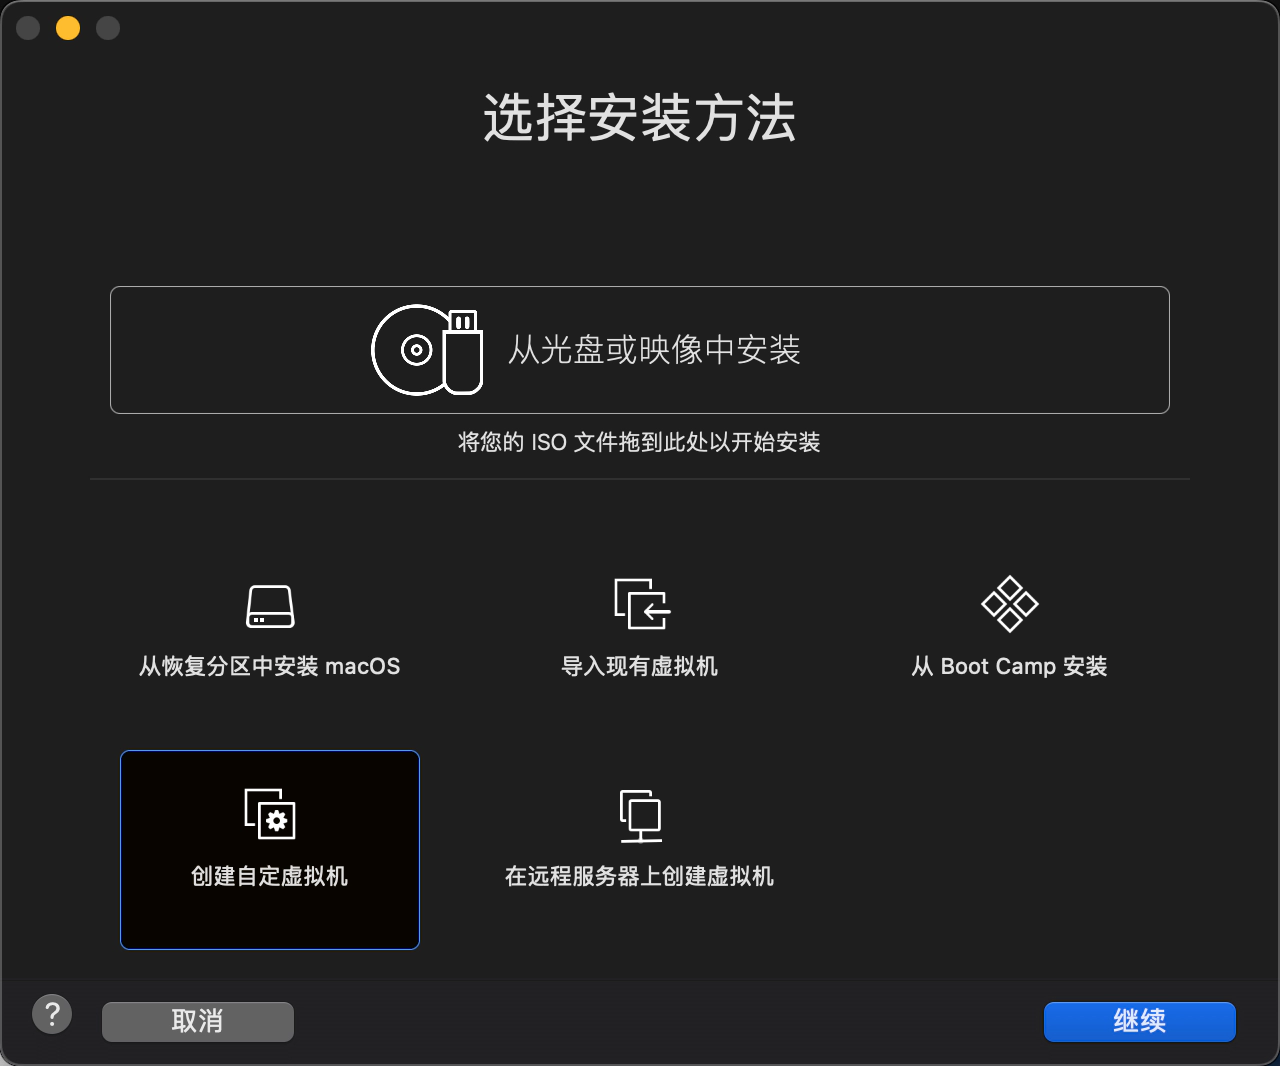
VMware Fusion natively supports installing macOS virtual machines, so unlike Workstation, you don’t need to use an unlocker. Just follow these steps, and leave any unspecified settings at their default values:
- On the Select the Installation Method page, select
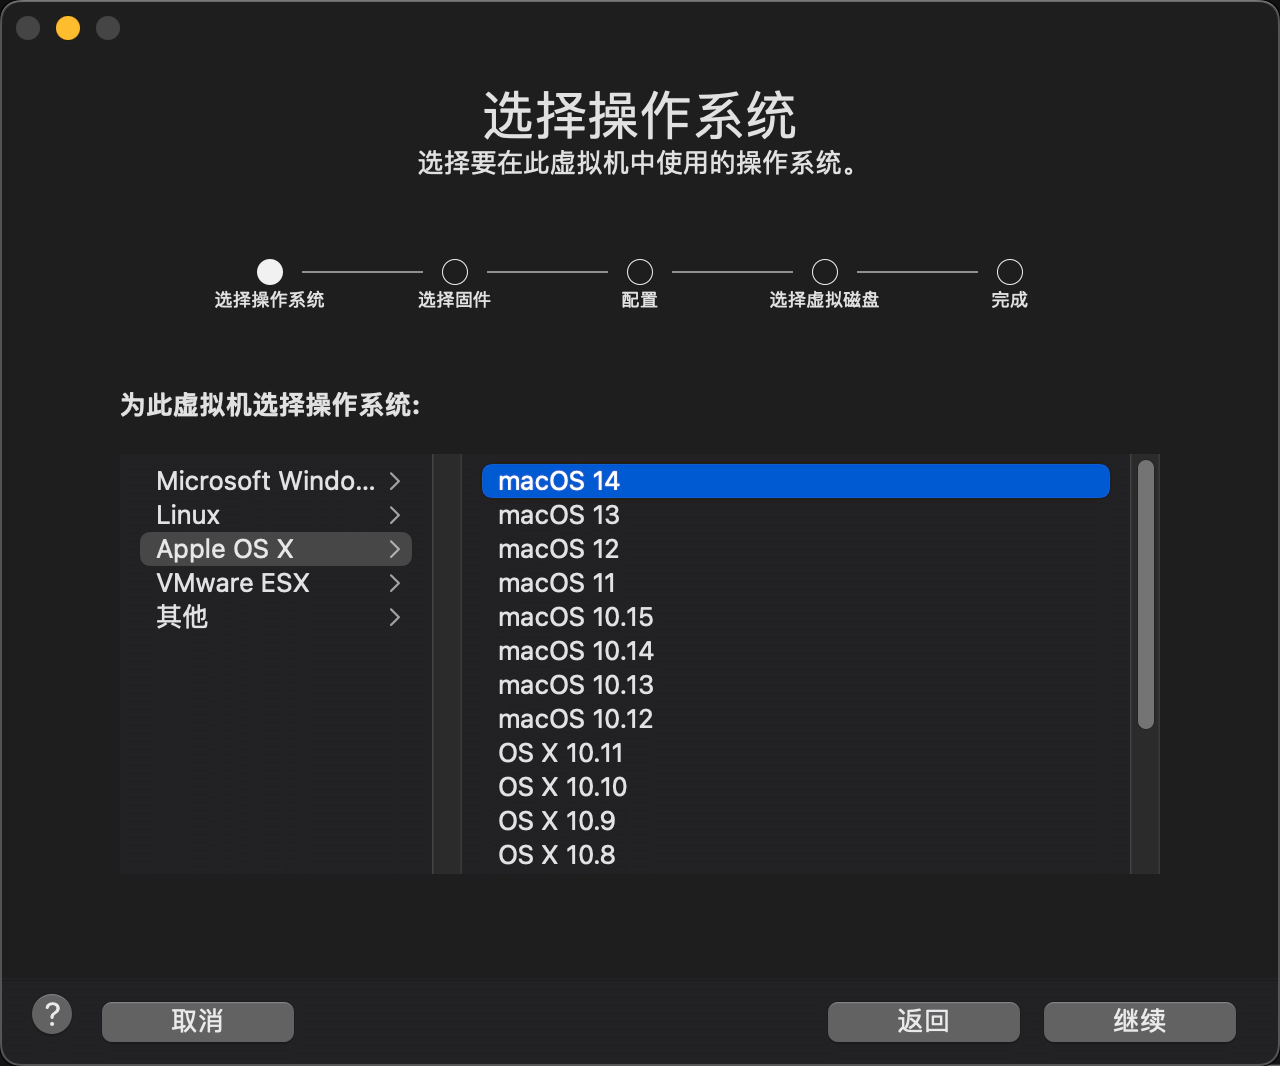
Create a custom virtual machine. - On the Choose Operating System page, choose
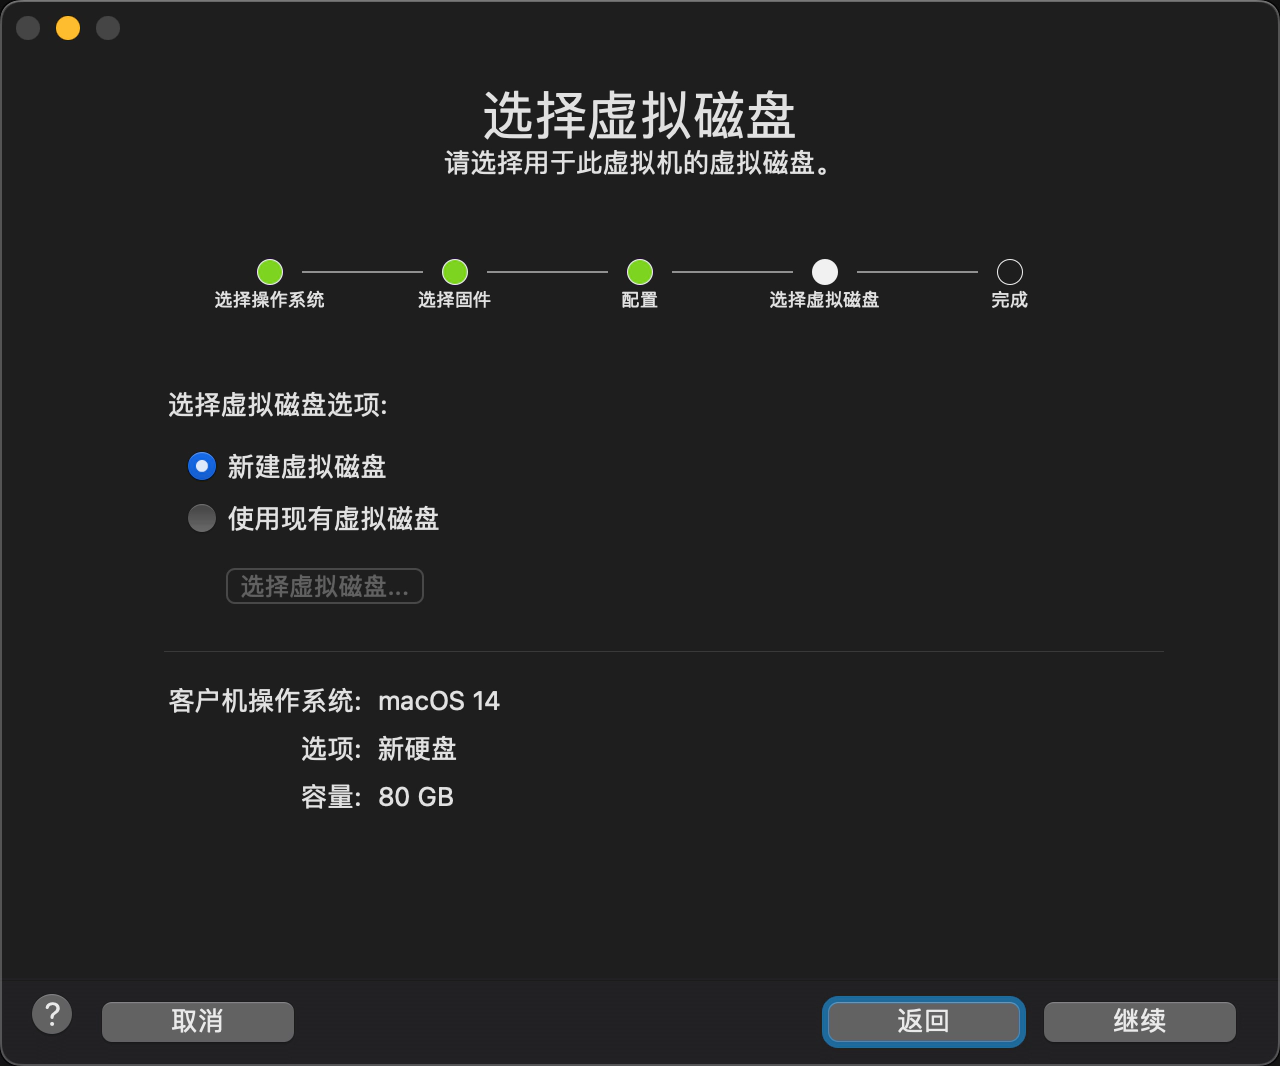
Apple OS X->macOS 14. - On the Choose a Virtual Disk page, choose
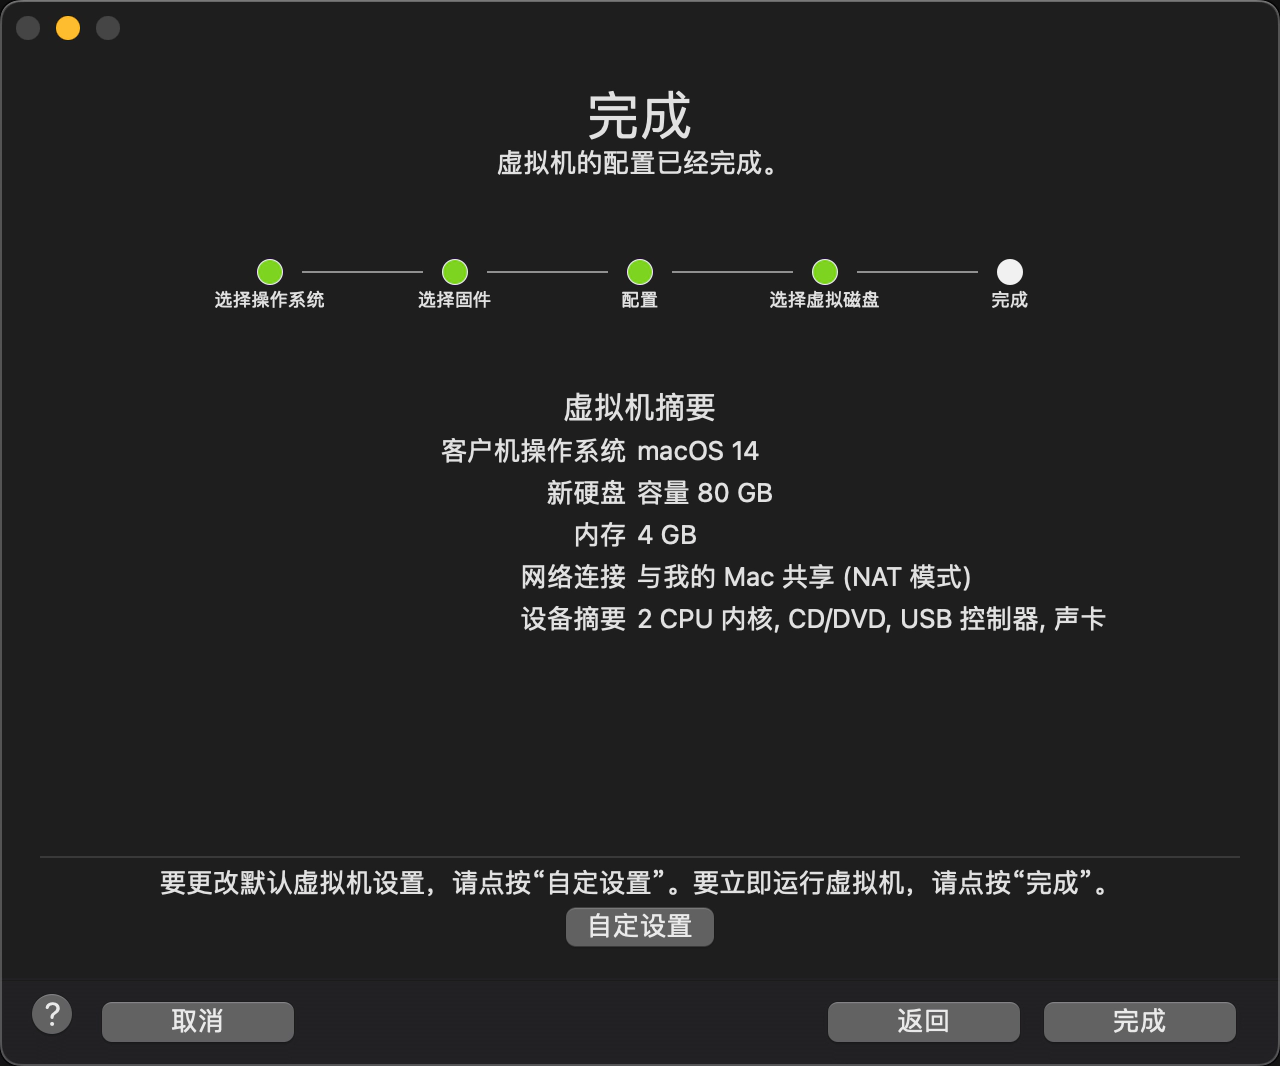
Create a new virtual disk. - Complete the virtual machine configuration.
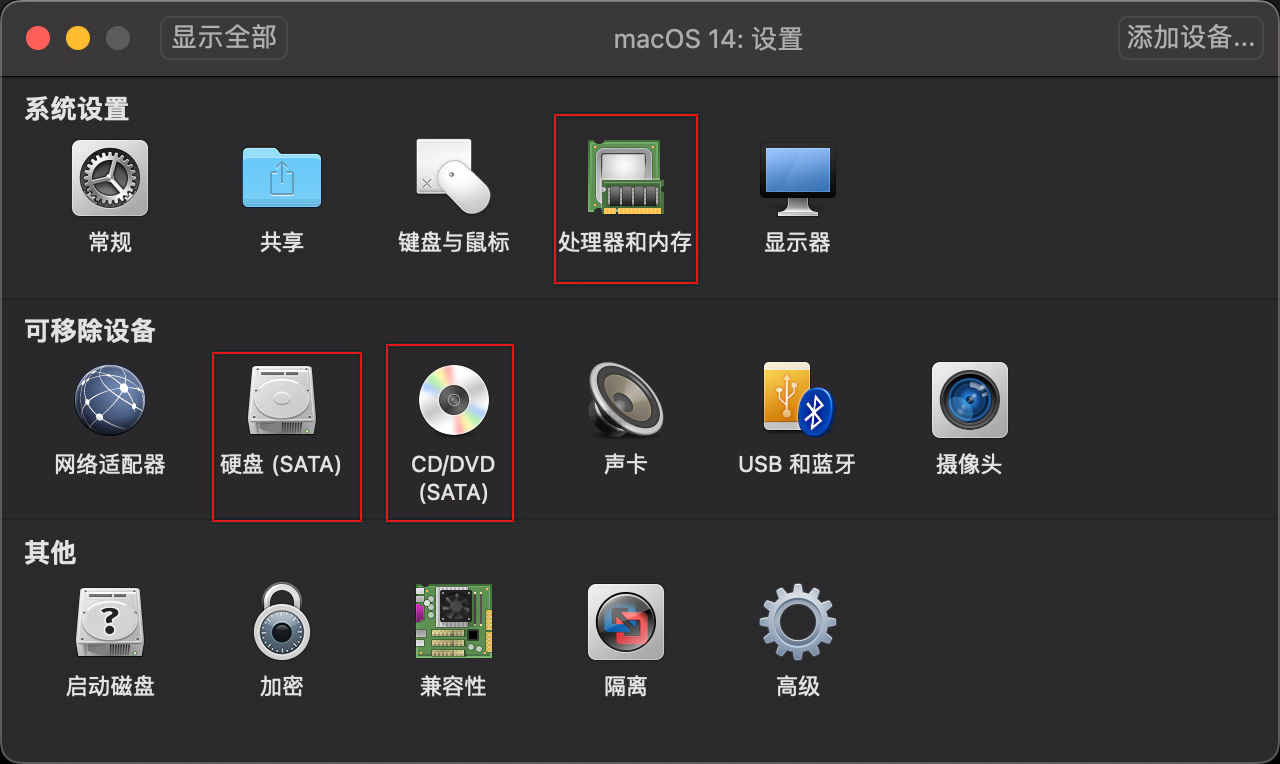
- Do not start the virtual machine yet. If it has already started, shut it down completely (do not suspend it).
- Click the
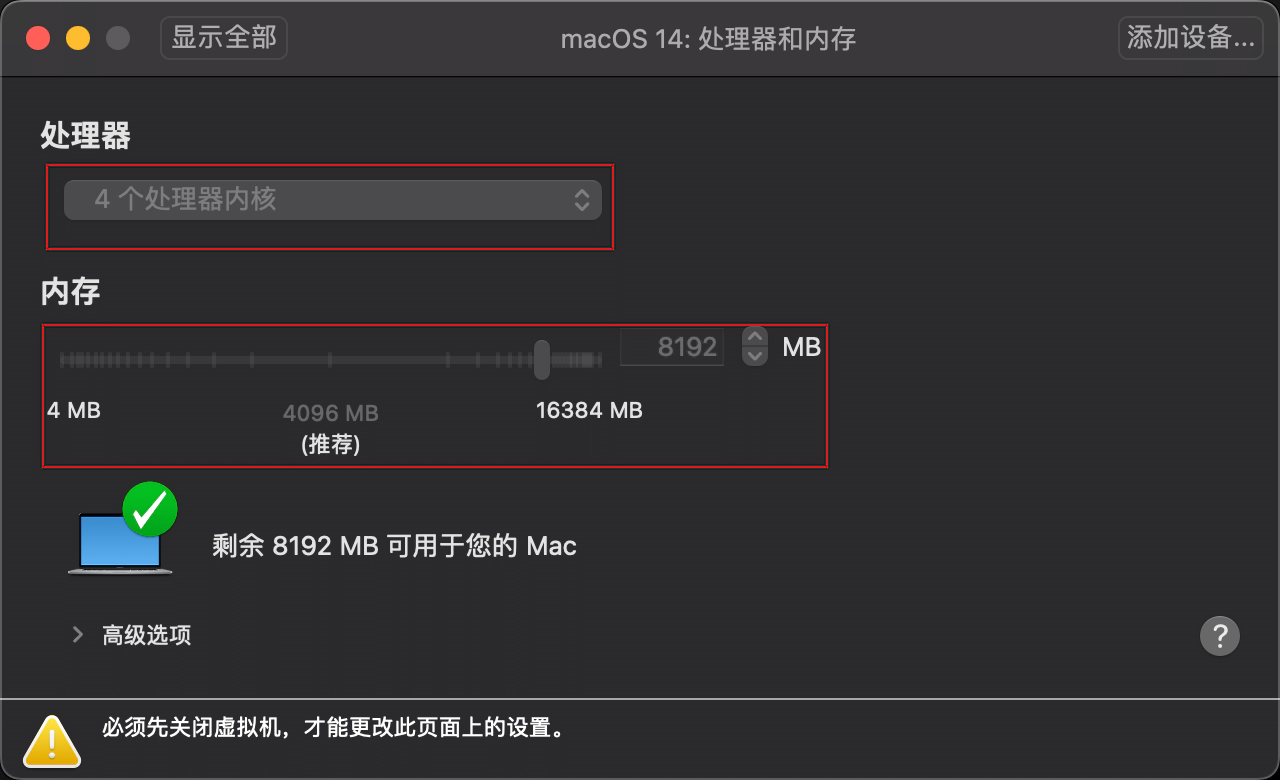
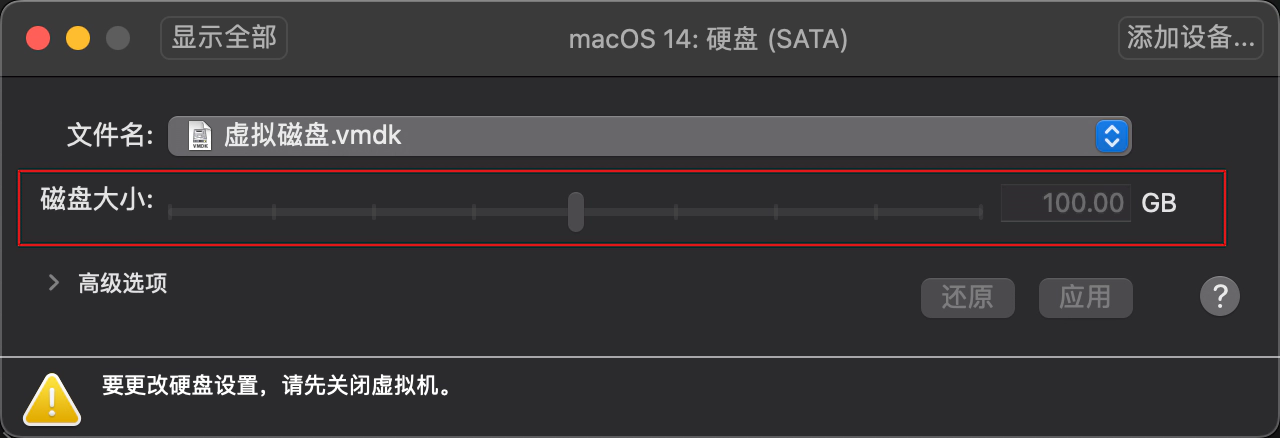
Settingsbutton in the top menu bar to configure the VM. If the VM is running, the settings page will be grayed out and unchangeable. - Adjust the CPU count, memory, and virtual hard disk size as needed.
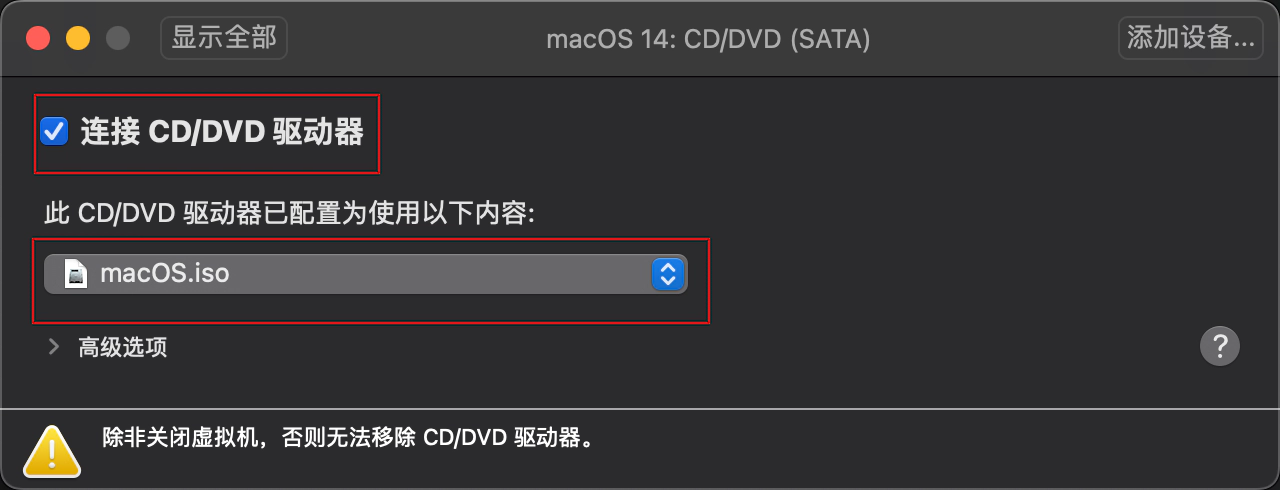
- In
CD/DVD(SATA), select the macOS installation image obtained earlier, and check theConnect CD/DVD Driveoption.
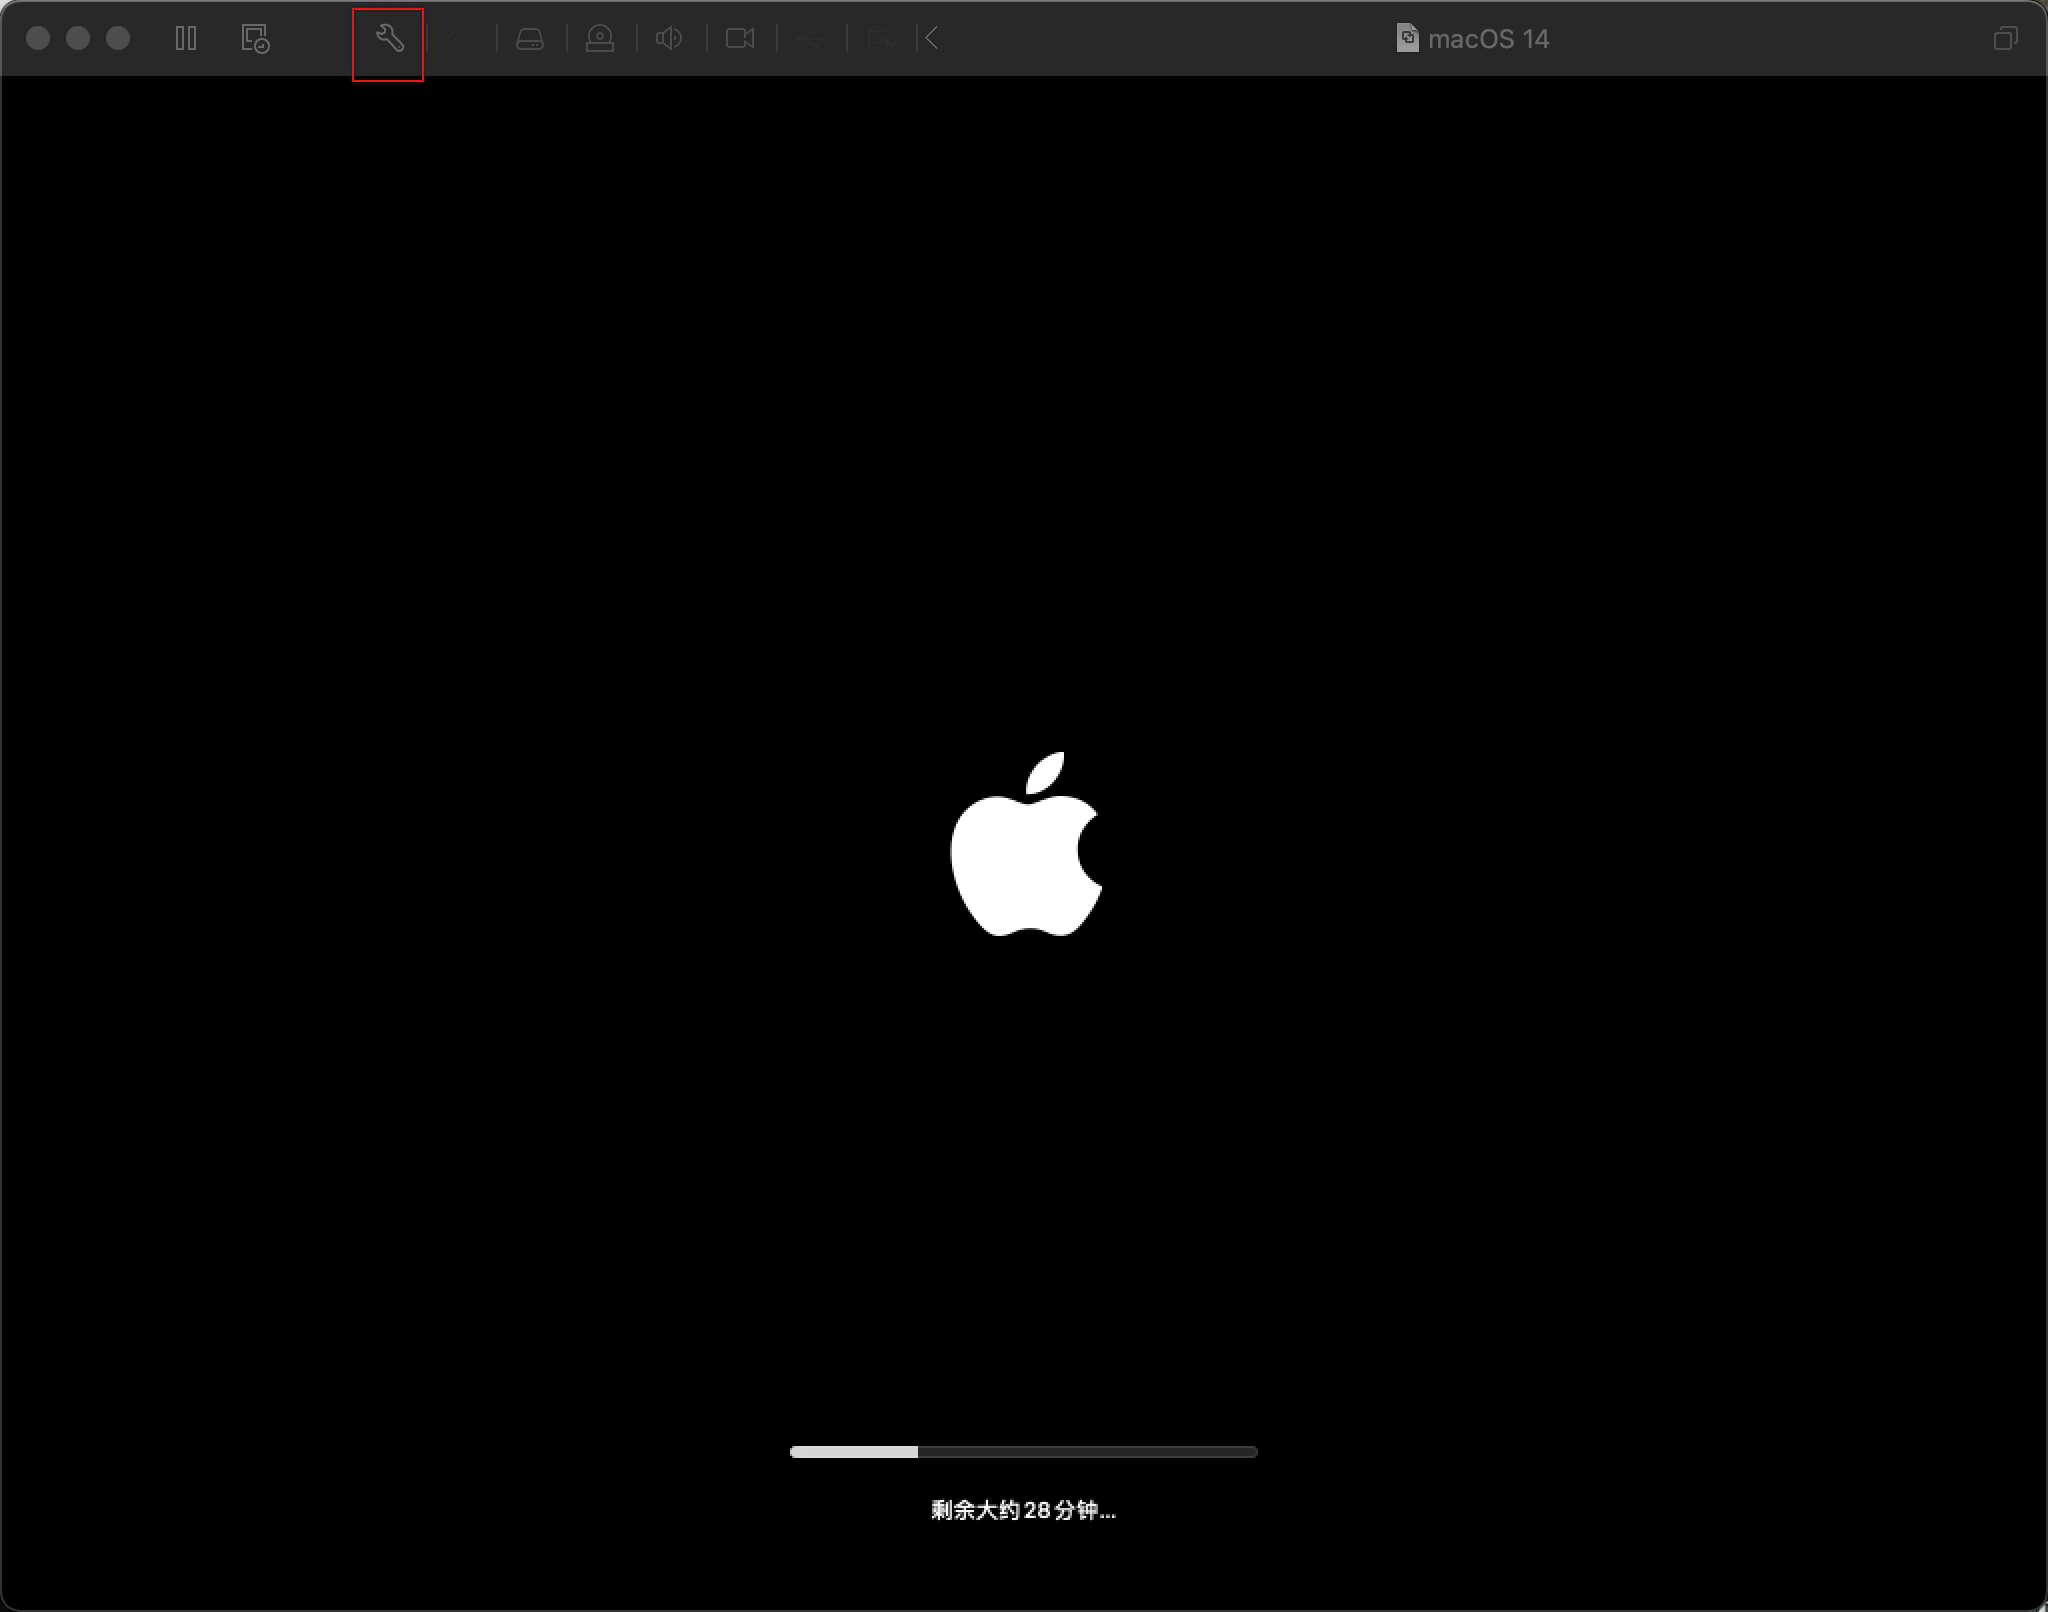
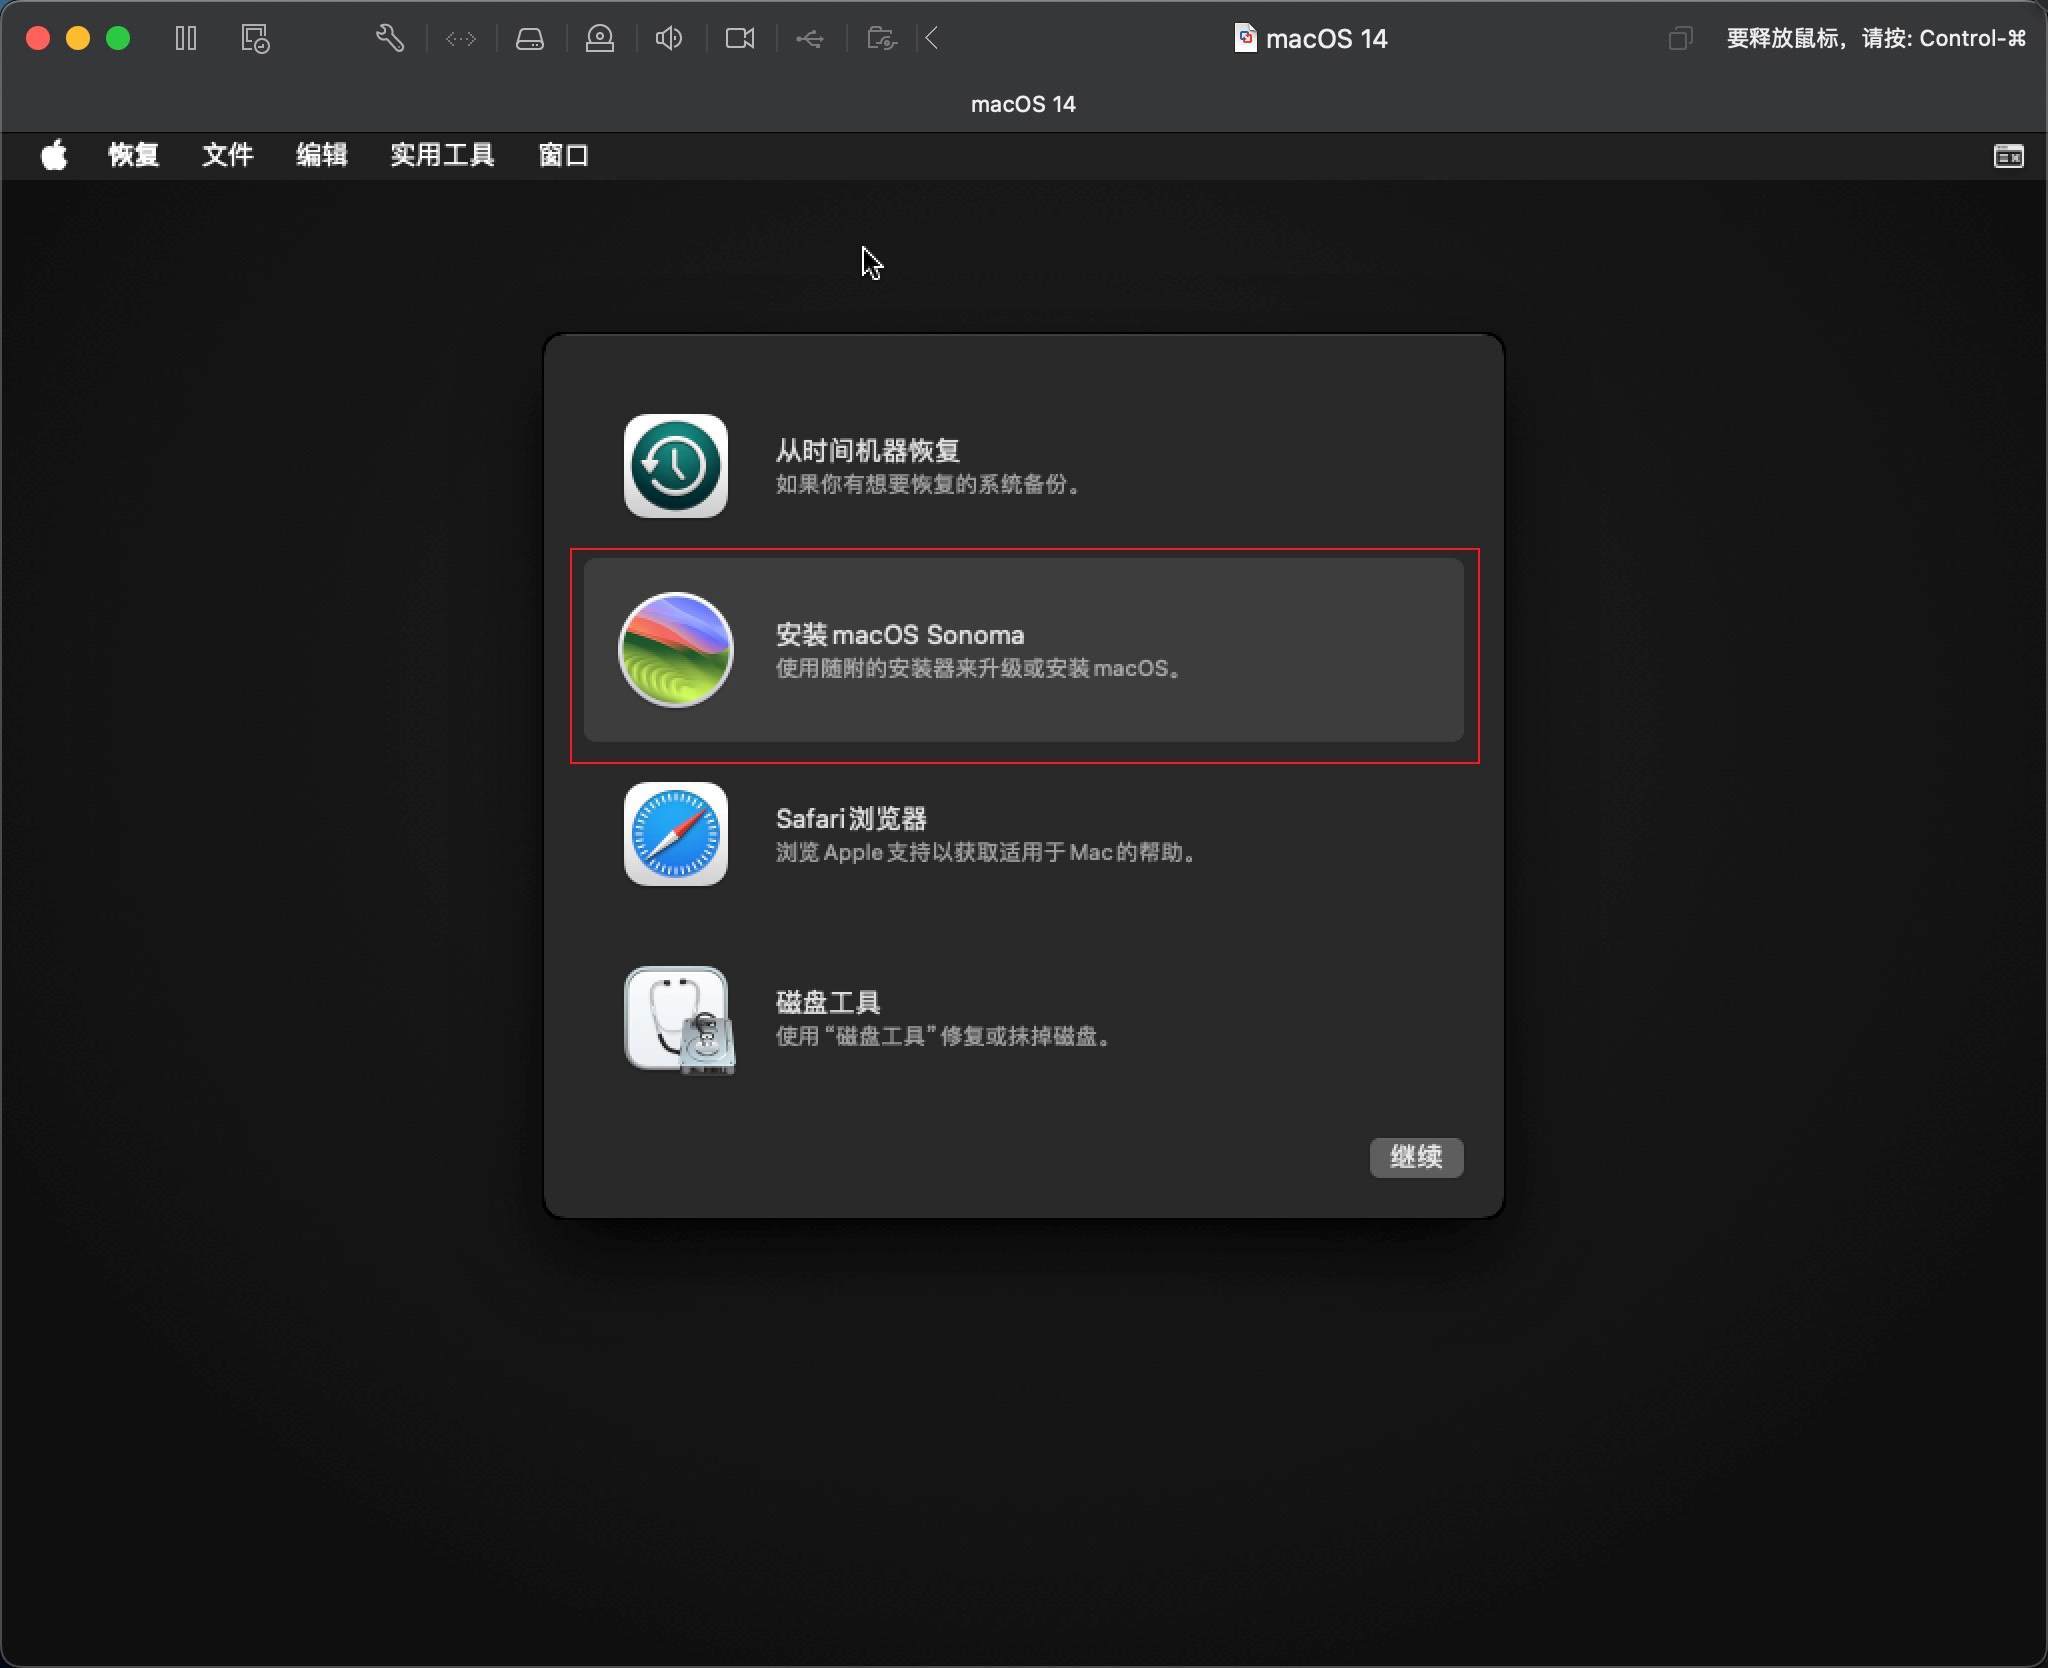
Install macOS VM
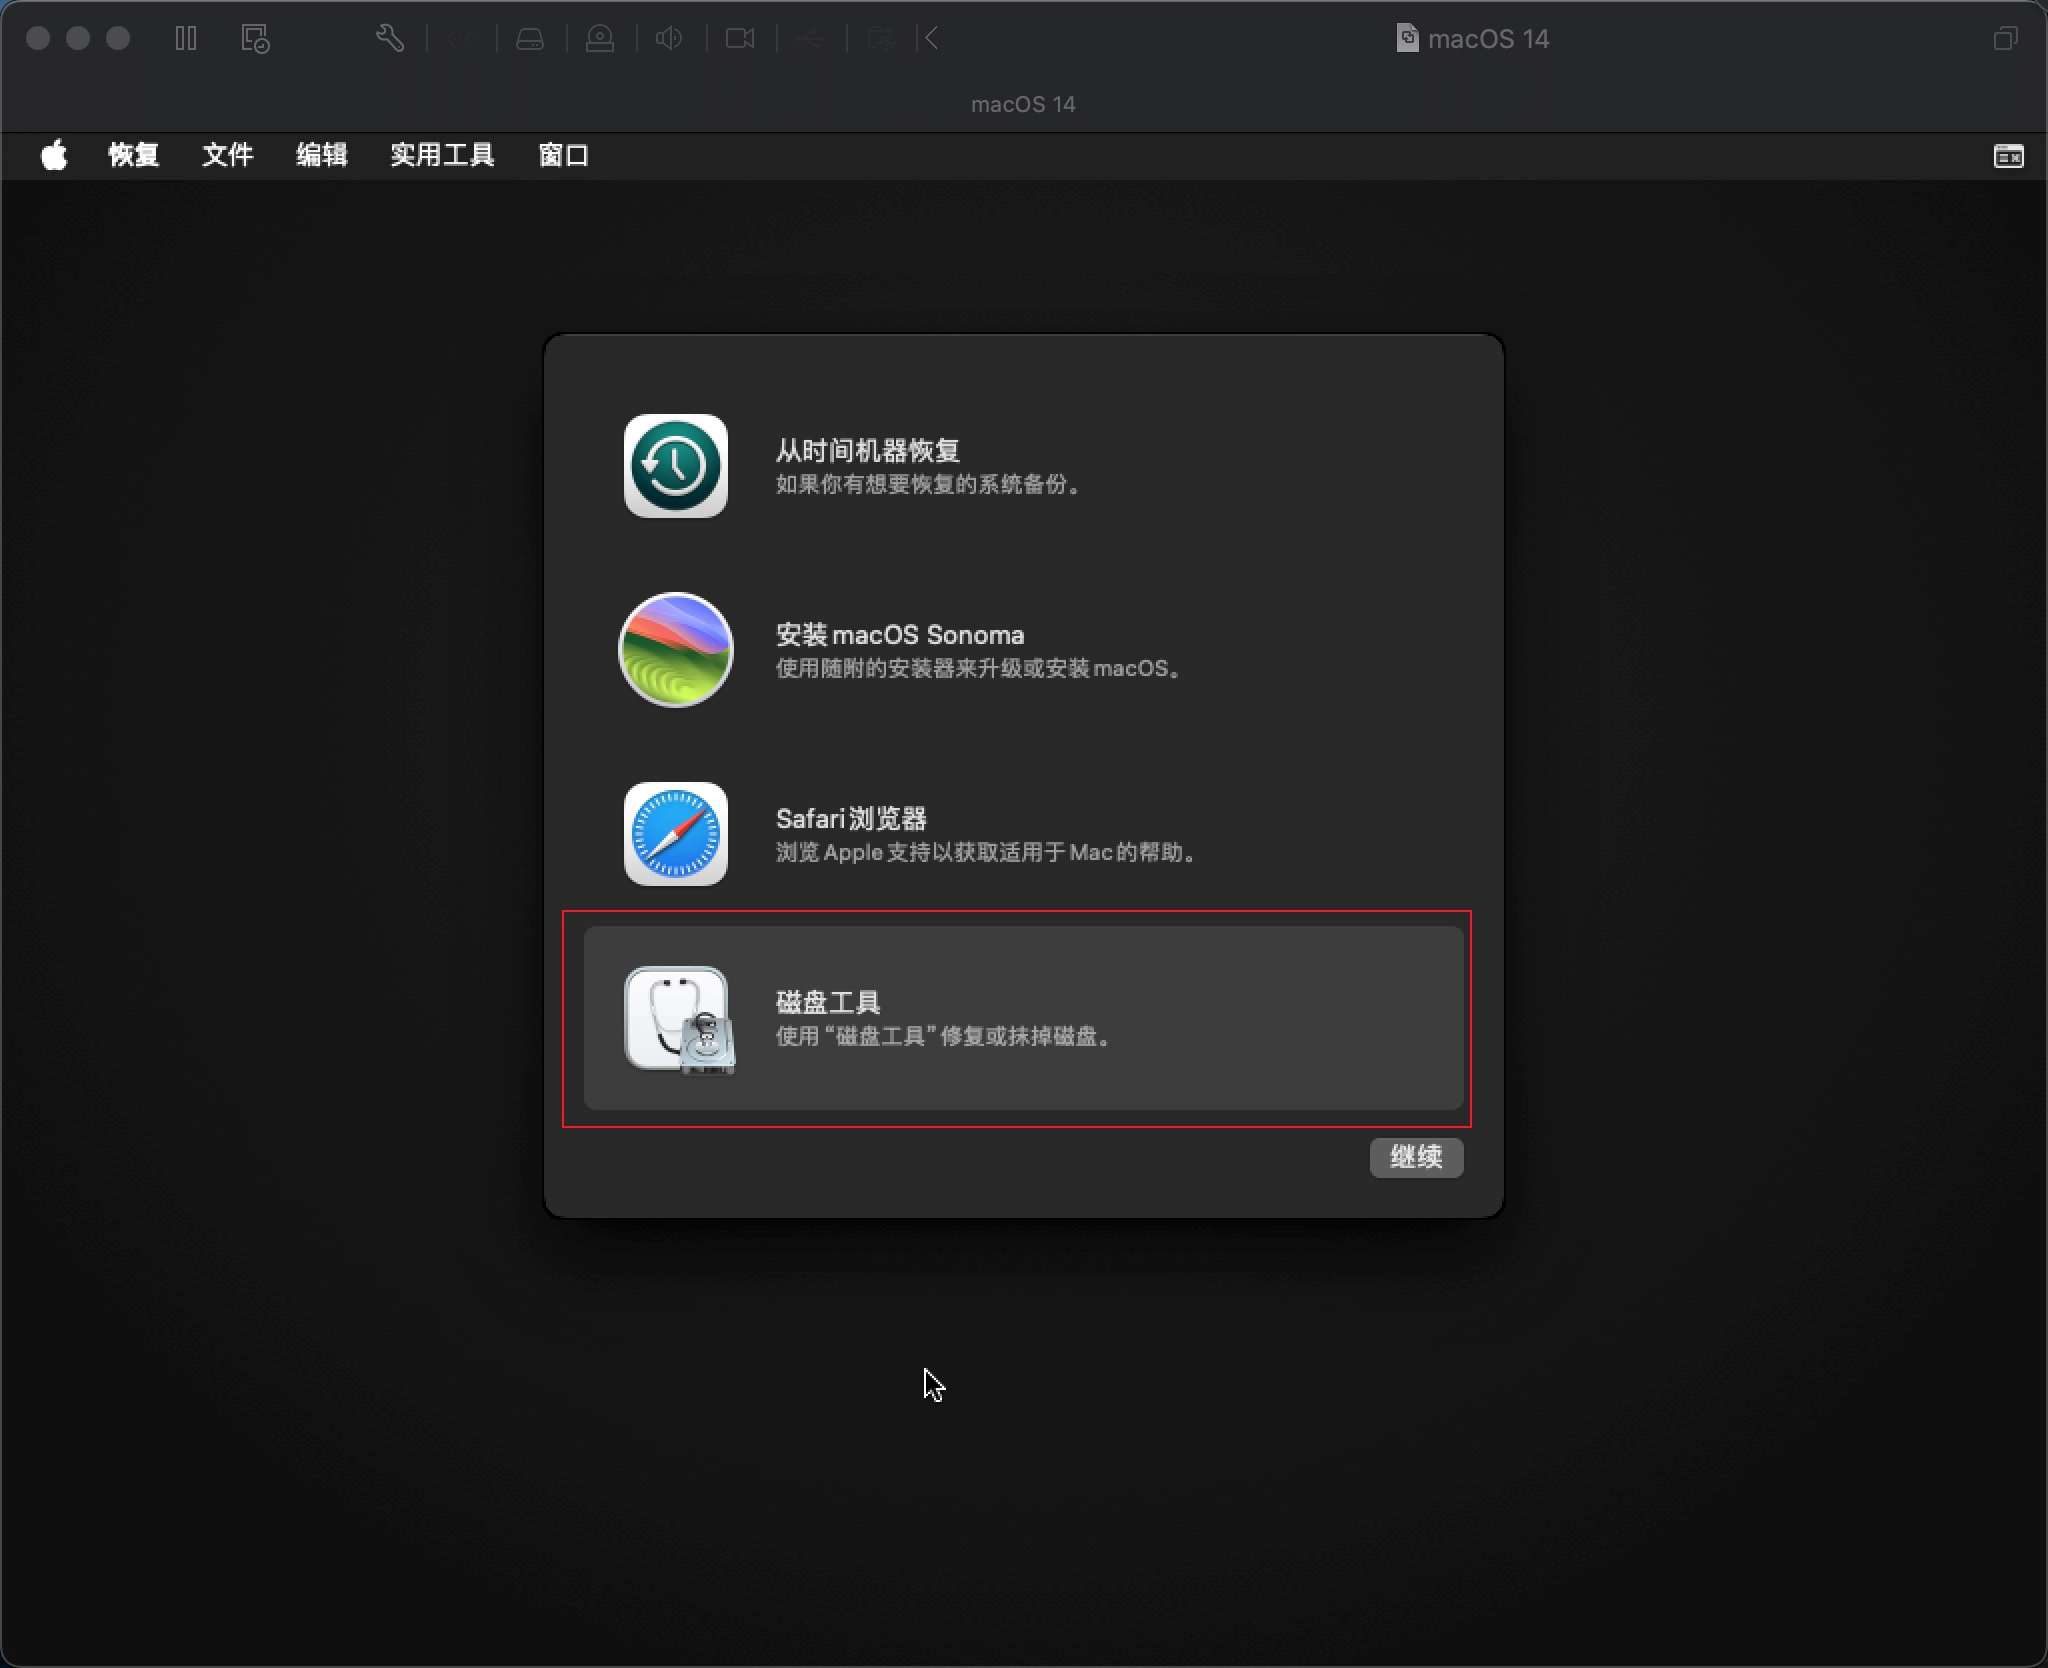
- Close the configuration page and start the virtual machine.
- Select
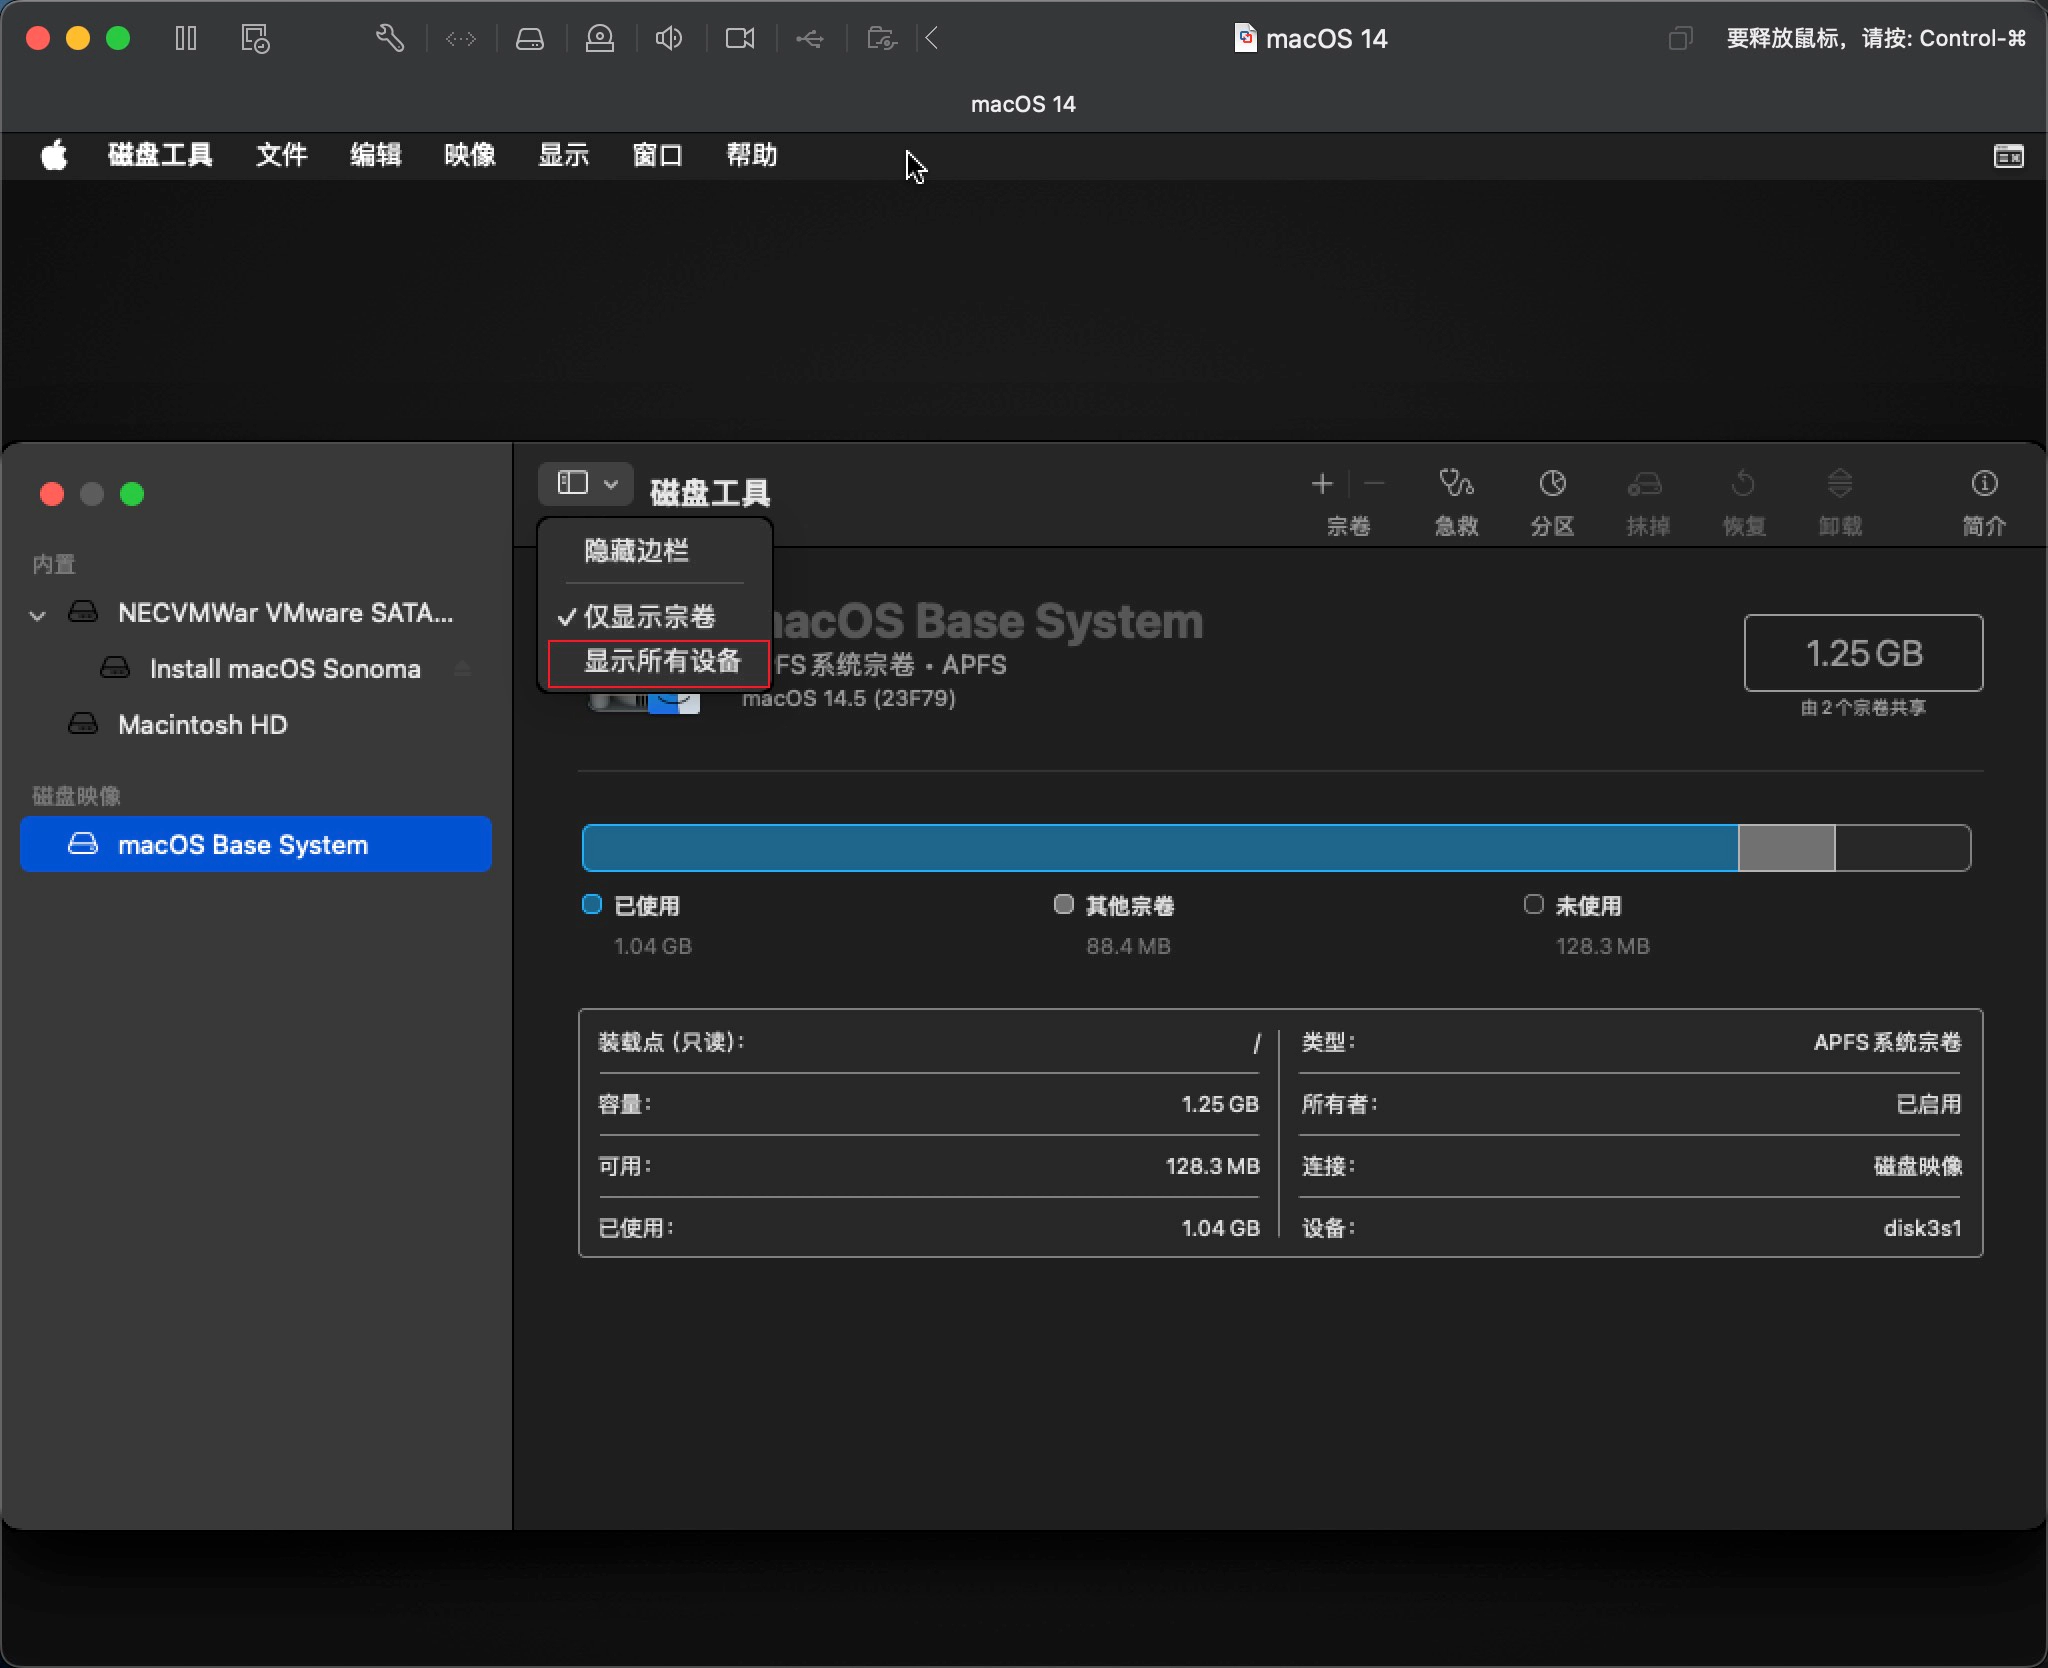
Disk Utility. - Click the top dropdown menu and choose
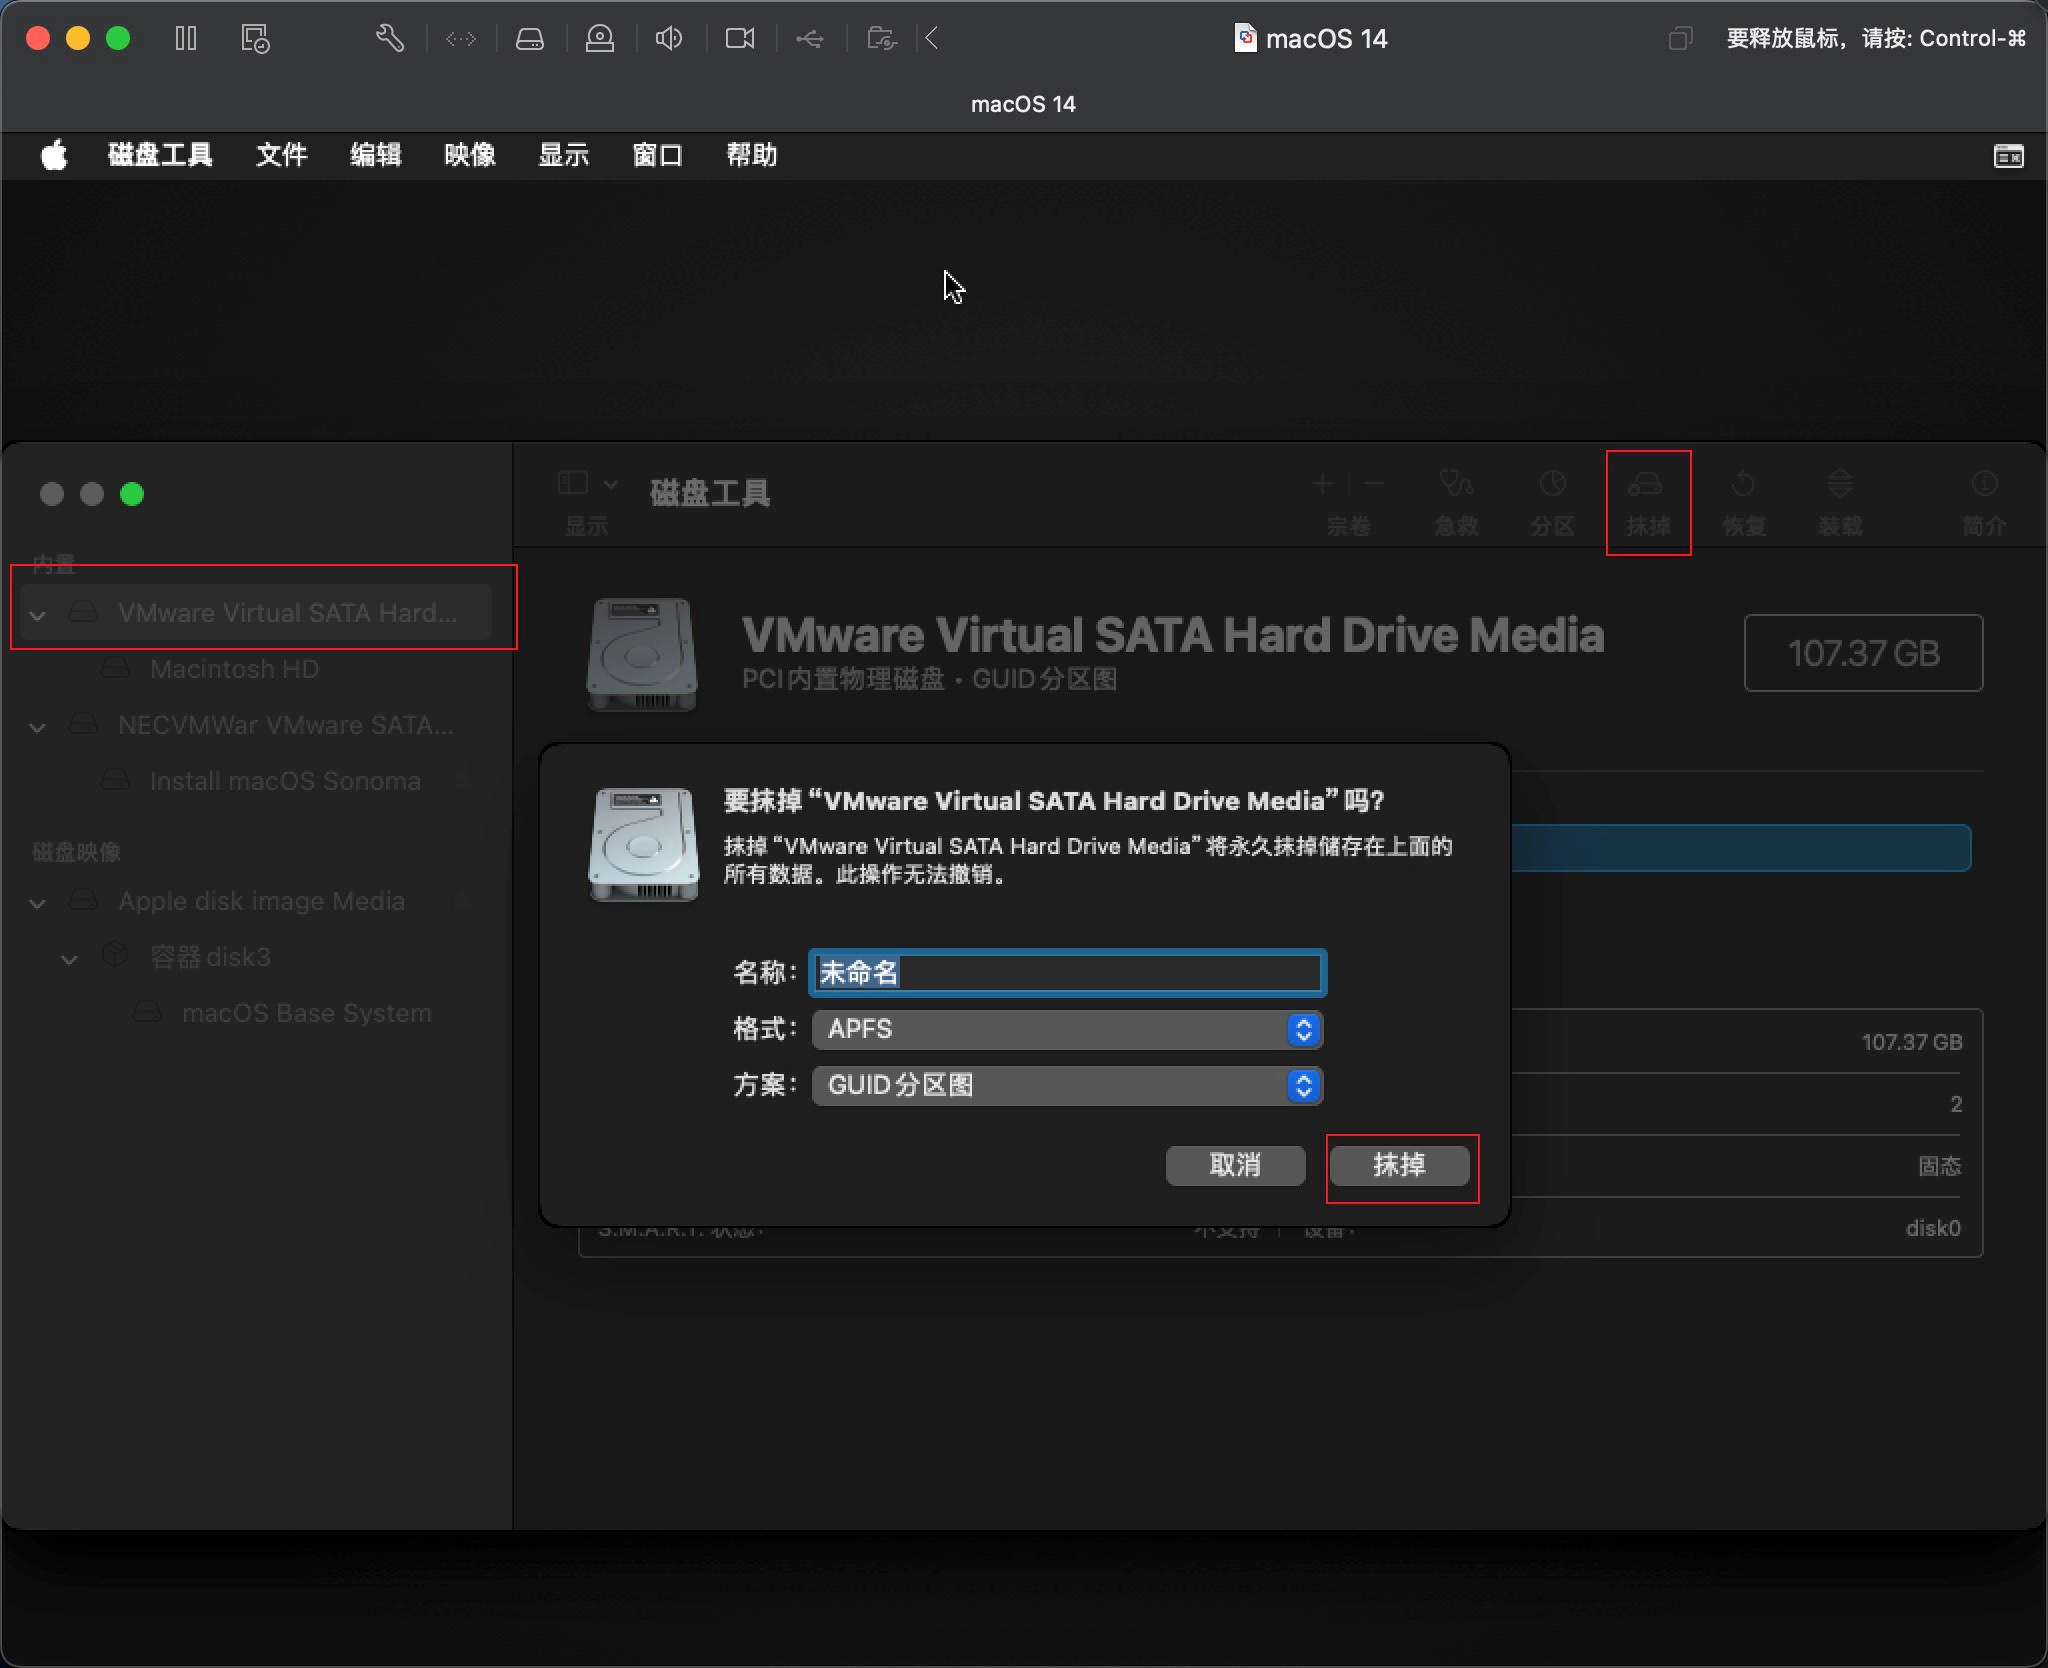
Show All Devices. - Select
VMware Virtual SATA Hard Drive Media, rename it, and then erase it, keeping the default format and scheme. - Follow the standard installation steps to install
macOS Sonoma.
Install VMware Tools
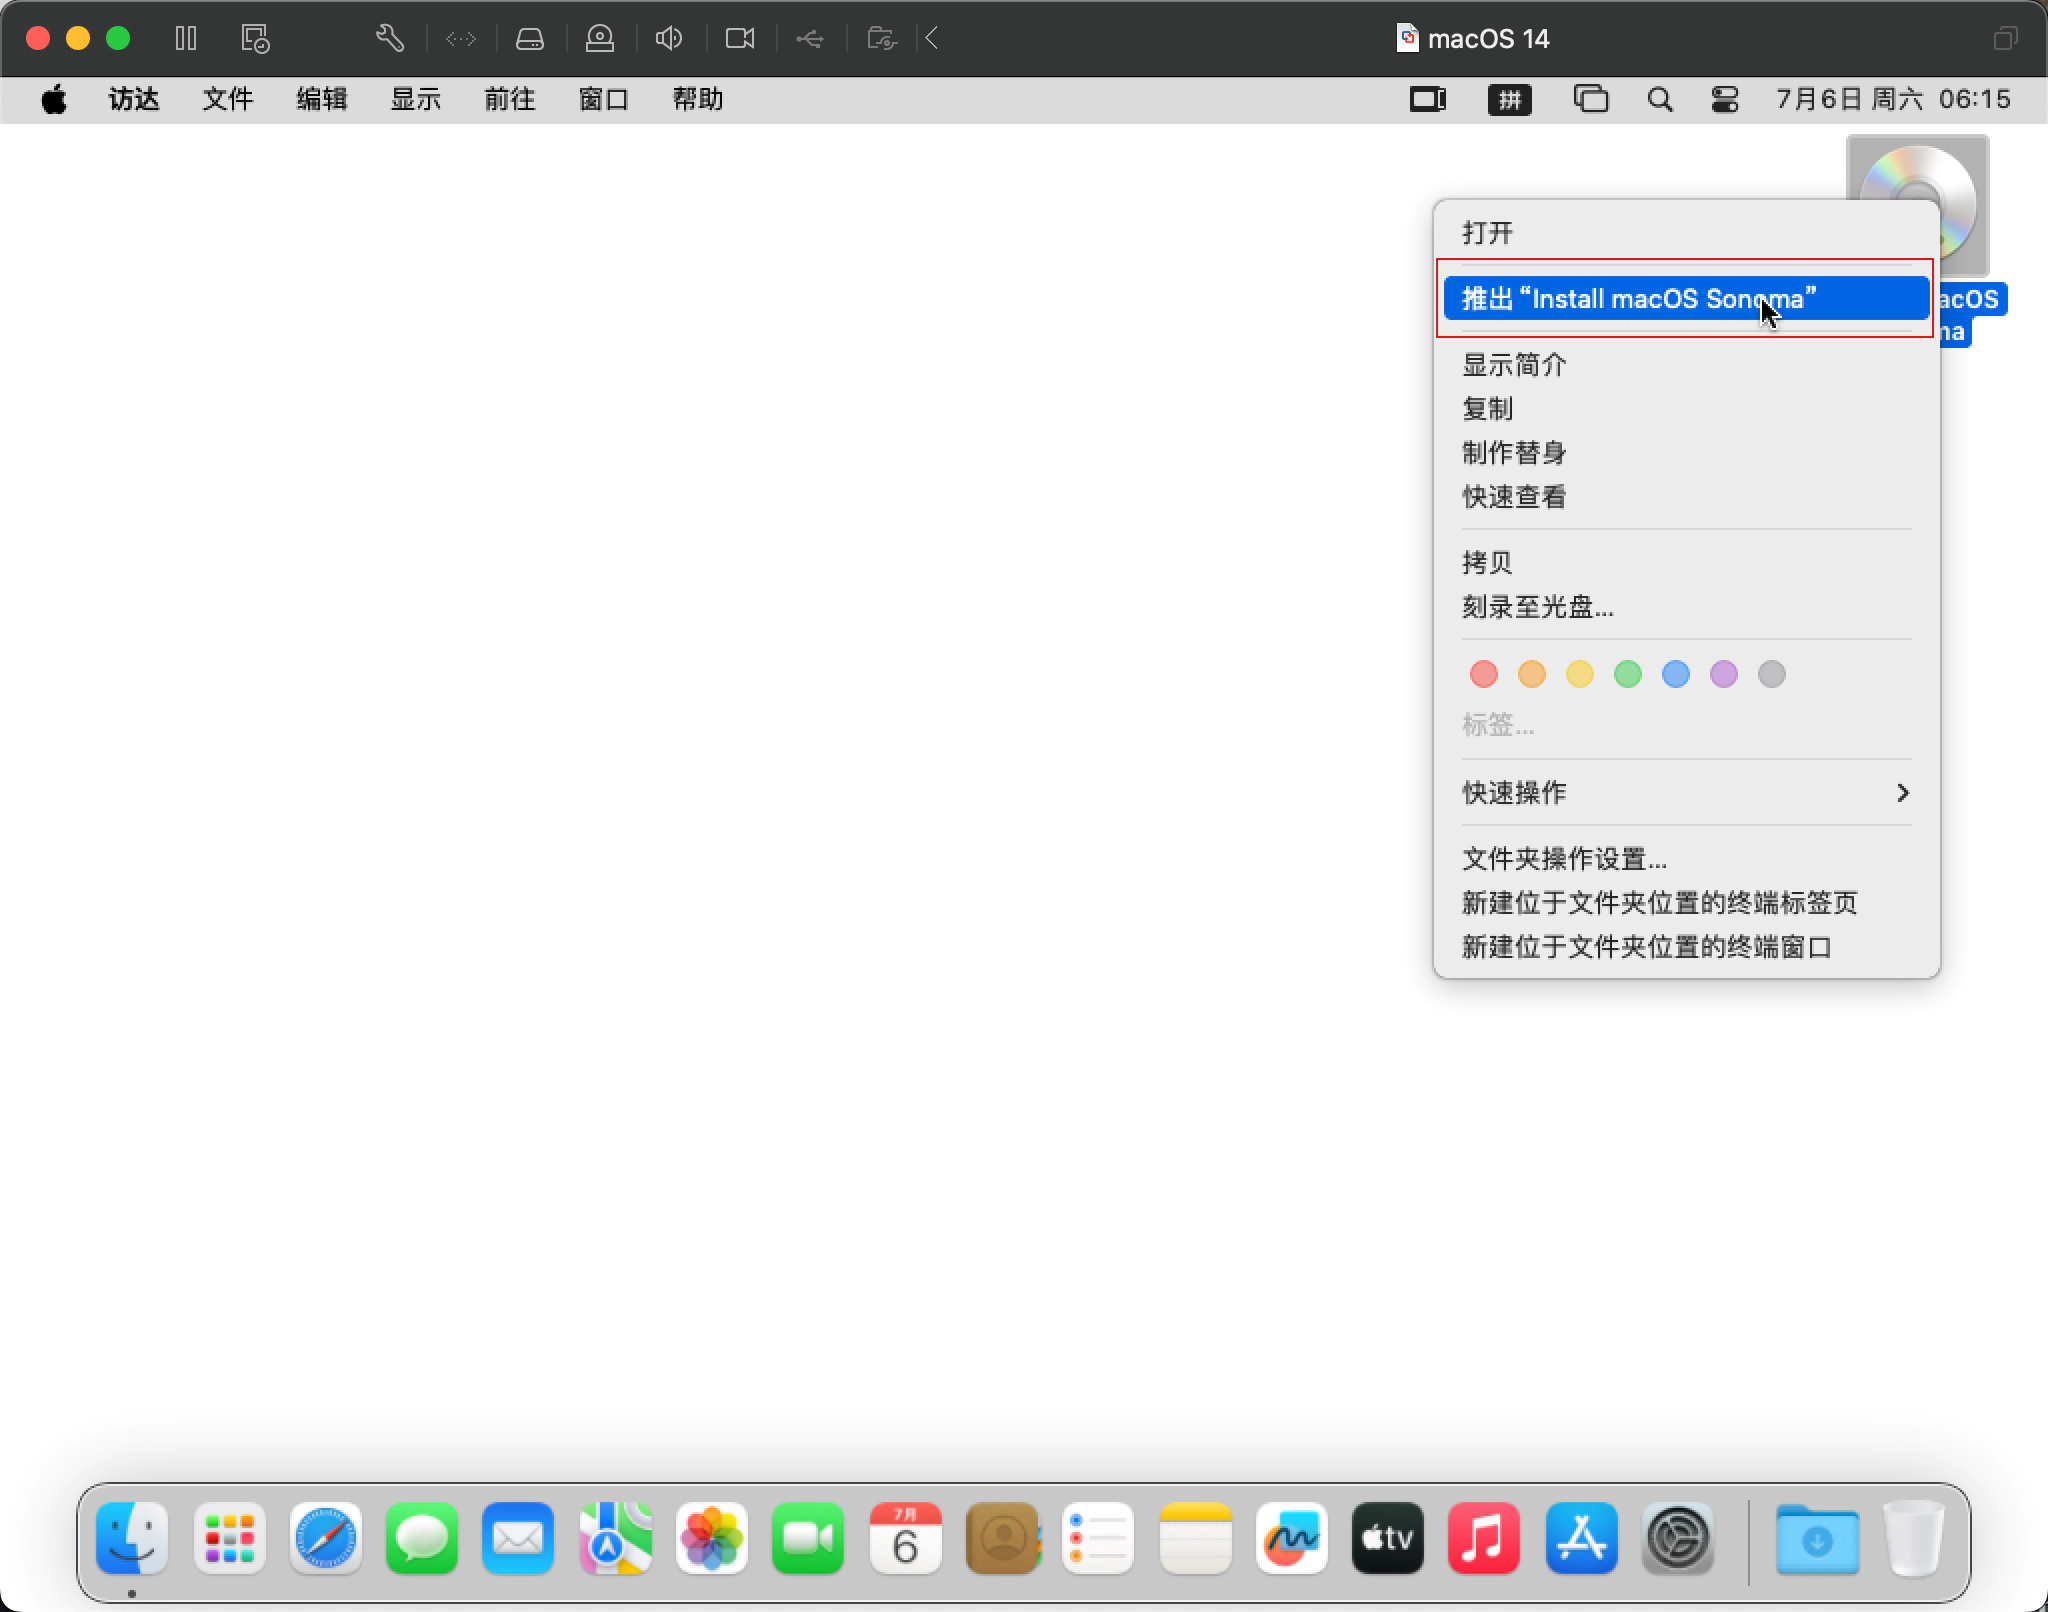
- After completing the installation and entering the desktop, right-click the installation image at the top right corner of the desktop and eject it.
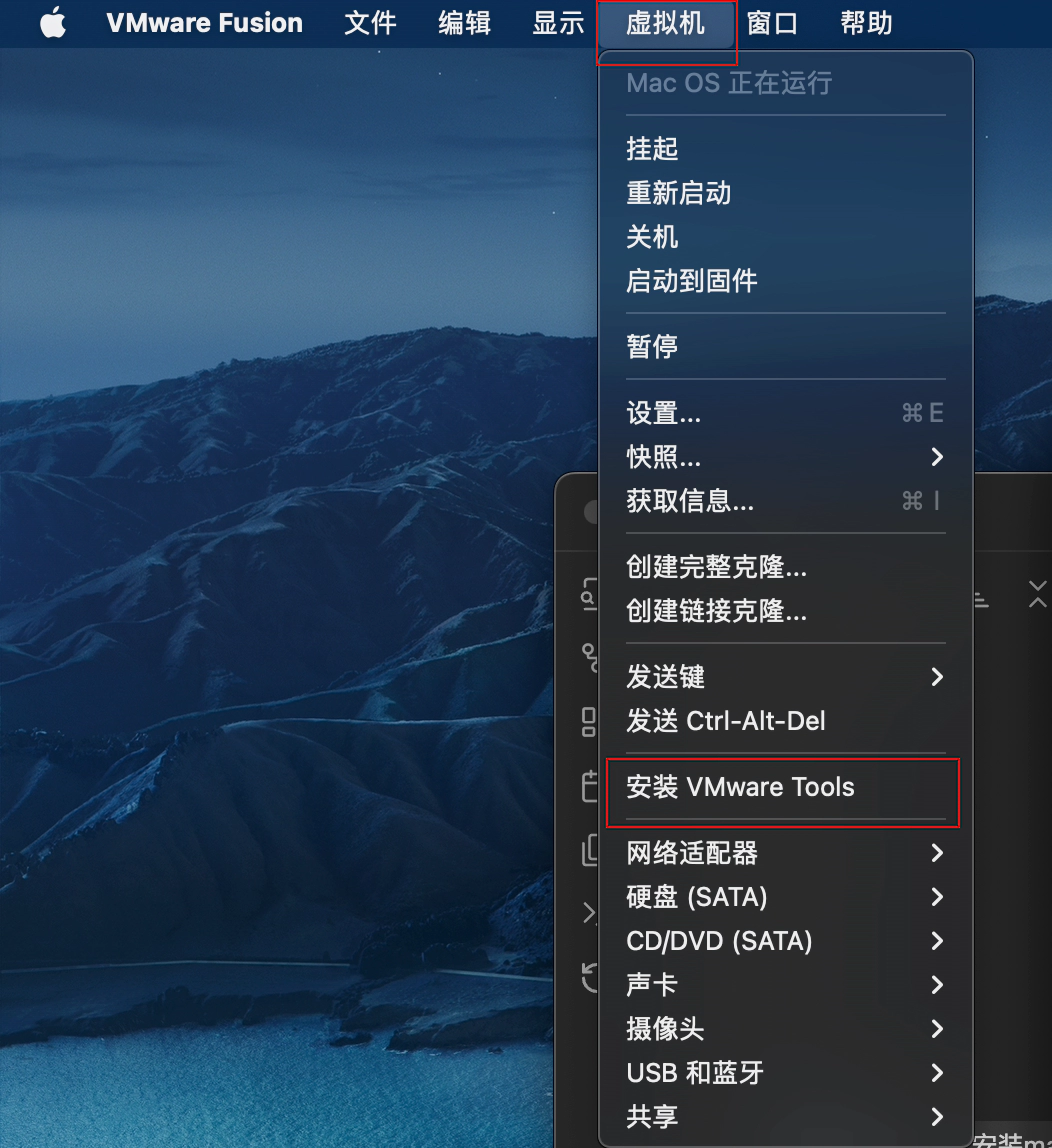
- On the host machine, open the
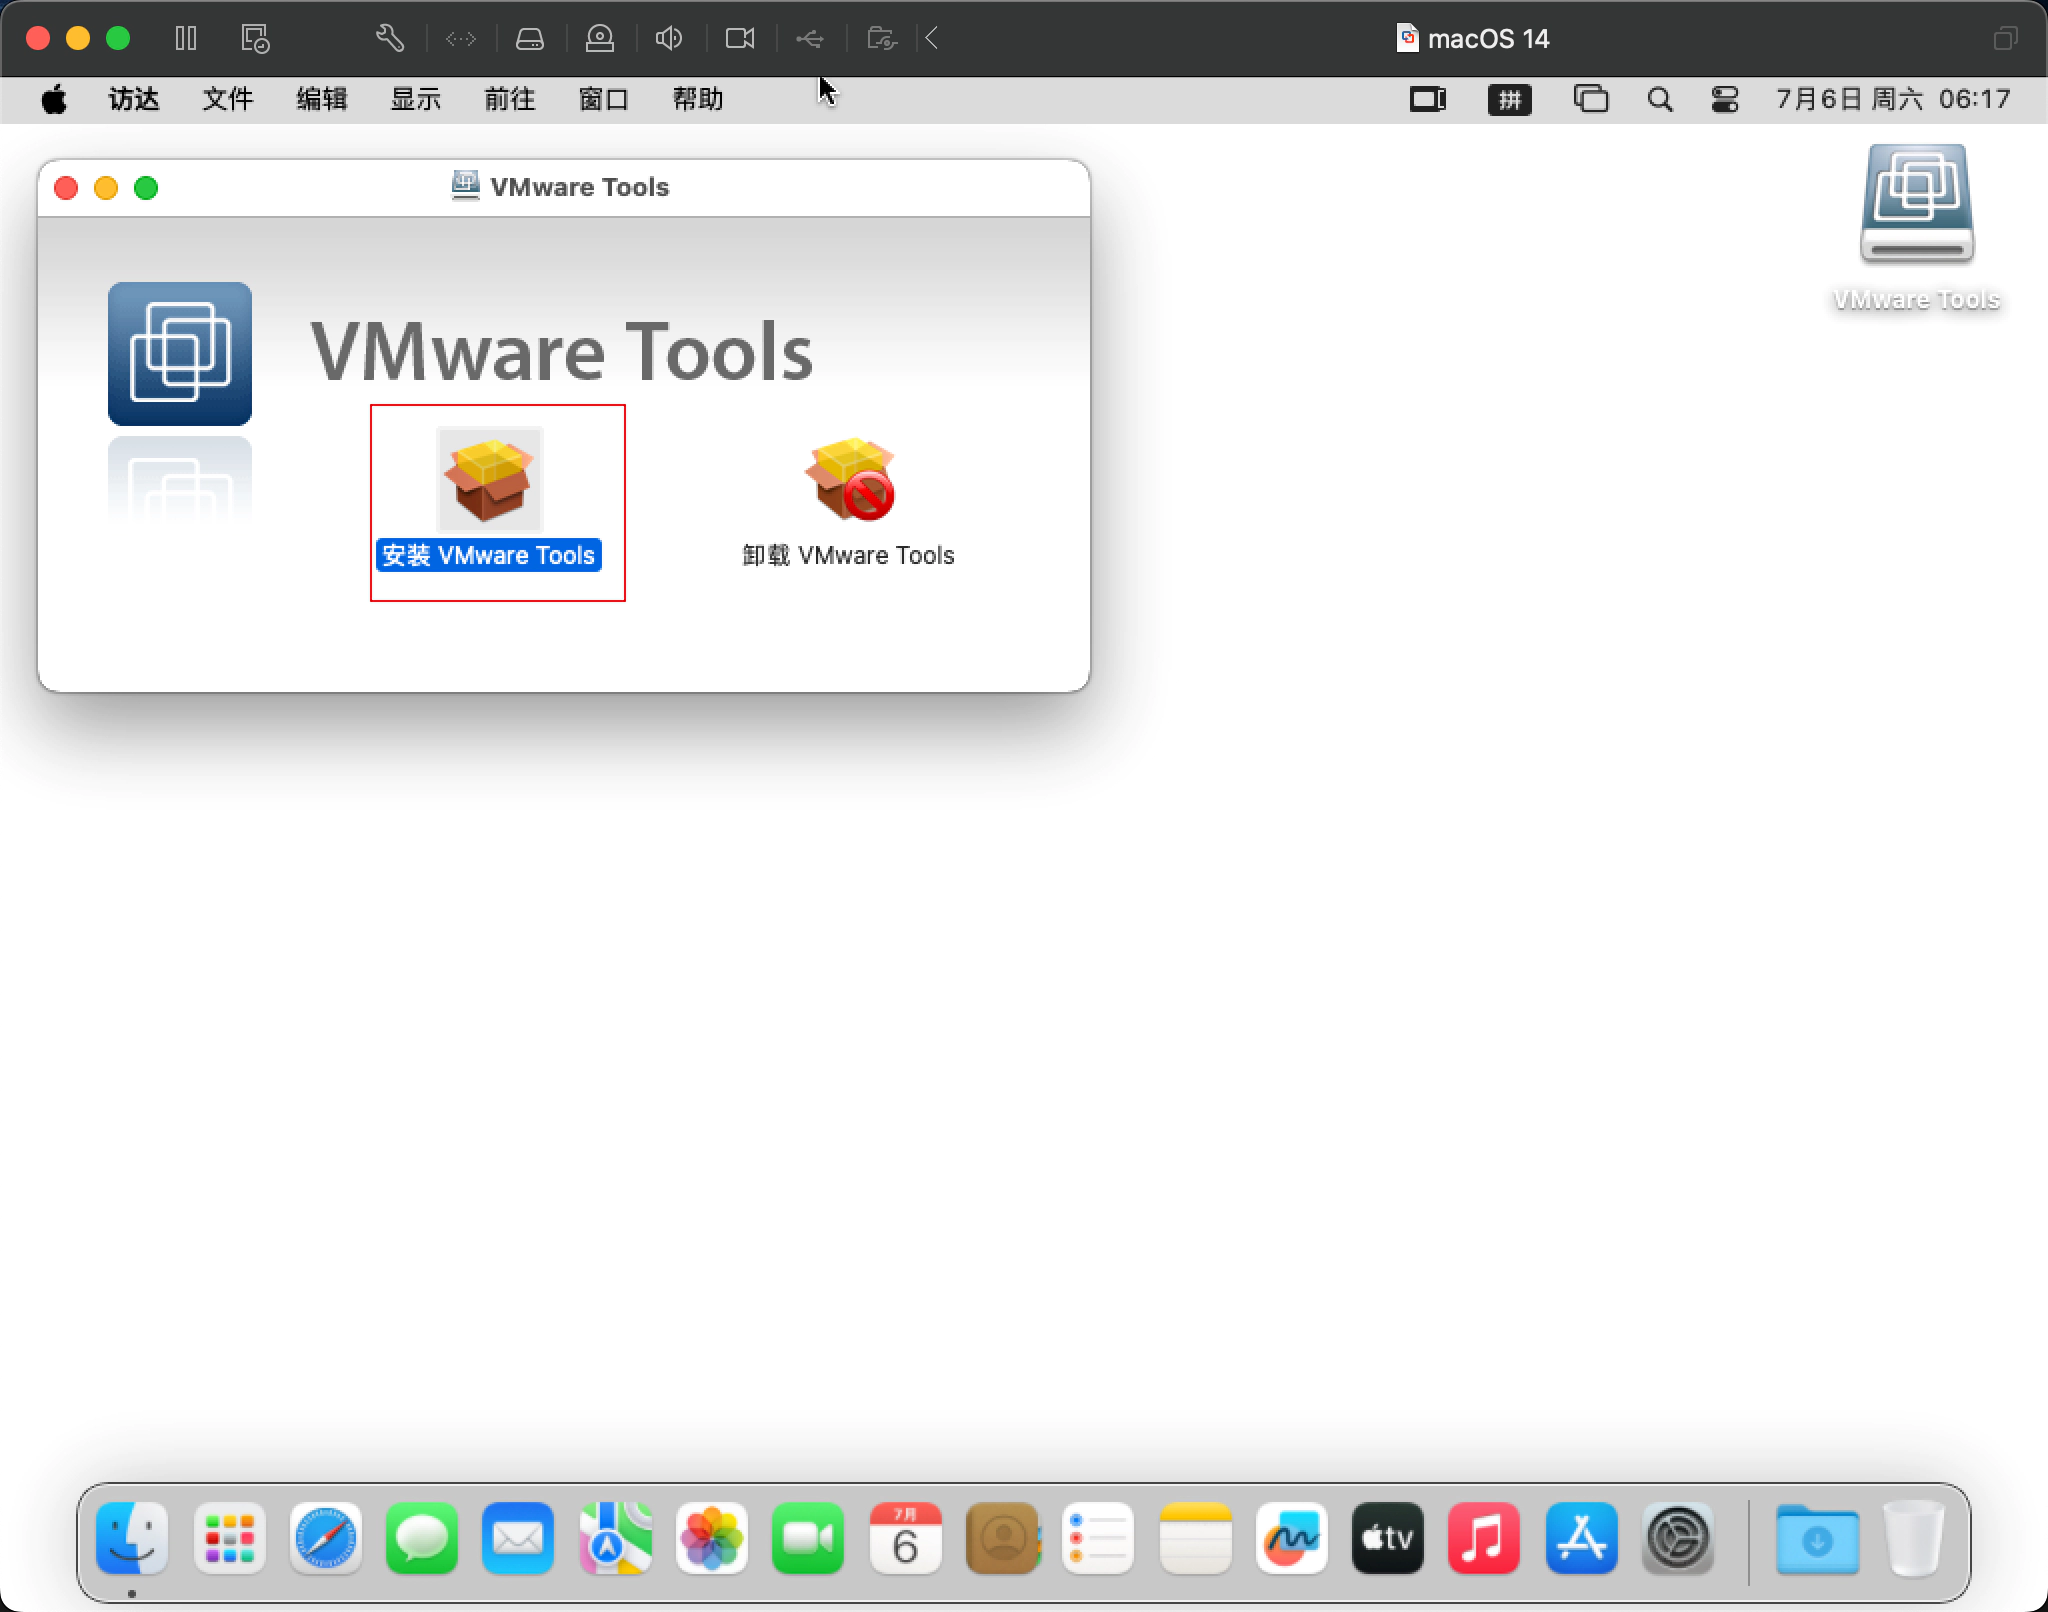
Virtual Machinedropdown menu from the top menu bar and selectInstall VMware Tools. - Double-click
Install VMware Toolsto start the installation. - During the installation, several permission request pop-ups will appear, including one that requires you to go into the settings. Allow all of them.
- Restart the virtual machine.
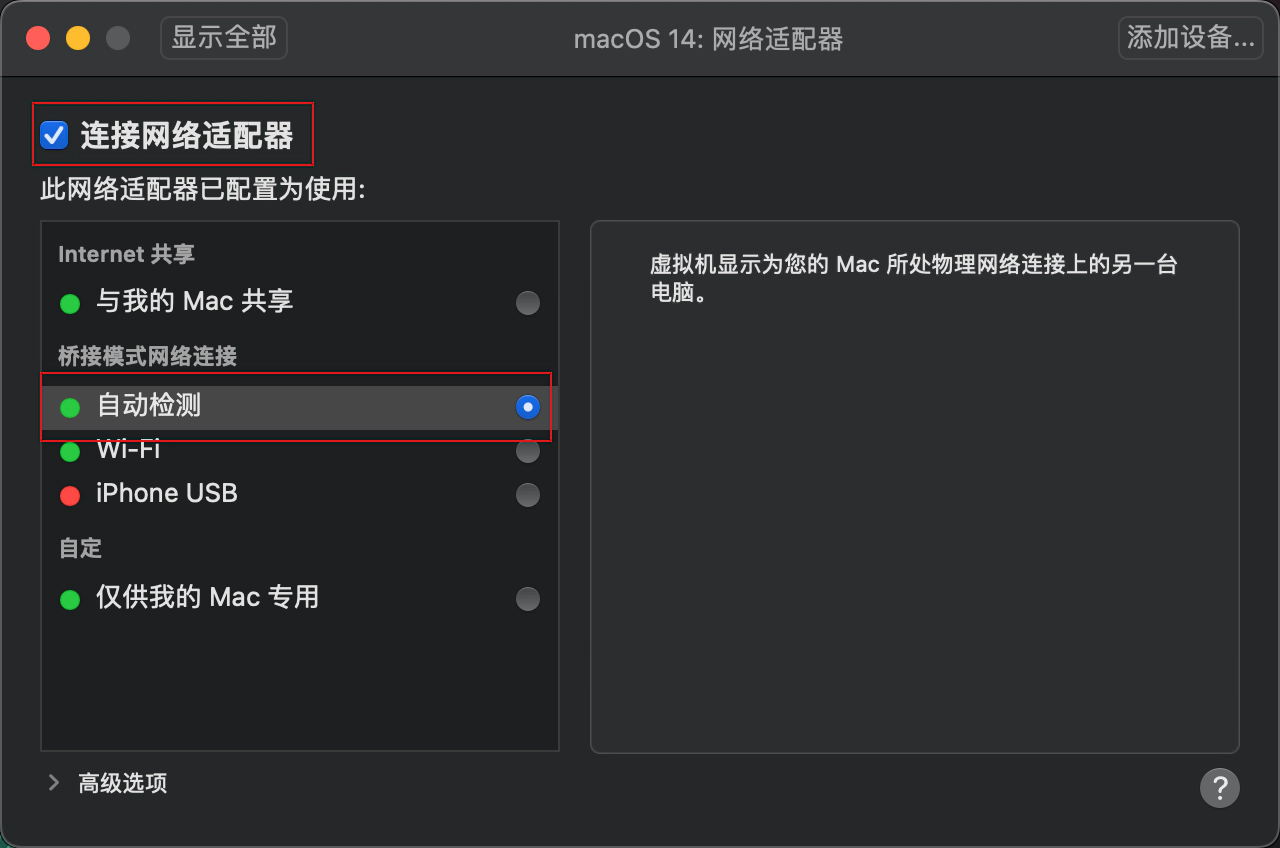
Connect to the Network
If there is no network connection, click the Settings button in the top menu bar, then select Network Adapter. Choose the Bridged Networking option under Network Connection, select Autodetect, and check the Connect network adapter box.
About 3D Acceleration
By default, macOS virtual machines cannot directly utilize the GPU, so all graphics are laboriously emulated by the CPU, resulting in noticeable lag. Additionally, Sonoma’s default desktop background is a video, which won’t play, leaving a blank white background. Fortunately, since our host machine is a real Mac, we can forcibly enable GPU 3D acceleration by editing the .vmx file. However, please note that this method is not perfect and may cause crashes. For those interested, you can check out my next blog post for details: Enable 3D Acceleration for macOS Virtual Machines in VMware Fusion.