Hexo Plugin Development
Lately, I’ve found myself a little envious of The Verge’s slick image carousel feature. Let’s be real—when you’ve got an organized set of images, a carousel beats a static picture group any day. Unfortunately, Hexo doesn’t have a built-in plugin for that. So, naturally, I took matters into my own hands and whipped up a carousel plugin based on Splide, designed specifically for the NexT theme. Here’s a rundown of the journey from development to release—because why not document the process while you're at it?
Version:
- Hexo: 7.3.0
- npm: 10.8.2
Create Plugin
- First things first—create a folder to house all your plugin files.
- Make sure the folder name starts with
hexo-, likehexo-splide-carousel, or Hexo simply won’t recognize it. No exceptions. - No need to keep this folder inside your blog directory either.
- Pro tip: use
gitto manage your code. You can set up a repo with the same name on GitHub and clone it locally.
- Make sure the folder name starts with
- Next, fire up your terminal and run
npm initto initialize the project. Just follow the prompts, and you’ll end up with a shiny newpackage.json. This file holds all the key info about your plugin—like its name, version, dependencies, etc. If you’re not sure about some options or just don’t care, stick with the defaults. You can always come back and tweak them later.- Want the full breakdown of each part of
package.json? Check out the official documentation.- Here’s an example to get you started:
1
2
3
4
5
6
7
8
9
10
11
12
13
14
15
16
17
18
19
20
21
22
23
24
25
{
"name": "hexo-splide-carousel",
"version": "1.2.1",
"description": "A package for Hexo blogs using the Next theme, provides image carousel and zoom functionality using Splide and medium-zoom libraries.",
"main": "index.js",
"scripts": {
"test": "echo \"Error: no test specified\" && exit 1"
},
"keywords": [
"hexo",
"theme-next",
"plugin",
"splide",
"carousel",
"medium-zoom"
],
"author": "Siriusq",
"homepage": "https://github.com/Siriusq/hexo-splide-carousel",
"bugs": "https://github.com/Siriusq/hexo-splide-carousel/issues",
"repository": {
"type": "git",
"url": "git://github.com:Siriusq/hexo-splide-carousel.git"
},
"license": "MIT"
}
- Here’s an example to get you started:
- If you don’t feel like typing everything out, just go with
npm init -y—this command auto-generates apackage.jsonwith all the default settings.
- Want the full breakdown of each part of
- Once that’s done, you should see two files in your folder:
index.jsandpackage.json. Theindex.jsfile is the main entry point for your plugin. This is where the magic happens.
Development
This section might get a bit long since it’s all about the details of the plugin files I wrote. Take it with a grain of salt—I mean, this is my first time developing a Hexo plugin, so expect a few bumps along the way.
Before diving in, I’d recommend taking the time to read through the official documentation.
Now, my plugin falls under the “tag” category. Here’s the gist: during Hexo’s static file generation process, if it detects a specific tag in a markdown file (like {% splide %}), it will convert that tag and its content into the HTML structure we’ve defined.
If your plugin works differently, you can always check out these websites for similar plugins to use as inspiration:
File Structure
Here’s how my plugin is structured. It’s not the gold standard of organization (for example, I wasn’t entirely sure where to put splide-init.js since I couldn’t find any solid guidelines). So I went with what looked sensible based on other plugins that seemed to be structured well enough.
1 | hexo-splide-carousel |
index.js
As mentioned earlier, this is the main entry point for the plugin—the brain behind the operation. In my plugin, it handles the following:
- Registers custom tags
- Imports necessary modules
- Injects JS scripts and CSS styles into the page
Register Tags
Tag plugins help developers quickly insert content into posts. You can find more details in the Tag Plugin Documentation.
For my plugin, I registered two tags: splide and sc.
1 | // Register Hexo custom tag and its shorthand |
const splideTag = require('./lib/scripts/tags/splide-tag')(hexo);require('./lib/scripts/tags/splide-tag'): This imports the tag function as a module, making it easier to update later on. The module lives at./lib/scripts/tags/splide-tag.js.(hexo): If your tag function relies on Hexo configurations or settings, you’ll need to pass the Hexo instance into the function.
hexo.extend.tag.registeris used to register the tag.- The first argument is the tag name, which you’ll use in markdown files.
- The second argument is the tag function. Since I imported it as a module, it keeps things clean.
- If your tag function is pretty simple, you could just pass it directly as
function (args, content) { // ... }.
- If your tag function is pretty simple, you could just pass it directly as
- The third argument contains tag options. Hexo offers two options,
endsandasync, both of which default tofalse.{ ends: true }means this tag will require a closing tag. In markdown files, you’d use anendtag to indicate where the tag finishes.
Load Files
First up, I load Hexo’s built-in file I/O module. For more info on how this works, check out hexo-fs.
1 | const fs = require('fs'); |
Then, using the fs module, I load additional files:
1 | // Load files from the lib directory |
Custom Configuration
I’ve baked in a few customizable features into the plugin, like picking which CDN provider to use or adjusting the style of the carousel. To make these adjustments easier for users, you’ll need to add some config options into the Hexo config file.
Note: In the _config.yml file, make sure you’re using two-space indentation.
For example, here’s how you can customize the CDN provider:
1 | # _config.yml |
Then, in index.js, you can read this configuration:
1 | const cdn = hexo.config.splide.cdn || 'unpkg'; |
To prevent users from leaving options blank, it’s a good idea to set a default. The || 'unpkg' part ensures that if the CDN isn’t specified in the config, it’ll default to unpkg.
Injectors
Injectors are used to insert static code snippets into the generated HTML’s <head> and <body>. Hexo performs the injection before running the after_render:html filter. For more details, check out the Injector Documentation.
Earlier, we loaded the JS and CSS files, but these need to be injected into the generated HTML to take effect. Here’s an example of injecting custom styles:
1 | // Previously loaded CSS styles |
- The first parameter specifies where the code gets injected:
head_begin: Injects right after<head>(default)head_end: Injects just before</head>body_begin: Injects right after<body>body_end: Injects just before</body>
- The second parameter is the code snippet to be injected.
- The third parameter defines the scope of the injection:
default: Injects on every page (this is the default)home: Injects only on the homepagepost: Injects only on post pagespage: Injects only on standalone pagesarchive: Injects only on archive pagescategory: Injects only on category pagestag: Injects only on tag pages
splide-tag.js
./lib/scripts/tags/splide-tag.js is the tag function I imported earlier as a module. Here’s the file:
1 | // Generate HTML structure |
The tag function receives two parameters: args and content. In Markdown files, my tag structure looks like this:
1 | {% splide type:'loop' autoplay:true %} |
argscontains the parameters passed to the tag plugin, liketype:'loop' autoplay:true.contentis the content covered by the tag plugin, i.e.,.
Other Files
splide-init.js listens for page events and determines whether to initialize the carousel component.splide-custom.css applies my custom styles, overriding some default styles of Splide.
Local Test
During development, we need to frequently test our plugin to ensure it works correctly.
- First, install our plugin in the blog project. There are several installation methods, including but not limited to:
- (Recommended) Execute the command
npm install <plugin-path>in the blog root directory. This command creates a link, meaning any changes made in the plugin project’s folder will be synced in real-time toblog-root/node_modules/plugin-name. - If you don’t plan to upload the plugin, you can also directly move the plugin folder to
./node_modulesand manually add the plugin and its version to thedependenciessection of./package.jsonin the blog root directory, like"hexo-splide-carousel": "^1.0.0",. If this is the last line, remember to add a comma at the end of the previous line and remove its own comma.
- (Recommended) Execute the command
- If your plugin has custom configuration options, remember to add them to the Hexo configuration file
_config.yml. - Then, proceed with the usual
hexo clandhexo stesting.
Publish
Once the plugin is complete, you can choose to upload it to npm so others can install and use it.
- Create a
READMEfile to describe the plugin’s purpose and usage. For more details, see the official documentation about package README files. - If there are files to ignore, you can create a
.npmignorefile, which has a similar syntax to.gitignore. Common files like the.gitfolder and theREADMEfile are ignored by default, so you don’t need to add them to.npmignore. More information can be found in the official documentation on keeping files out of your package. - Complete the
package.json. - Register for an account on the npm website.
- Execute
npm loginin the plugin directory, then press Enter to open a browser and log in. - Execute
npm publish, then press Enter to open a browser for identity verification. - Search for your plugin name on the npm homepage to find the recently published plugin.
Update
If you discover new bugs or add new features to the plugin, you need to push the updated plugin to npm again.
- Execute
npm version <version-number>.- The default version number after initialization is
1.0.0. - If the update primarily involves bug fixes, just increase the last digit, like
1.0.1. - If you added new features that are backward-compatible, change the middle digit, like
1.1.0. - If there are significant changes and new features that are not backward-compatible, change the first digit, like
2.0.0. - For detailed versioning rules, see the official documentation on semantic versioning.
- The default version number after initialization is
- Execute
npm publish, then press Enter to open a browser for identity verification, and wait for the command in the terminal to complete.
Submit to Hexo
After publishing the plugin, we can also submit it to the official Hexo plugin list, making it easier for more people to find and use.
- Fork the hexojs/site repository to your own account.
- Clone the forked repository to your local machine.
- Create a new
yamlfile in./source/_data/plugins/, naming it after your plugin. - In the newly created file, fill in the relevant information in English. Here’s an example:
1
2
3
4
5
6description: Server module for Hexo.
link: https://github.com/hexojs/hexo-server
tags:
- official
- server
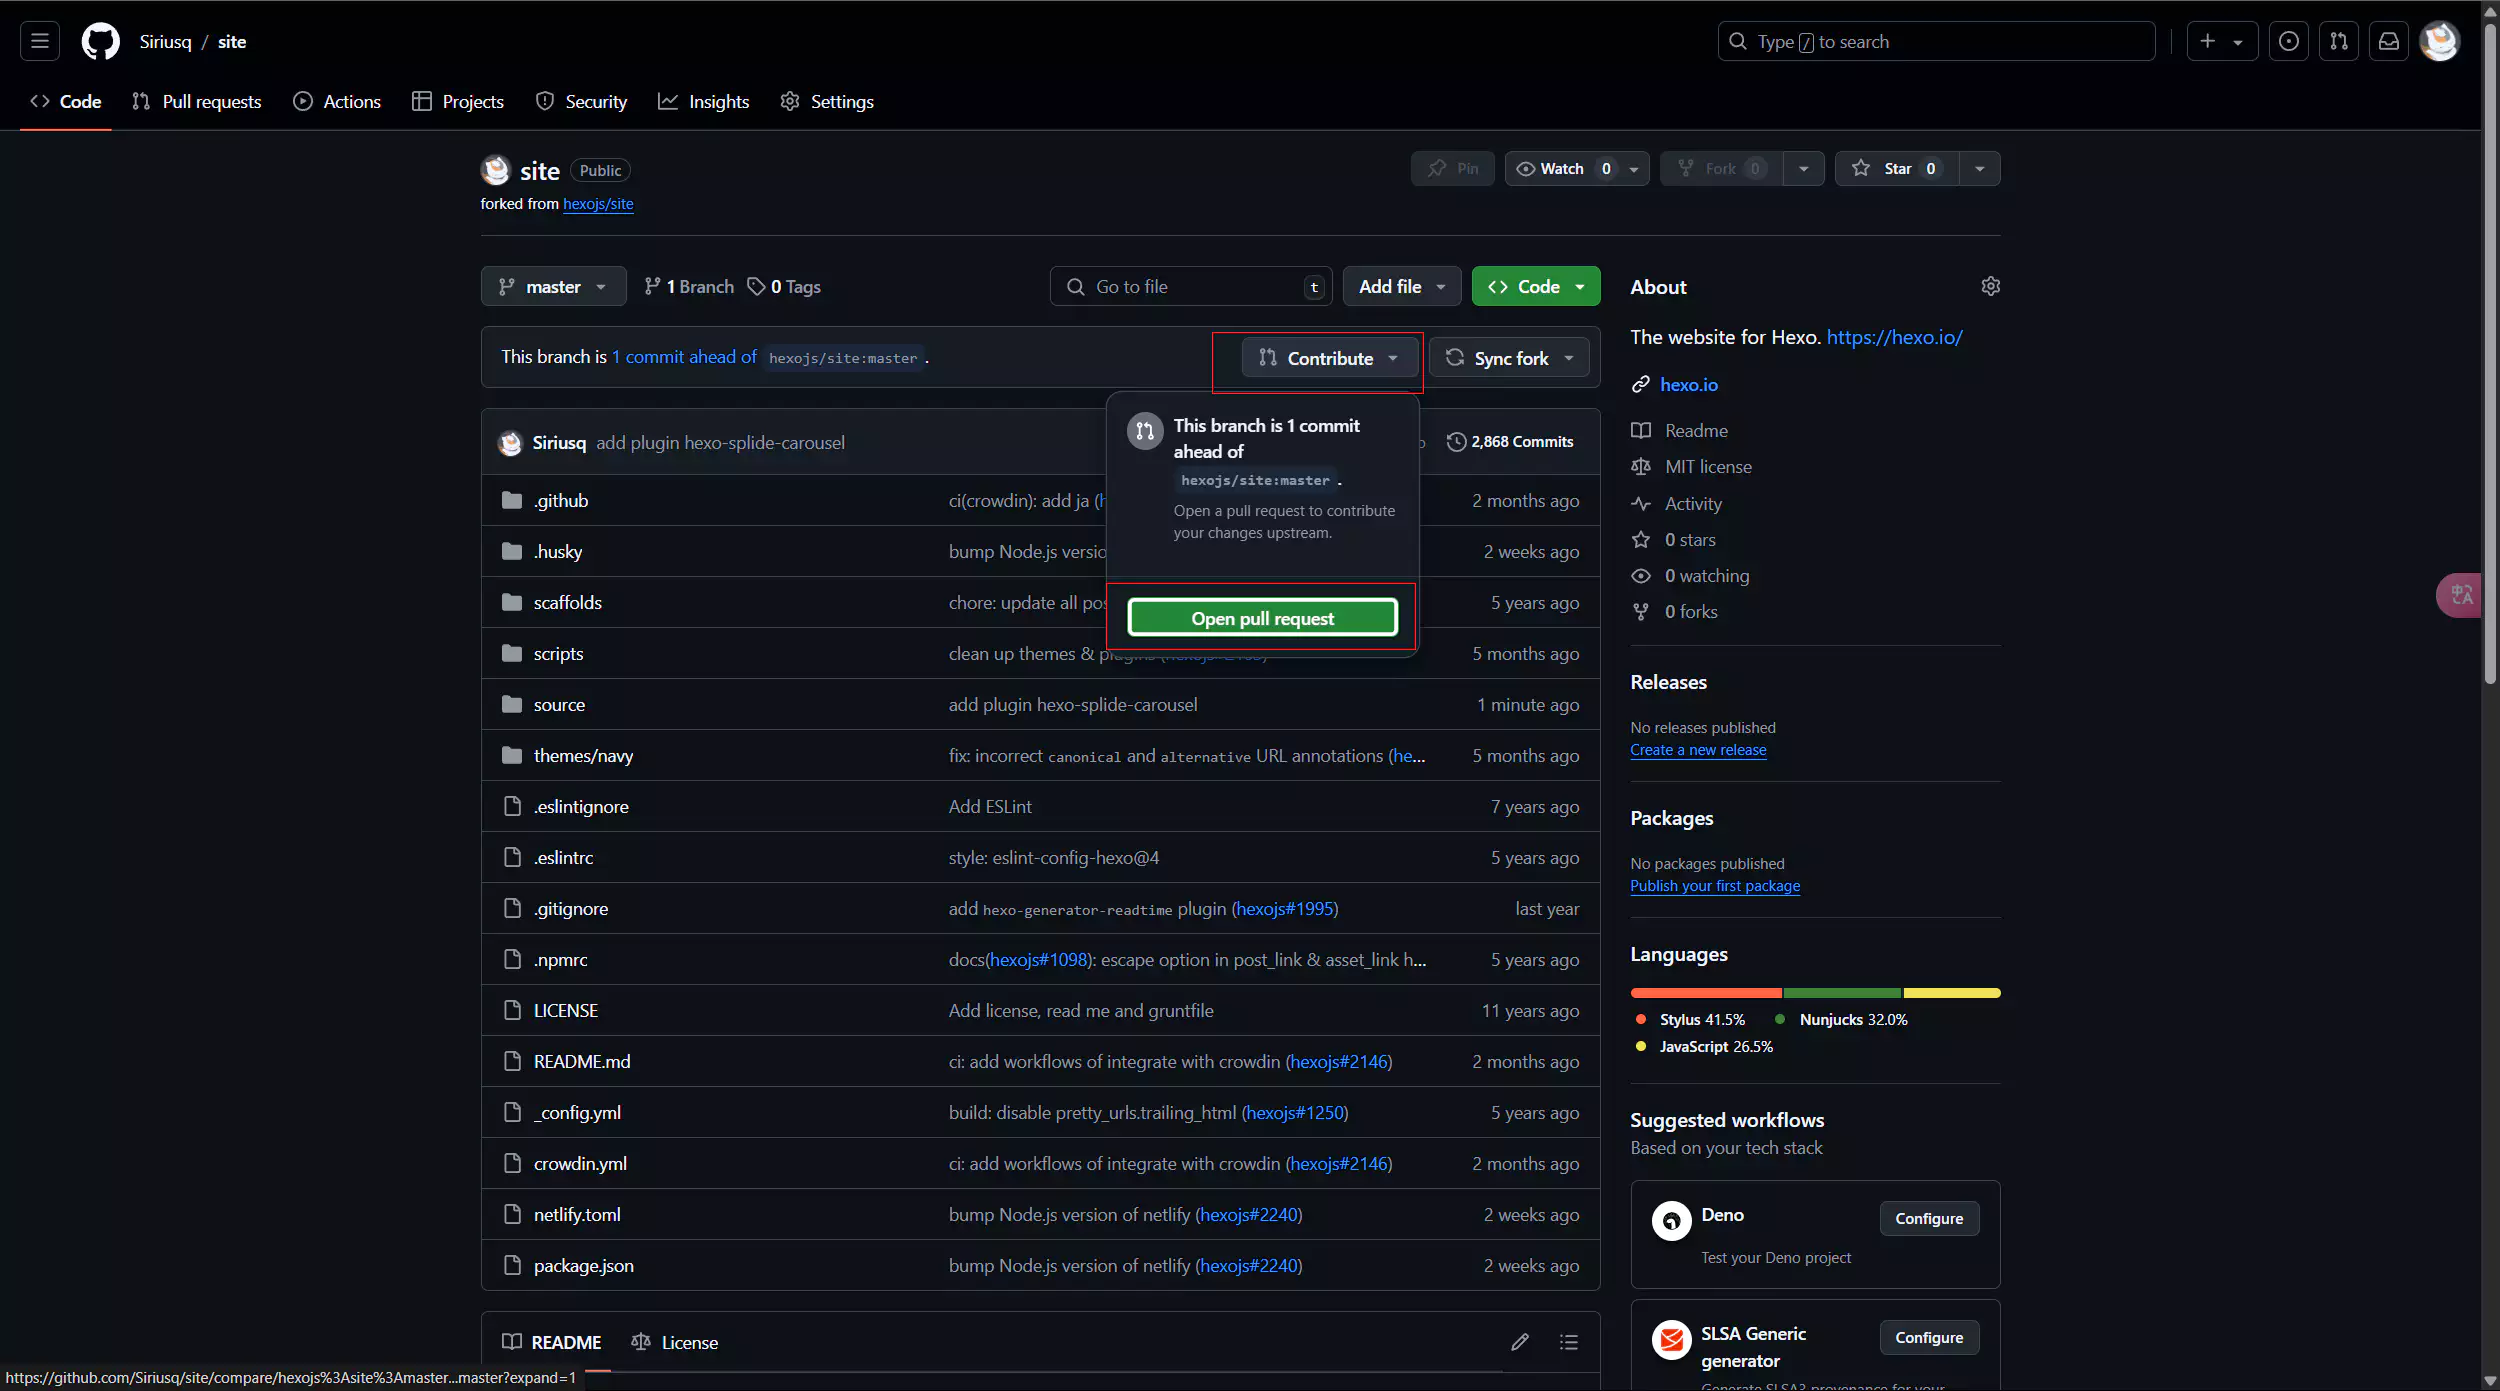
- console - Push the changes to your repository.
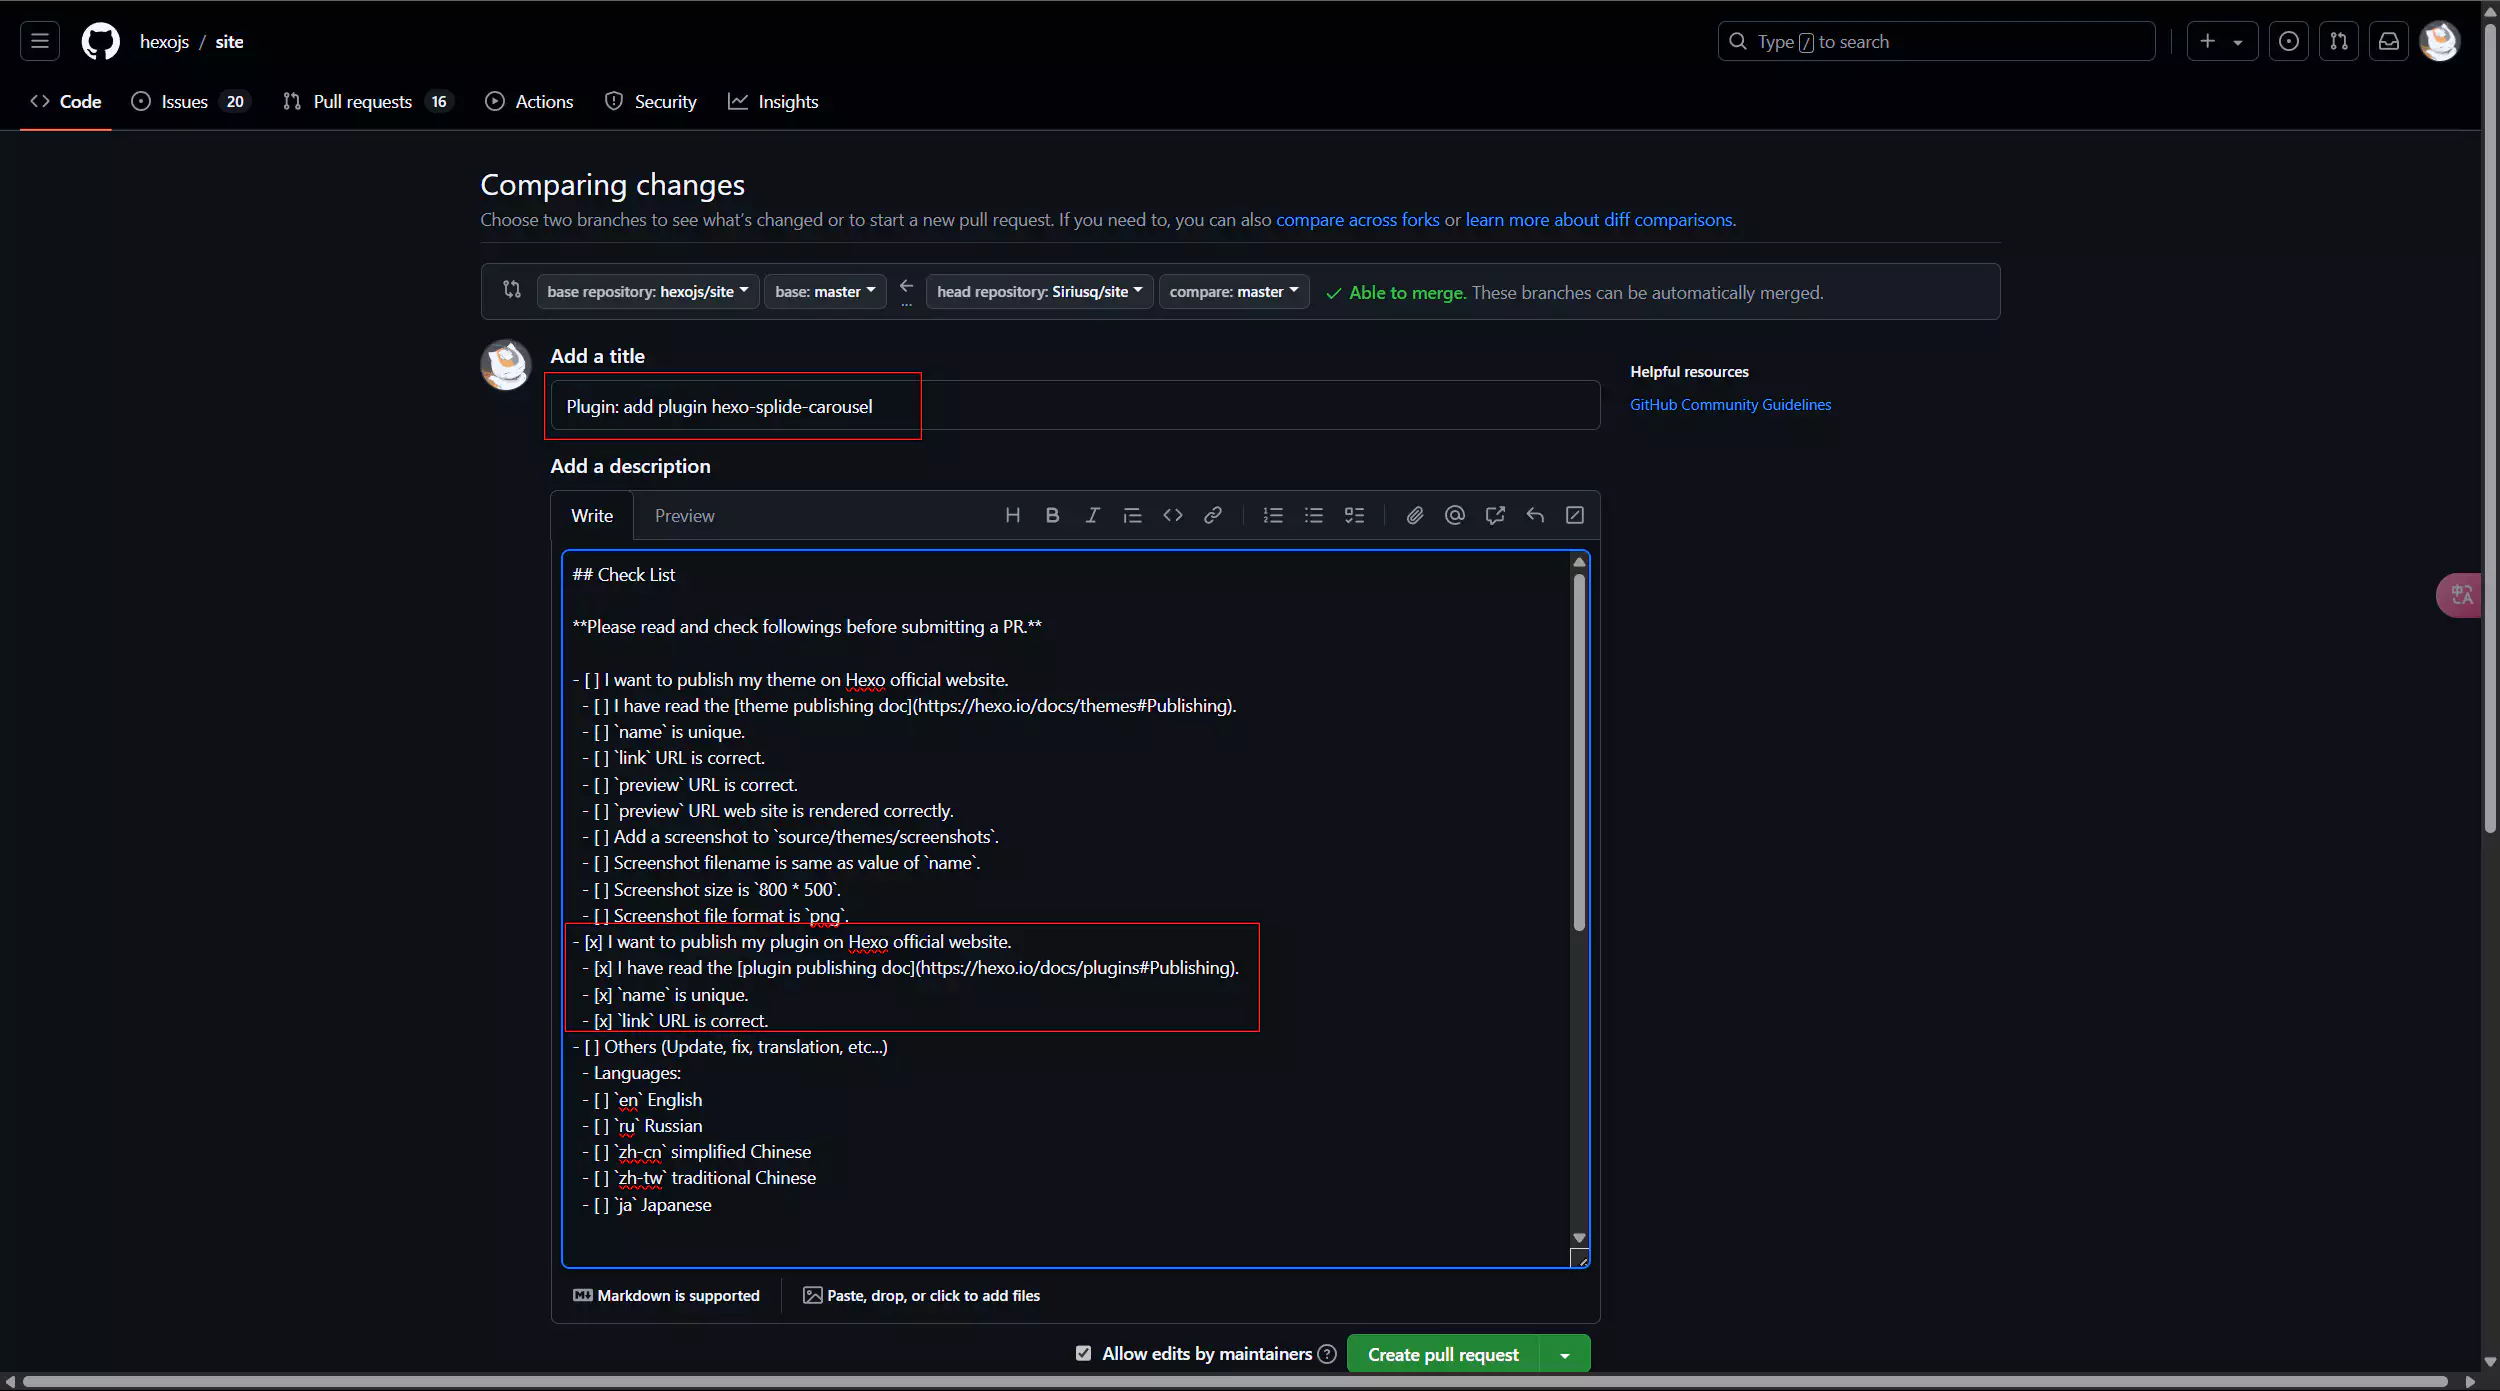
- Open a new pull request.
- In the title, describe the changes made, such as
Plugin: add plugin hexo-splide-carousel. - Check the relevant options in the
Check List. - Submit and wait for Hexo to complete the relevant checks.
- Finally, your plugin will appear in the Hexo official plugin list.
References

