Accessing Windows Shared Folders on iPhone
Because the local network file transfer software I've been using doesn't work on Win11 anymore, and I couldn't find a good alternative, I decided to resort to the old method of using Windows shared folders to transfer files to iOS devices.
Note: The methods described in this article are intended for trusted networks, such as your home WiFi. It is strongly discouraged to set up sharing on public networks as it is highly insecure.
Enable SMB Protocol
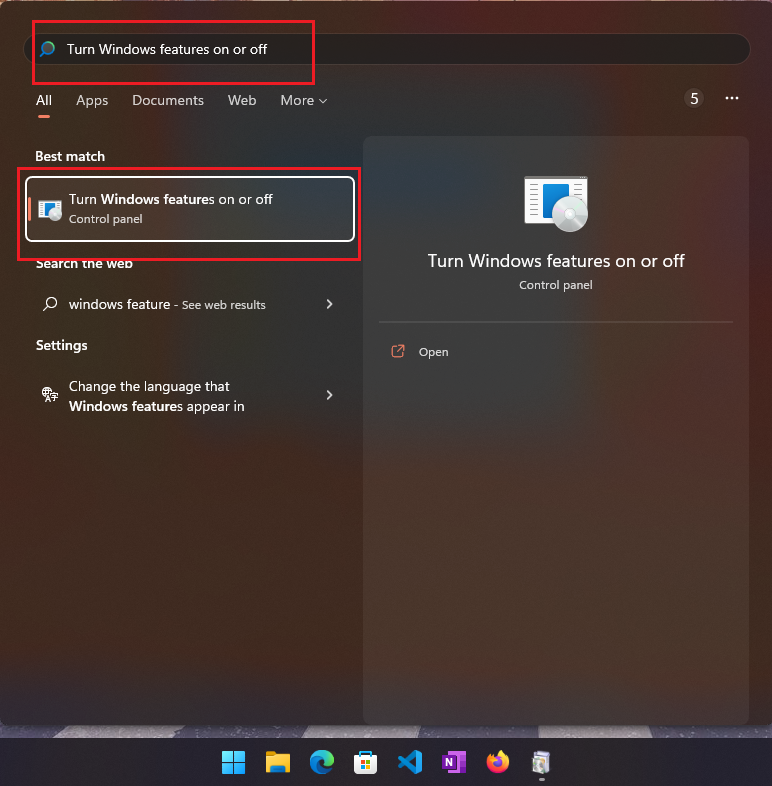
In the search bar above the Start menu, type Turn Windows features on or off and open the corresponding panel. Check the box to enable the SMB Direct feature.

Sharing Settings
- Open
Settings-Network & Internet-Wi-Fi-[Current Wi-Fi]Properties. - Set the network profile type to
Private network. - In the search bar above the Start menu, type
Manage advanced sharing settingsand open the corresponding panel. - Select
Turn on network discoveryandTurn on file and printer sharingin thePrivatesection. CheckTurn on automatic setup of network-connected devices. - In the
All Networkssection, selectTurn off Public folder sharing, chooseUsing 128-bit encryption... (recommended)and selectTurn on password-protected sharing. - Click
Save changes.


Create a Shared User
- Press the
Win + Xshortcut keys to openComputer Management. - Expand the
Local Users and Groupssection, right-click onUsersand selectNew User. - Enter the new username and password, and check the option for
Password never expires. - Click
Create.

Folder Settings
- Locate the folder you want to share, right-click it, and select
Properties. - Open the
Sharingtab, click theSharebutton under Network File and Folder Sharing. - Choose the user you created earlier, then click
Add. - Adjust the permission level for the new user to
Read/Write. - Click
Share.


iOS File Settings
- In the folder properties, you will find a line labeled
Network Path. - Open the Files app on your iOS device, tap the three dots in the upper right corner, and select
Connect to Server. - Enter
smb:[network path of the shared folder], replacing backslashes\with forward slashes/. For example, if the network path displayed in Windows is\\ThisPC\ShareFolder, you should entersmb://ThisPC/ShareFolderhere. - Enter the newly created username and password.
- Click
Nextin the upper-right corner to connect to the server.


Notes
- iOS’s built-in Files app can be a bit unintelligent. If you haven’t accessed the shared folder for a while, the next time you access it, you might only see an empty folder. In this case, you must exit the SMB server, then click the three dots in the upper-right corner and reconnect to the server.
- iOS’s built-in Files app may show an additional file named
desktop.inicompared to Windows File Explorer. This is a hidden file in Windows, so you can safely ignore it. - It’s highly recommended to use a third-party file app to replace the built-in one.
- Your iPhone and PC must be on the same network.