Enabling Integrated Graphics with Discrete Graphics Installed
Though practically speaking, the motherboard automatically blocks out the integrated graphics when a discrete graphics is plugged in. Although Intel's integrated graphics has poorer gaming performance, its video encoding and decoding capabilities are excellent. A graphics without a full encoder like the 6500xt can cause significant stuttering and frame drops when it comes to video clips, or in-game recording and pushing streams, so calling on the integrated graphics can take the burden off the discrete graphics and CPU for a smoother experience.
Tips
- This method is only applicable to desktop CPUs with integrated graphics.
- Intel CPUs with an
Fsuffix, such as12490F, do not have integrated graphics. - Only CPUs with
GorGEsuffixes in the AMD 5000 series and earlier have integrated graphics, such as the5600G, while the 7000 series all have integrated graphics. - If the integrated graphics is enabled, some of the memory bandwidth will be occupied, and if it works alongside the discrete graphics, it may have a negative impact on the game frame rate in some cases.
Enable Integrated Graphics in BIOS
Here I’ll use an ASUS B460I motherboard as an example.
- Make sure the monitor is connected to the video output port of the discrete graphics.
- Press
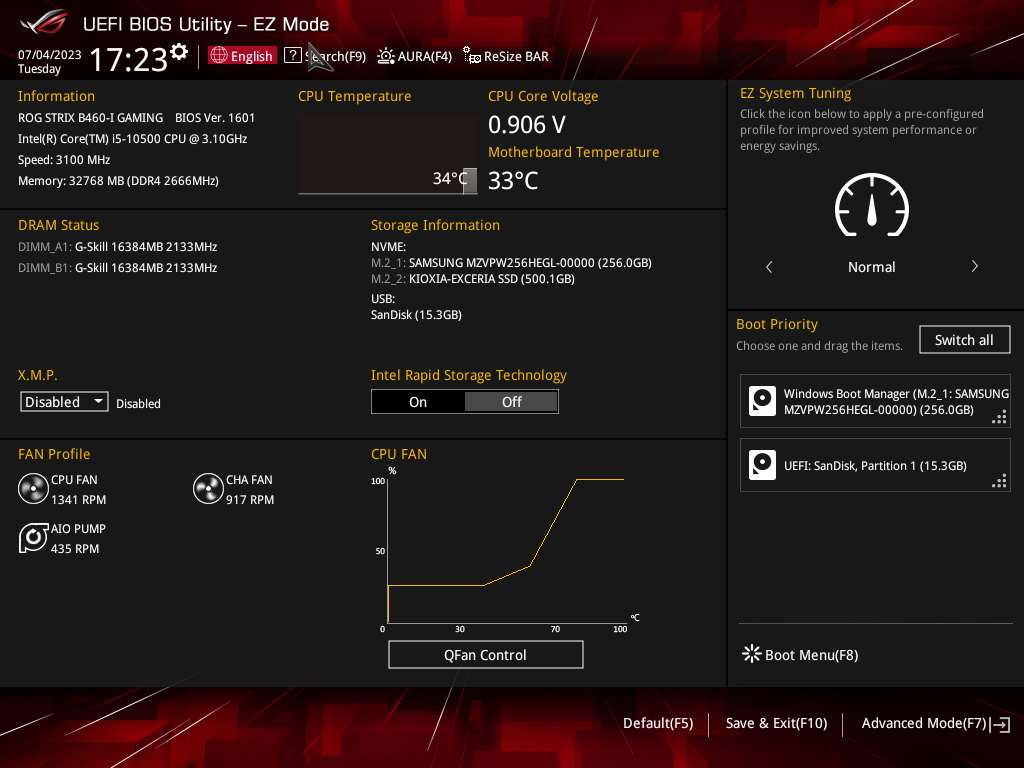
DelorF2to enter the BIOS when booting up. - If the top left corner shows
EZ Mode, pressF7to enterAdvanced Mode.![SwitchToAdvancedMode.jpg]()
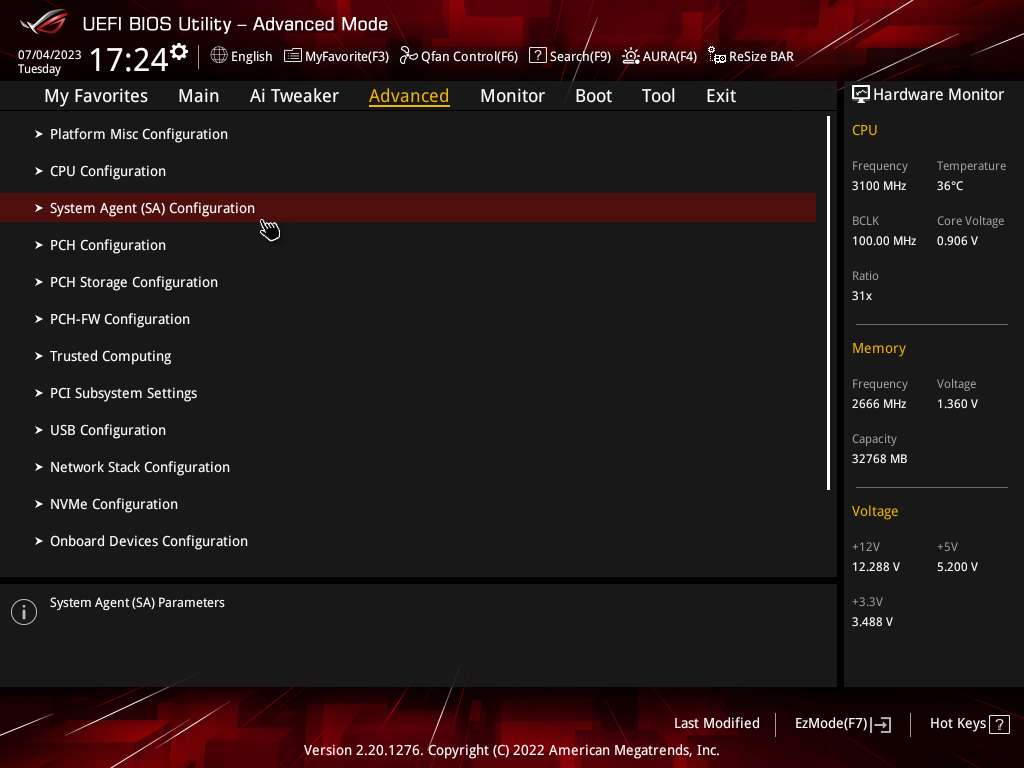
- Select
Advancedin the top menu bar. - Open
System Agent (SA) Configuration(NB Configurationfor AMD platforms).![SAConfig.jpg]()
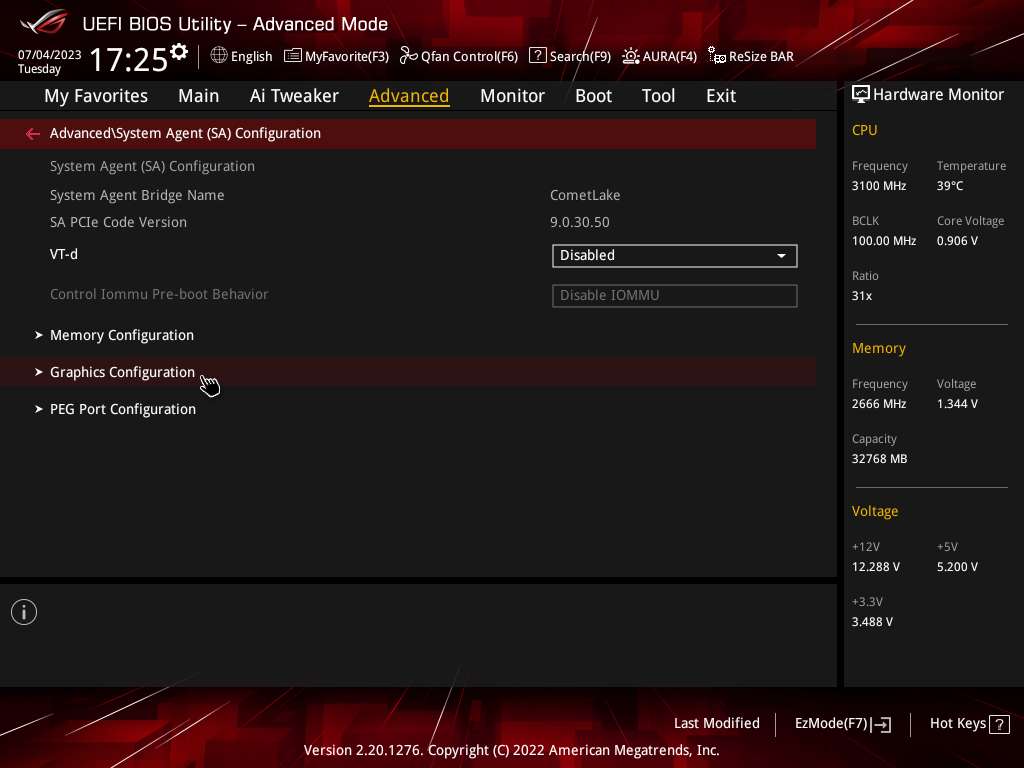
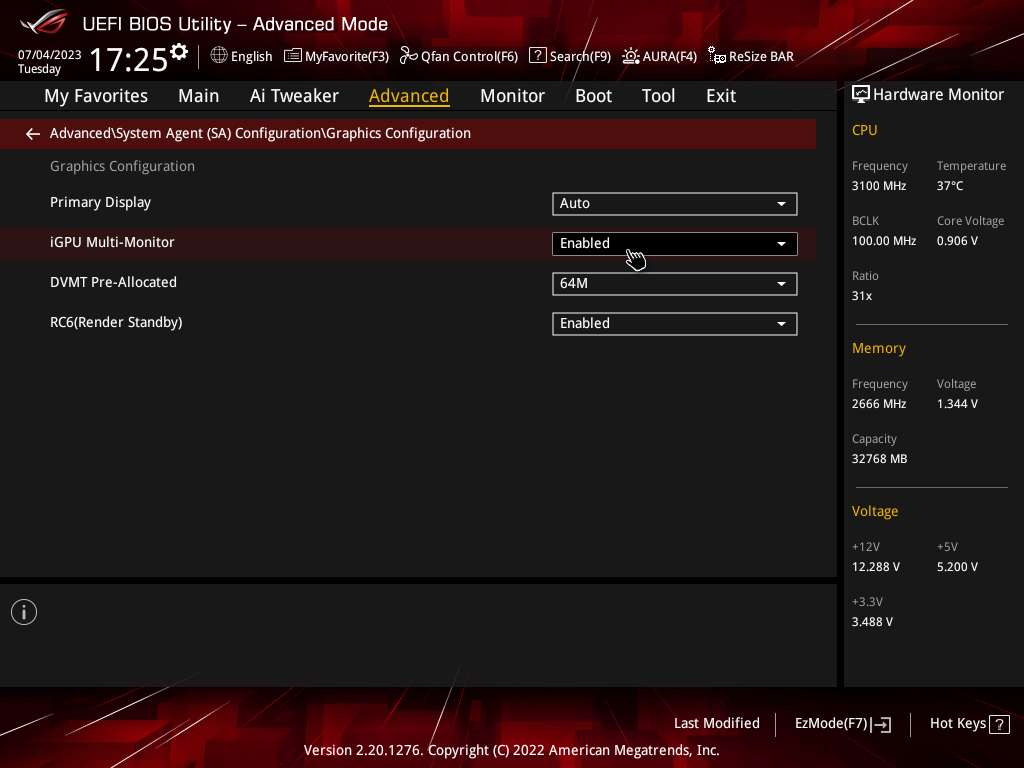
- Open
Graphics Configuration.![GraphicsConfig.jpg]()
- Set the
iGPU Multi-Monitoroption toEnable(orGFX Multi-Monitorfor AMD platforms).![iGPU.jpg]()
- Press
F10to save and exit.
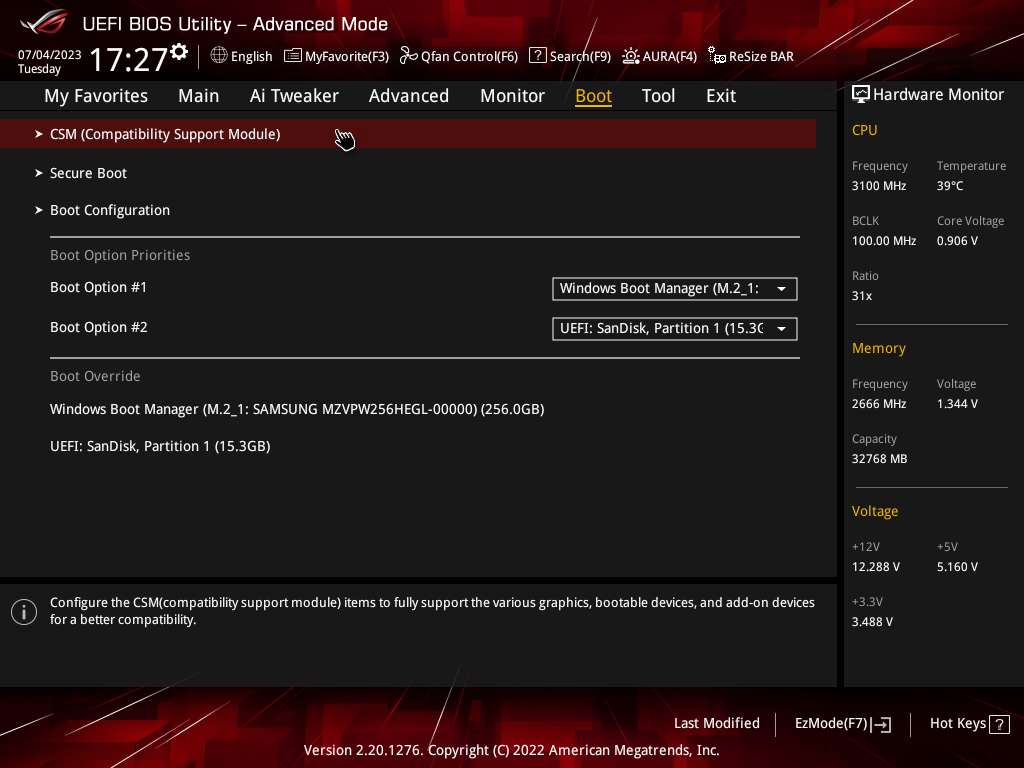
If you can’t find the options above, please follow the following steps to check
- Select
Bootin the top menu bar - open
CSM (Compatibility Support Module)option![CSM.jpg]()
- Set
Launch CSMtoDisable.![6DisableCSM.jpg]()
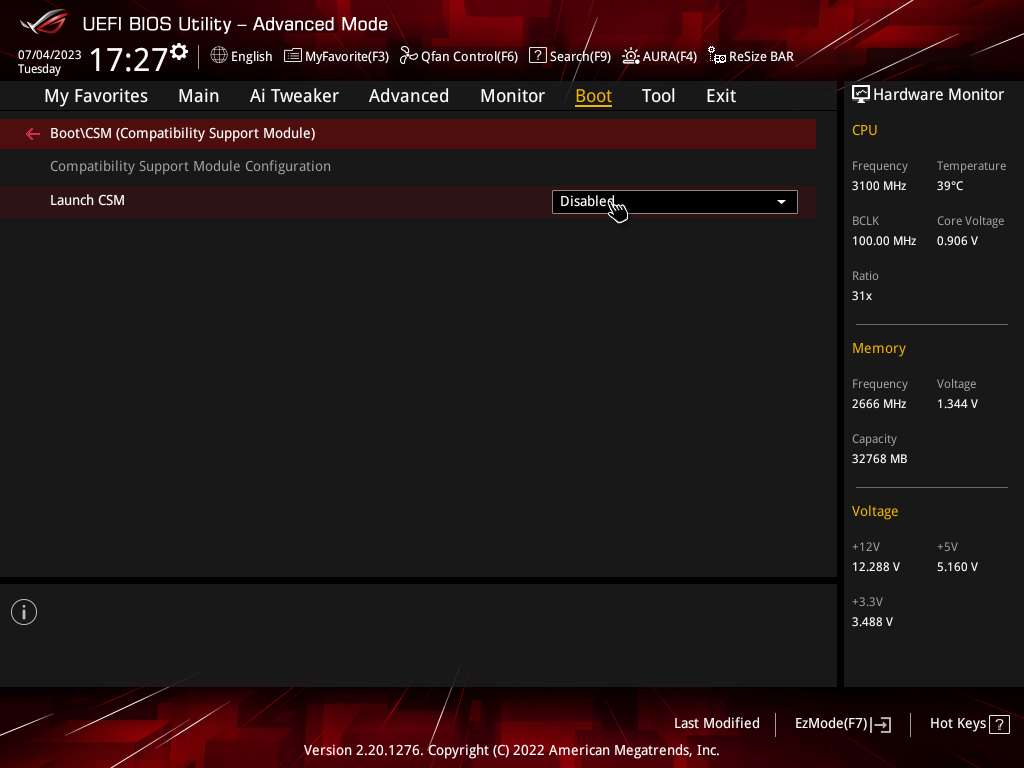
Note that enabling both discrete and integrated graphics requires the operating system to boot in UEFI mode, as Legacy mode does not support it, and you will need to reinstall the system and set the boot mode to UEFI before you can do so. If you disable CSM in Legacy mode, you may not be able to boot into the operating system.
How to take a screenshot in BIOS
Take the ASUS motherboard as an example, first insert the USB drive and once it enters the BIOS, press F12 to take a screenshot.
Note that screenshots need to be saved to an external storage device (e.g. a USB drive, etc.), in bmp format, with a file size of 3.00MB and a resolution of 1024*768.
Install Graphics Drivers
Normally the driver will be installed automatically after you enter the OS, if you can see the integrated graphics in your task manager, you can skip this part.

If the integrated graphics is not recognized by the operating system, please follow these steps to proceed.
- Turn off and cut off the power.
- Connect the monitor to the video output connector on the motherboard
- Turn on Windows Update and wait for the driver to be downloaded automatically, or go to the CPU manufacturer’s website to download the corresponding driver.
- Turn off the computer again after the installation is complete.
- Reconnect the monitor to the discrete graphics.
Set the Software’s Preferred Graphics
Only enabling integrated graphics in the BIOS does not achieve our goal, if you open the Task Manager you will find that the software is still running on the discrete graphics (the integrated graphics does not have any workload), you need to set the software’s graphics preferences to assign the software to run on the integrated graphics, proceed as follows.
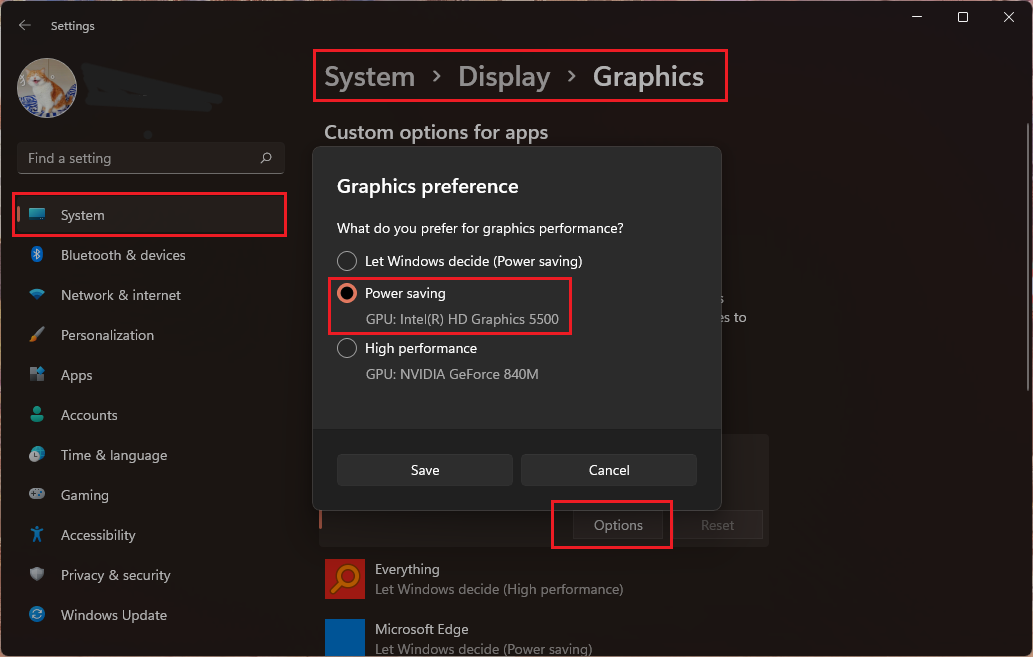
- Press the
WinandIkeys together to openWindows Settings. - Open
System - Display - Graphics. - Open the
Optionsmenu under the appropriate software. - Set
Graphics preferencestoPower savingand save.
If you cannot find the software you are looking for, please follow these procedures.
- Find
Custom options for appsinSystem - Display - Graphics. - Select
Desktop apporMicrosoft Store app. - Click
Browse.Desktop Applications: find the.exeexecutable file according to the file path and add it.Microsoft Store Applications: select directly from the list.

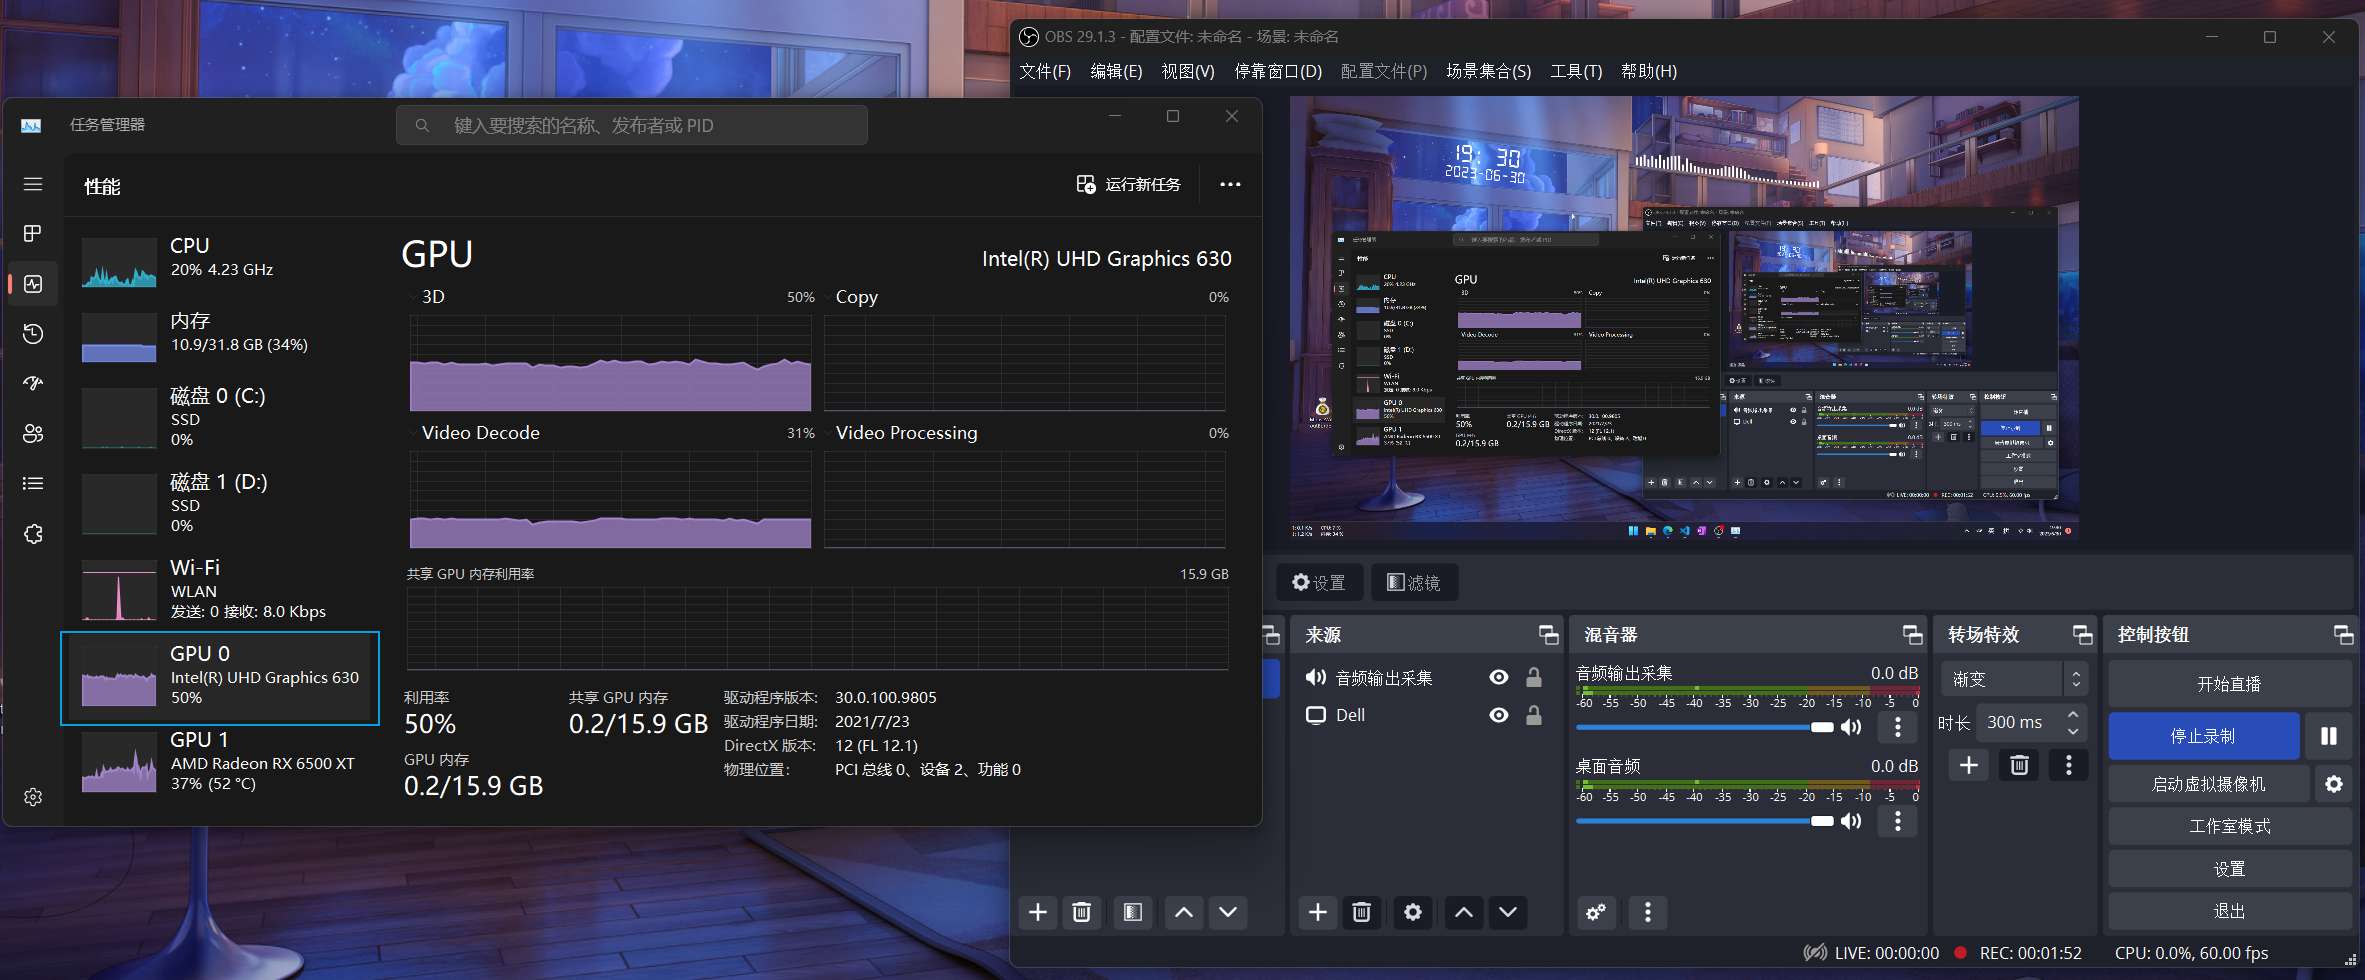
Once set up successfully, start the relevant software to test, here I take the screen recording software OBS Studio as an example, click start recording, then open the task manager, you can see the integrated graphics card has been working now!