Enable Cloudflare Acceleration and HTTPS on GitHub Pages
A few days ago, when transferring the domain, I found that GitHub Pages hadn't fully enabled HTTPS, and the A records set in Cloudflare were also incomplete, so I went through the process again and decided to document it along the way.
This post was translated from my Chinese blog post with the aid of ChatGpt.
Configuration
Cloudflare
I’ve previously configured Cloudflare, but I’ll provide a brief summary with some images.
- Log in to Cloudflare and click on
Add sitein the top menu. - Enter your domain name, and then click the
Add sitebutton. I’m adding a random one for demonstration purposes.![Add Site]()
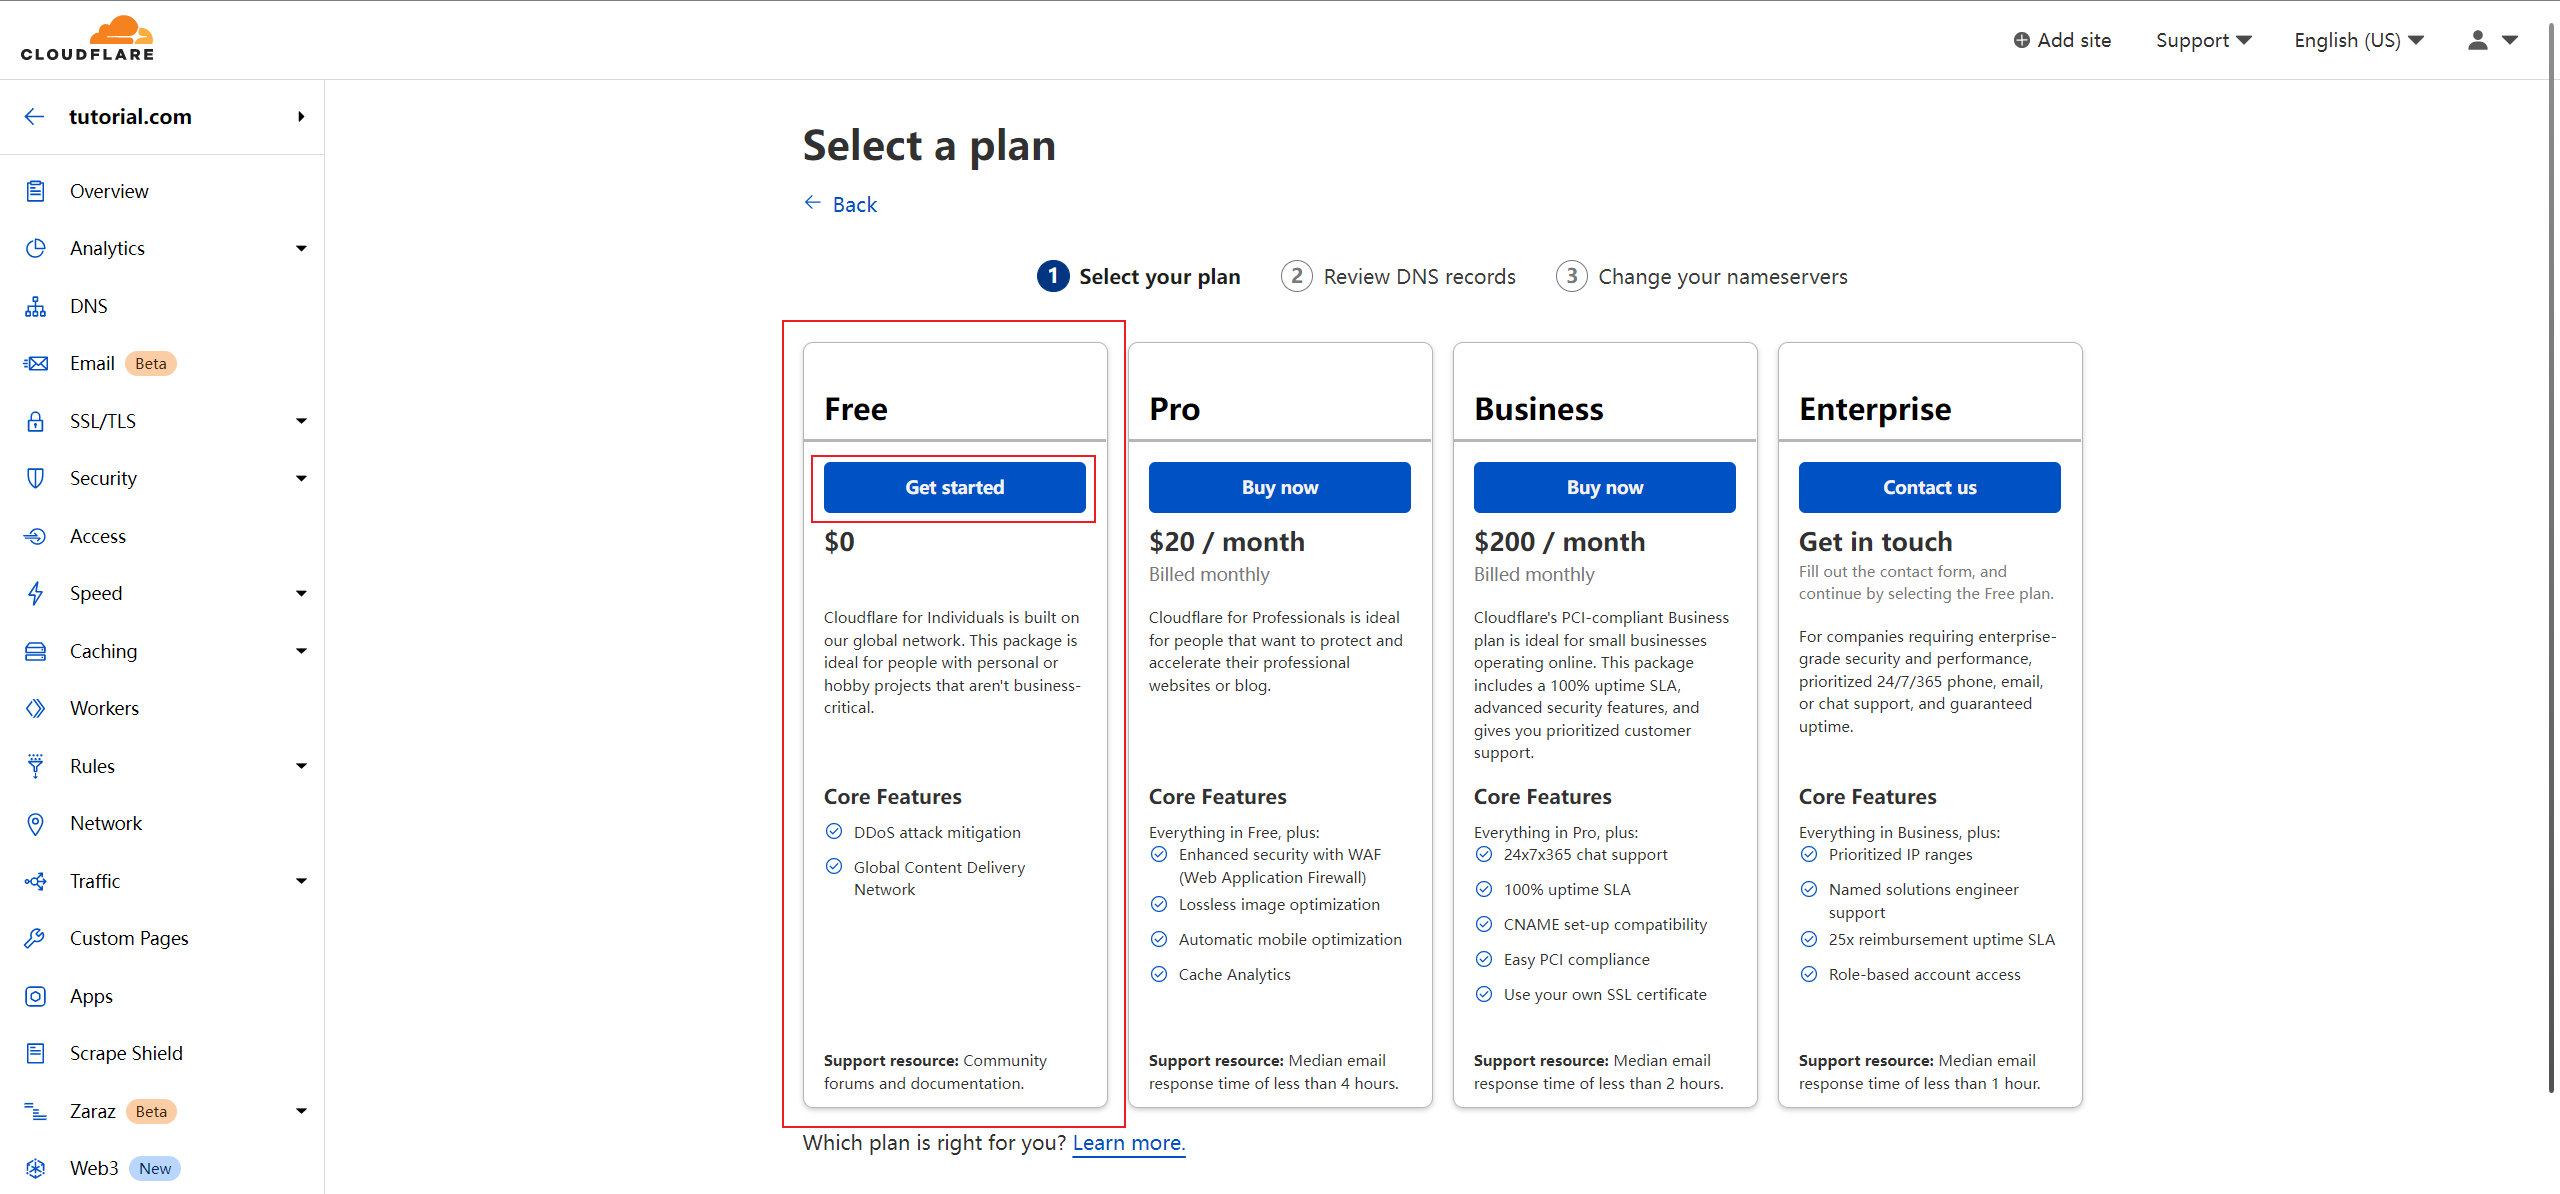
- Choose a plan; usually, the
Freeplan is sufficient.![Choose Plan]()
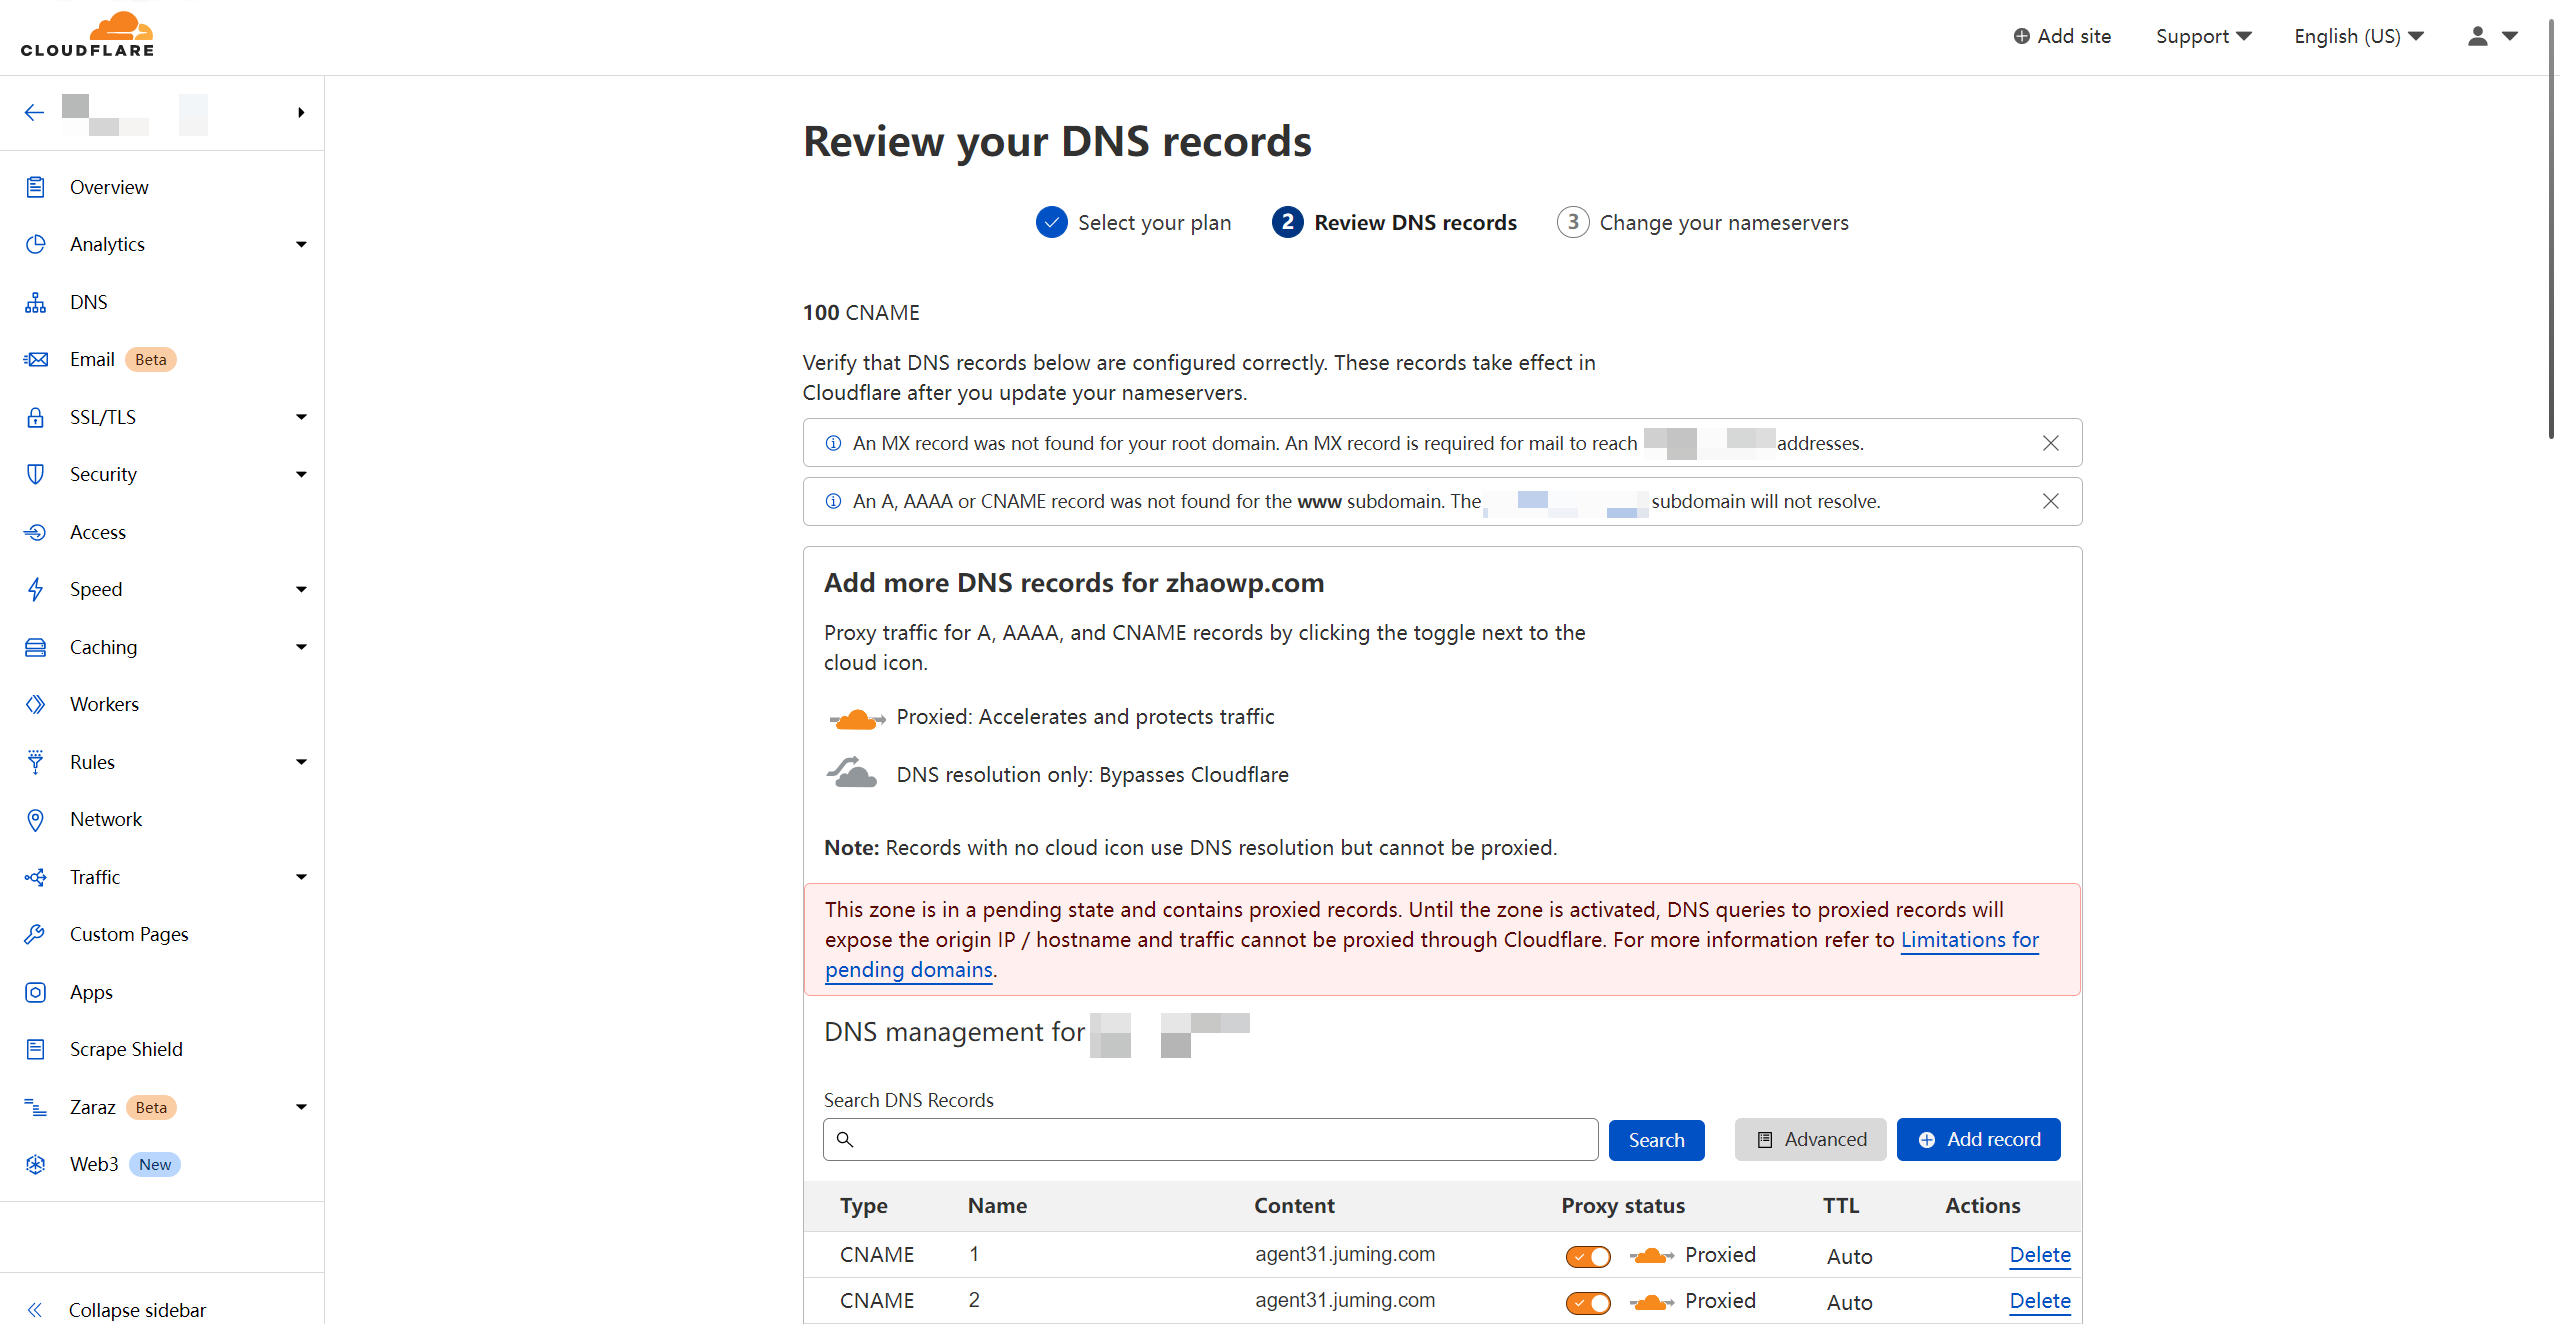
- Cloudflare will automatically fetch your domain’s DNS records. Skip this for now and scroll to the bottom of the page, then click the
Continuebutton. We’ll come back to configure it later.![Continue]()
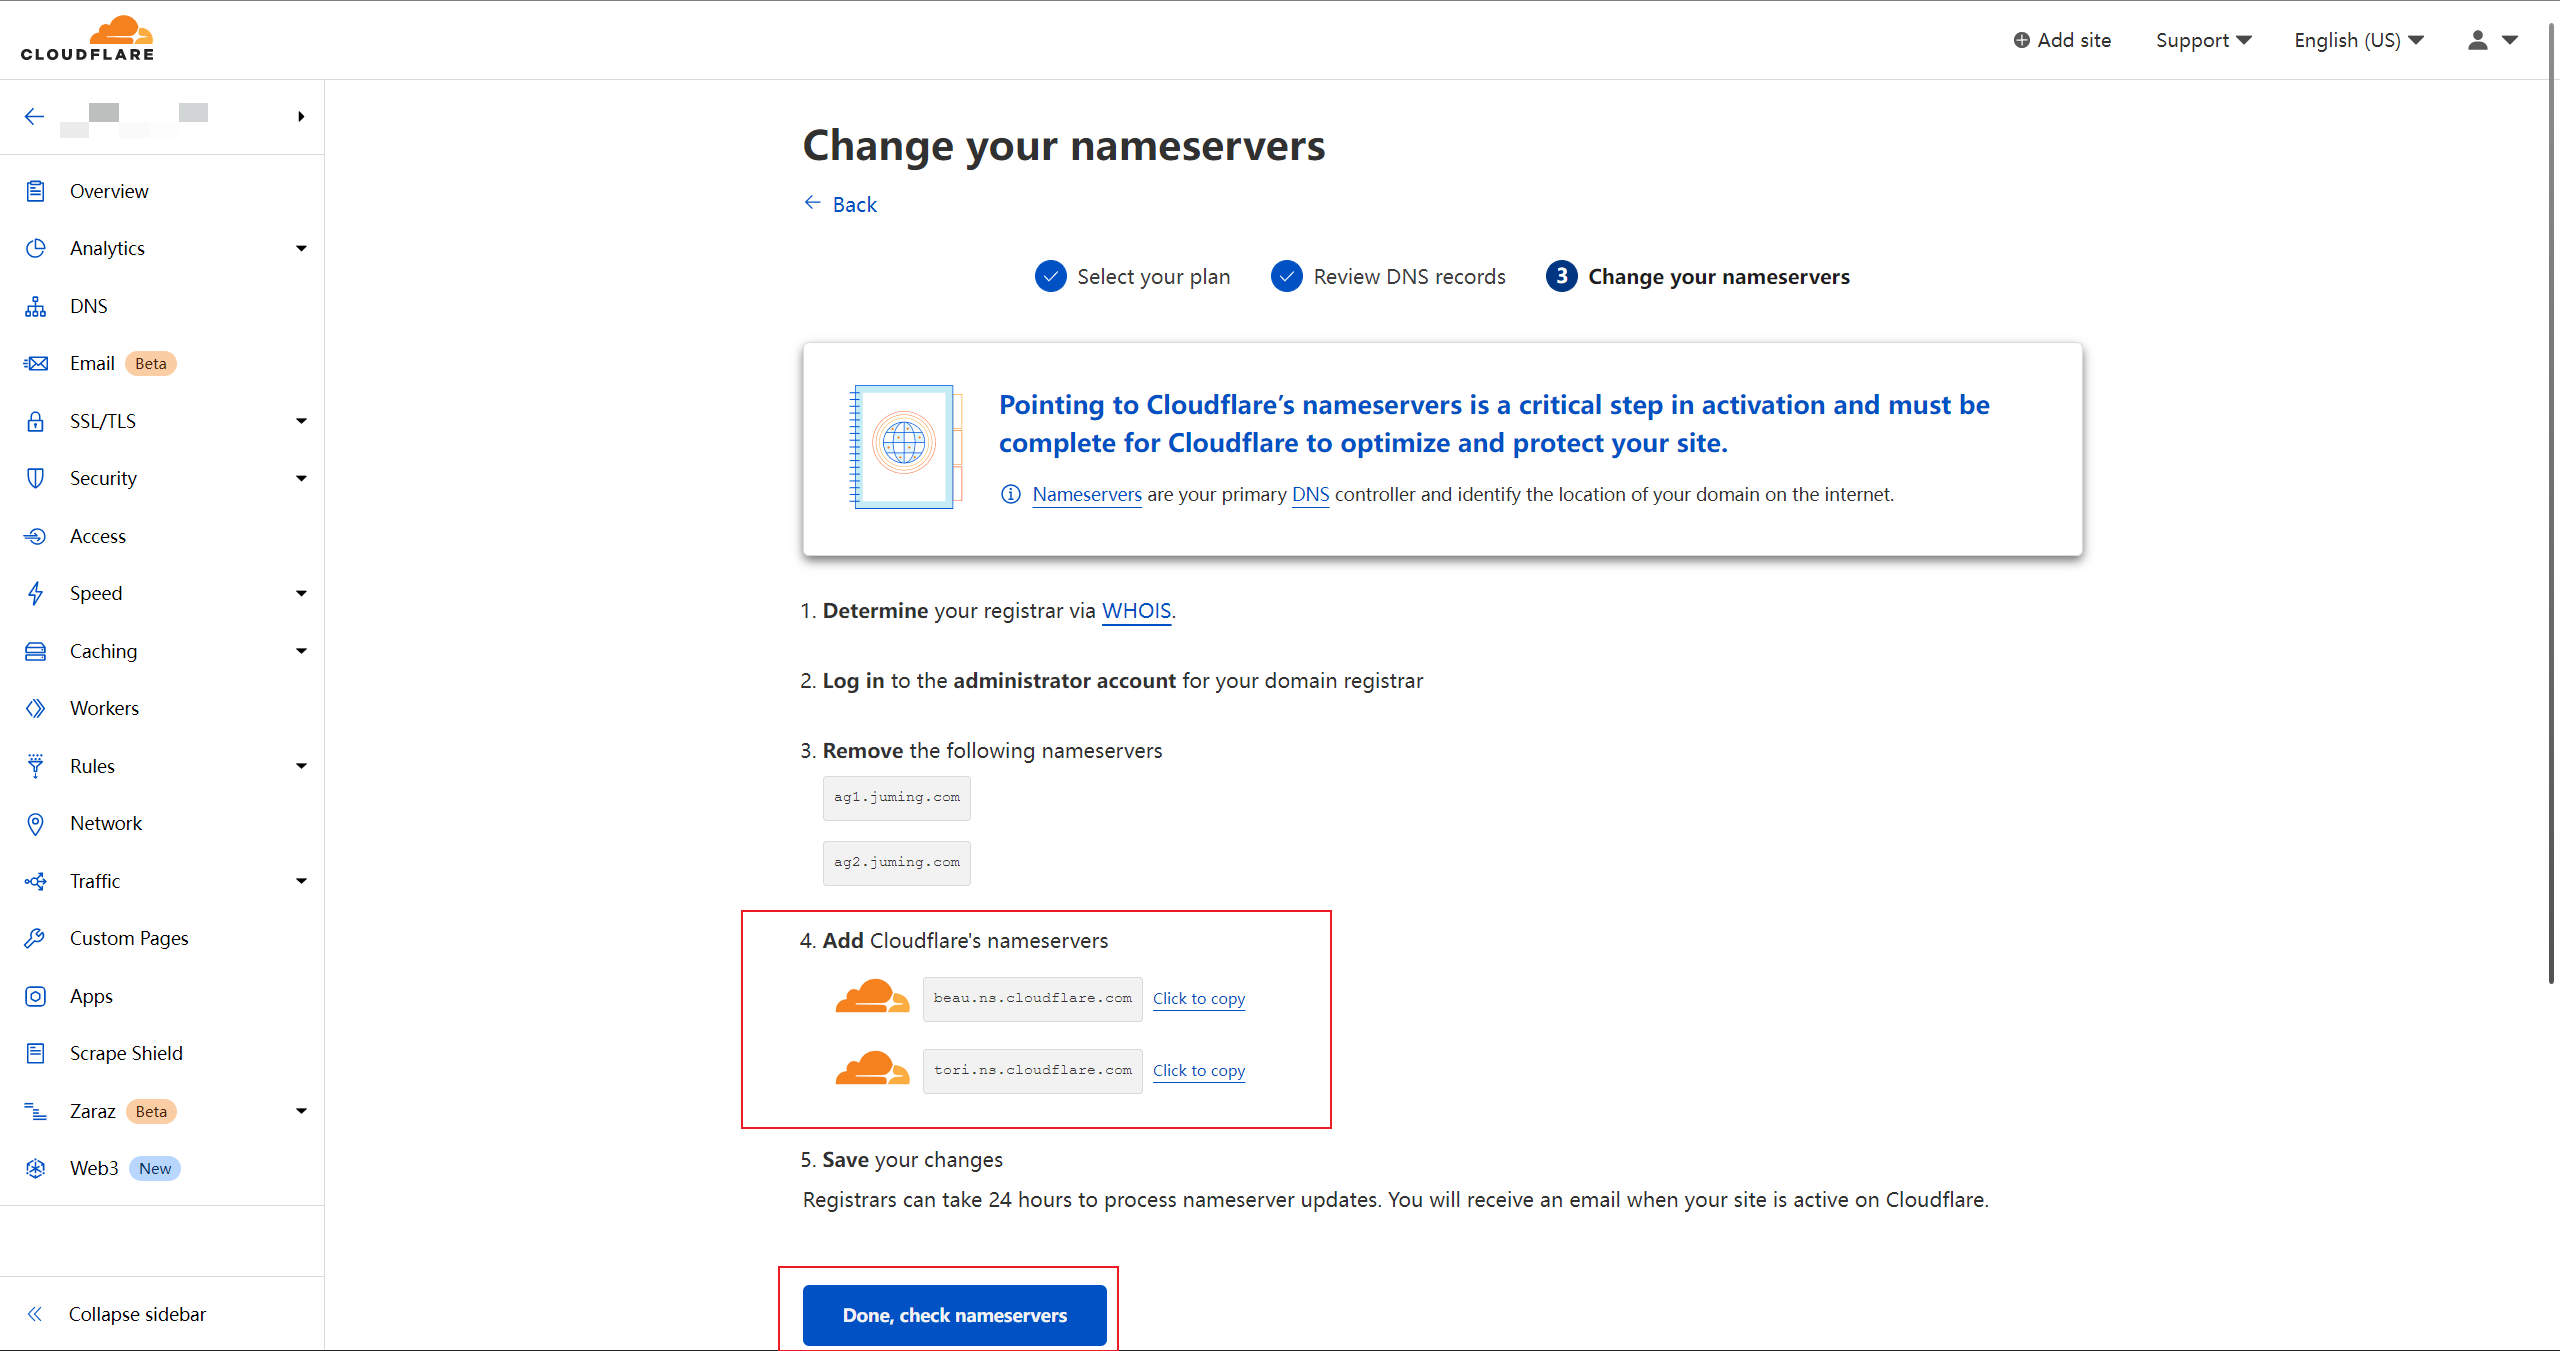
- Copy the domain name servers provided by Cloudflare and replace the existing ones with your domain registrar.
![Change DNS Servers]()
![Change DNS Servers]()
- Return to Cloudflare and click
Done, check nameservers. - Now, patiently wait for it to take effect. You will receive an email notification once it’s active. While waiting, you can set up
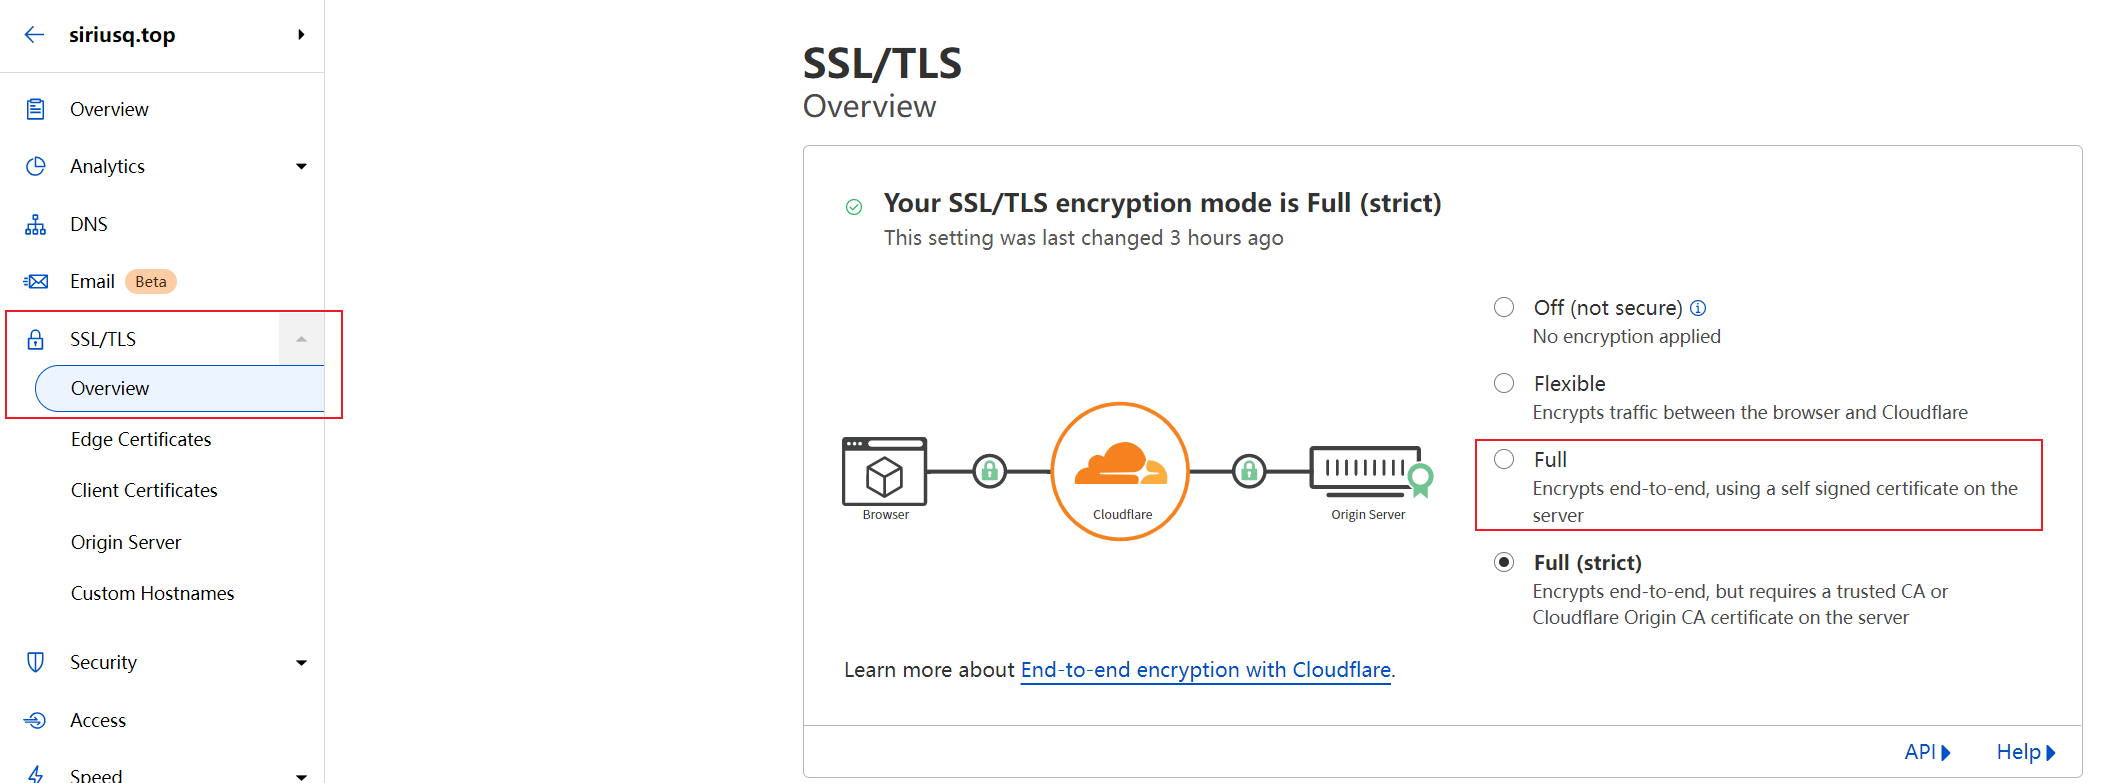
SSL/TLS.- In the
Overviewsection, set the Encryption Mode toFull.![Encryption Mode]()
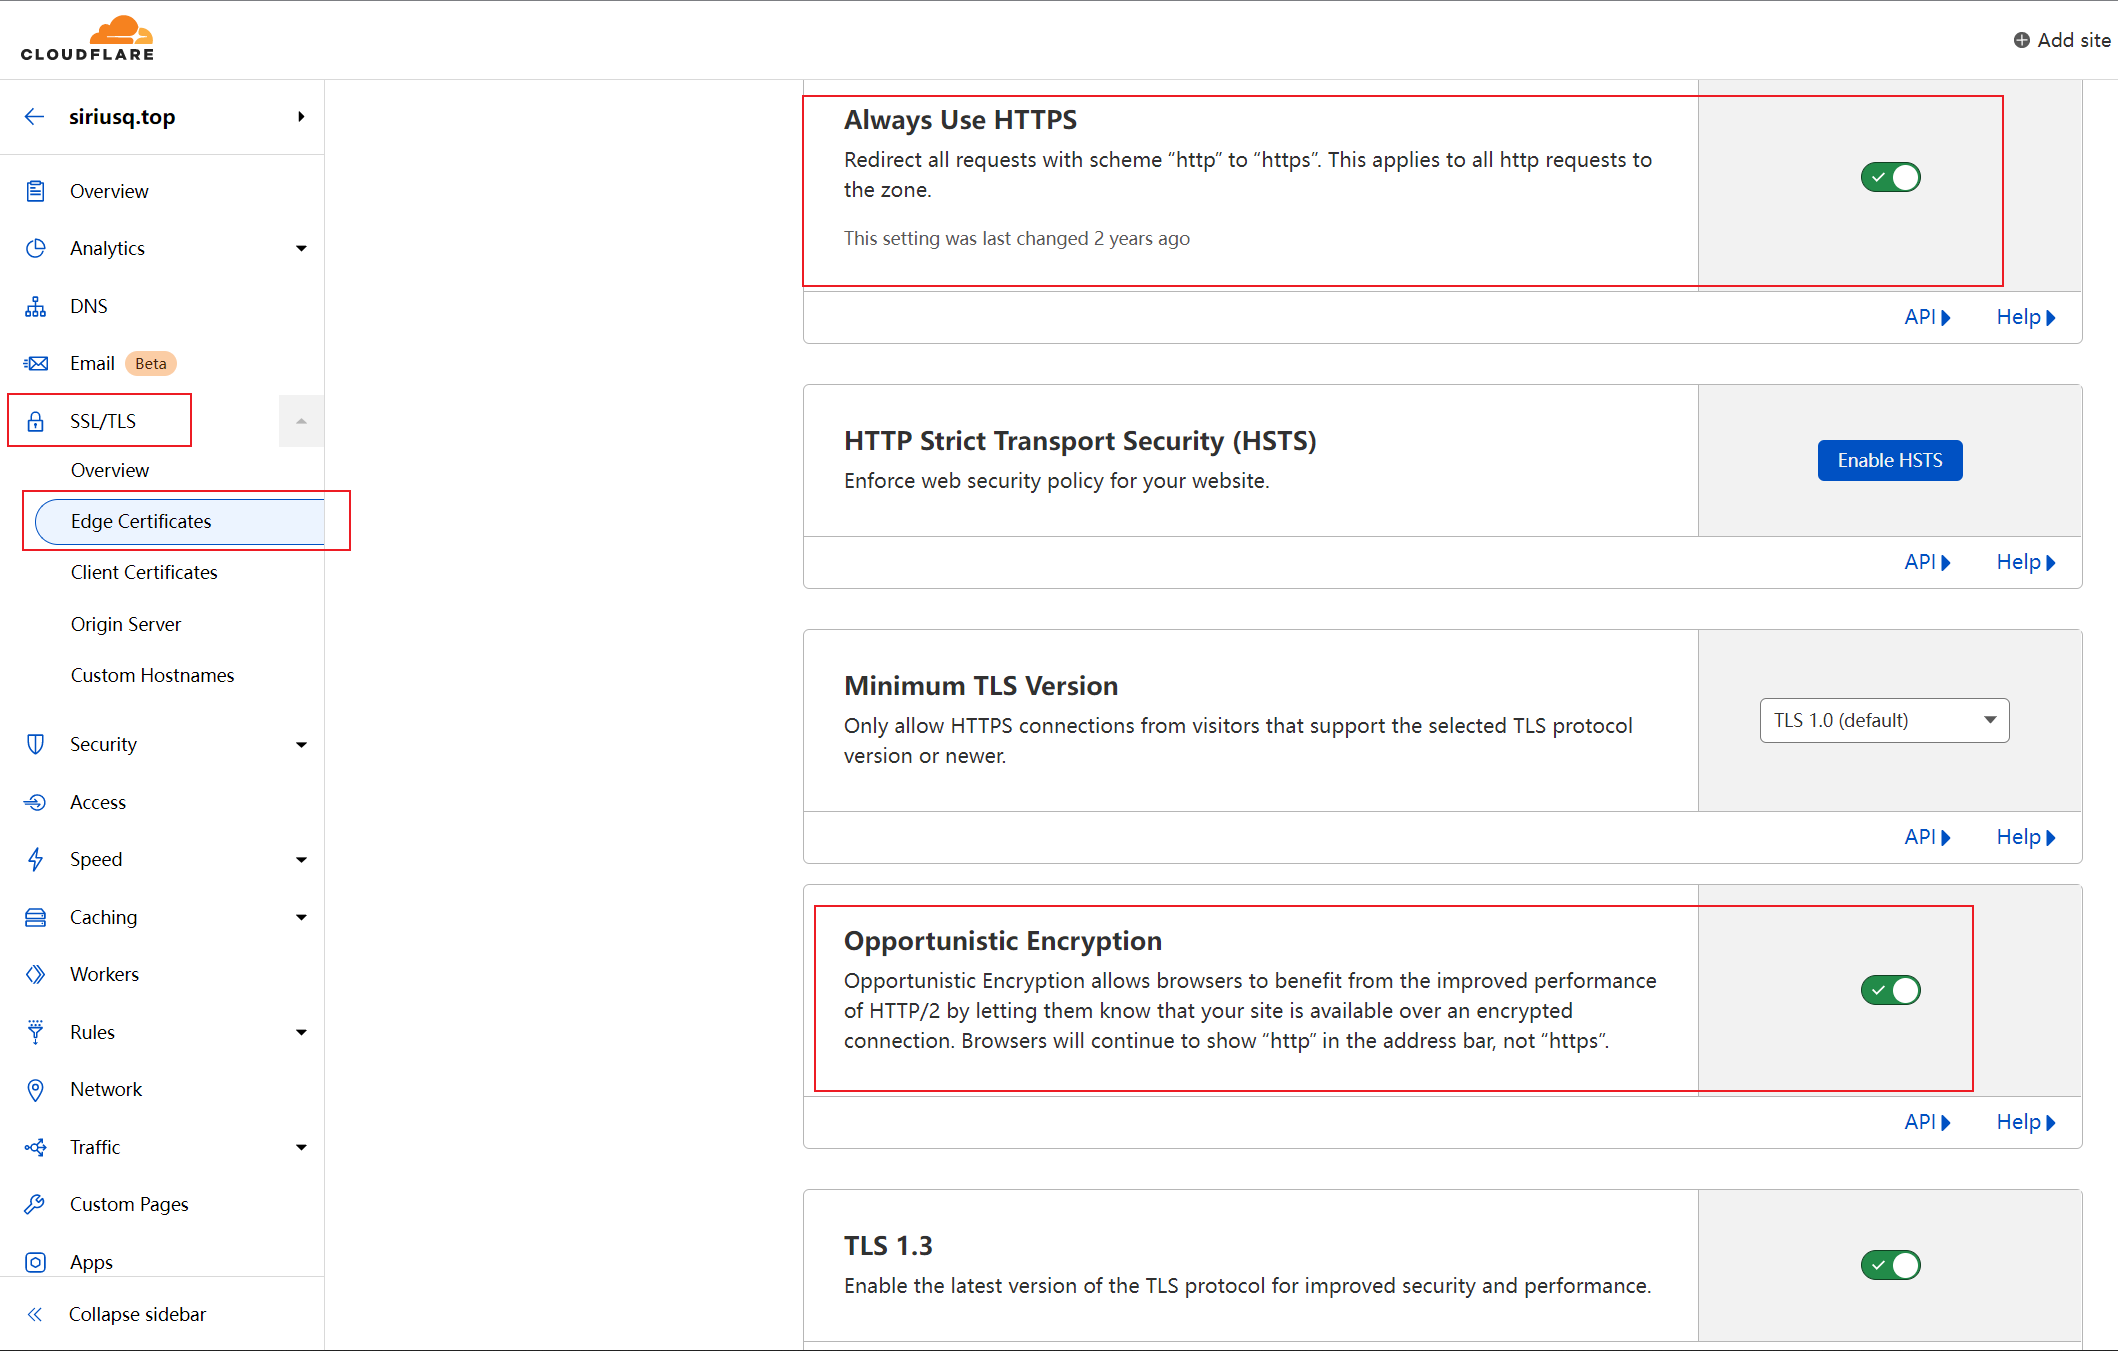
- Then, in
Edge Certificates, enableAlways Use HTTPSandOpportunistic Encryption, among others.![Edge Certificates]()
- In
Origin Server, enableAuthenticated Origin Pulls.![Origin Server]()
- In the
- After it becomes active, go to the
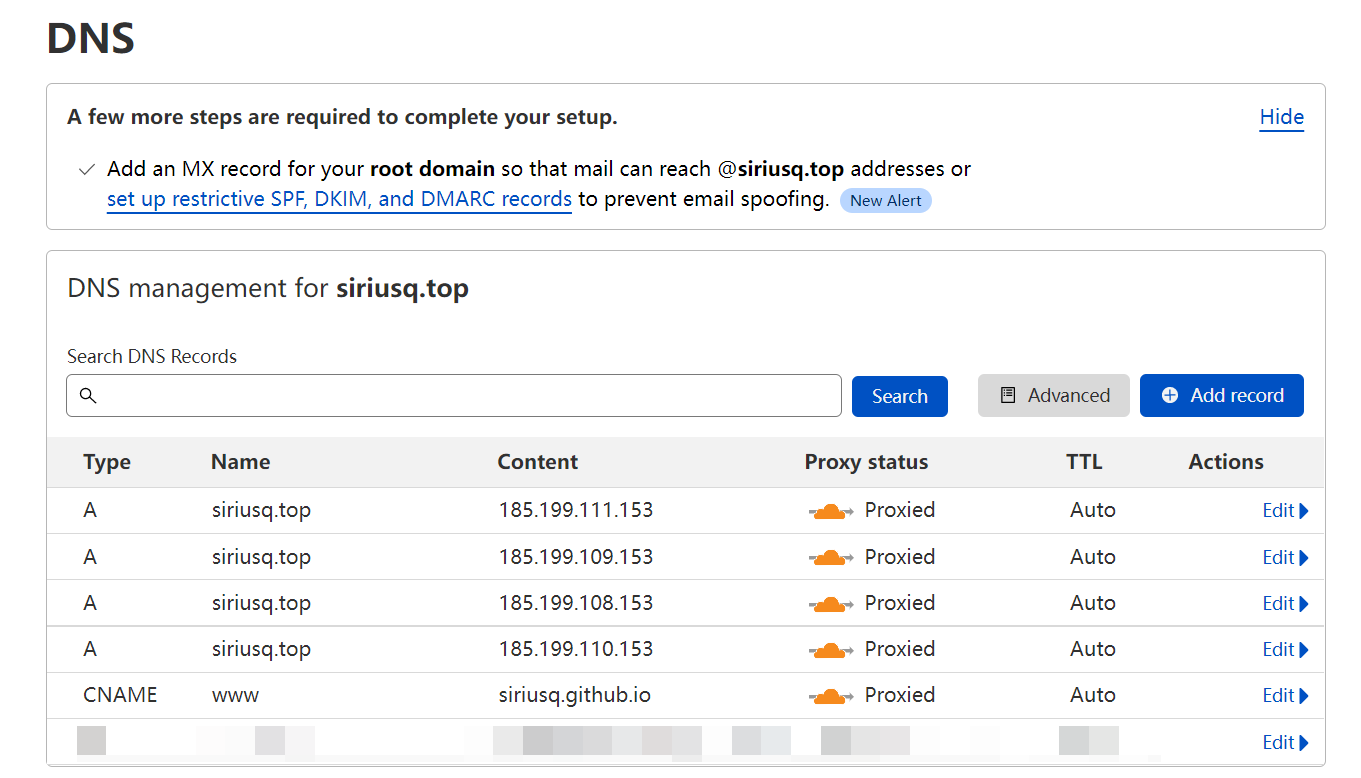
DNSsettings and add four A records and one CNAME record.- For the CNAME record, set the NAME to
wwwand the Content to GitHub Pages’ default domain, i.e.,username.github.io. - For the A records, set the Name to either
@or your domain and the Content to:- 185.199.108.153
- 185.199.109.153
- 185.199.110.153
- 185.199.111.153
- For the CNAME record, set the NAME to
- Confirm that the Proxy status for each record is set to
Proxied, indicated by an orange cloud icon.![Proxy Status]()


GitHub Pages Configuration
- Open your website’s repository settings, go to
Settings-Pages. - In
Custom domain, enter your domain name. After clicking Save, it will automatically generate a CNAME file.
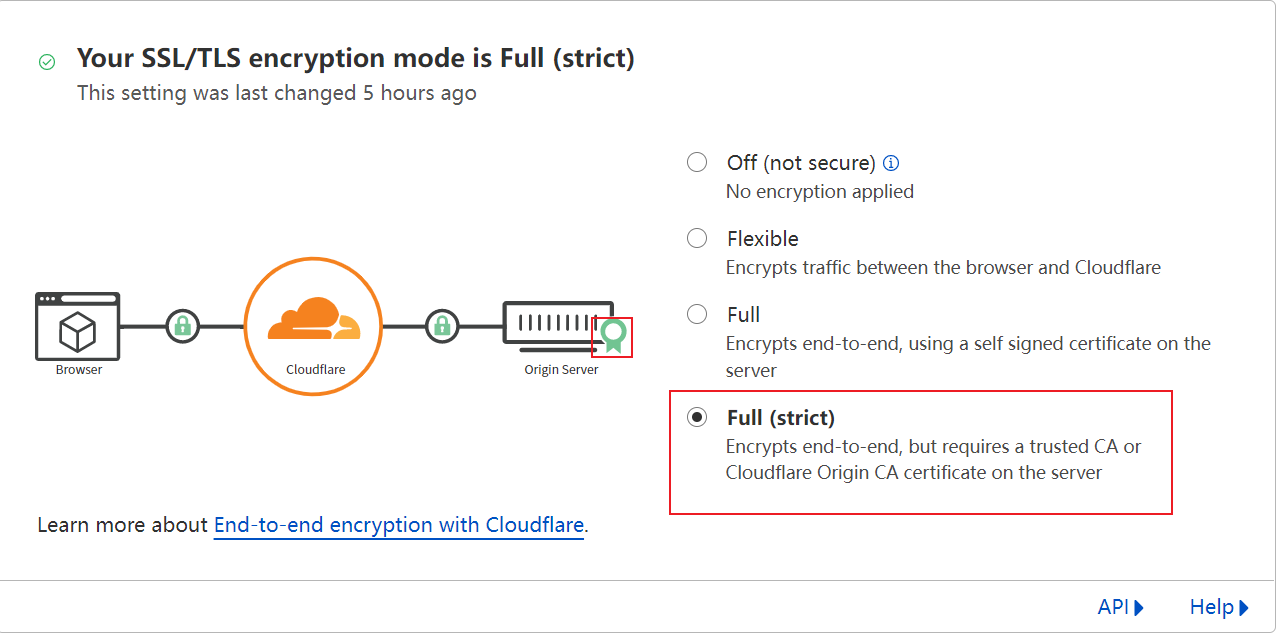
Enable Full (strict) Mode Encryption
The difference between Full (strict) mode and Full mode is that Full (strict) mode uses valid certificates signed by trusted CAs or Cloudflare Origin CA and verifies the certificate for each request. On the other hand, Full mode uses unverified self-signed certificates. GitHub Pages can obtain a free trusted certificate by enabling Enforce HTTPS, meeting the conditions to enable Full (strict) mode. Here’s an issue I discovered today: I couldn’t enable Enforce HTTPS in my Pages settings. The checkbox was grayed out. It turned out that the Cloudflare proxy status caused this issue. Here’s the solution:
- In Cloudflare’s DNS settings, change the Proxy status for all records to
DNS Only, indicated by grayed-out clouds.![https00.png]()
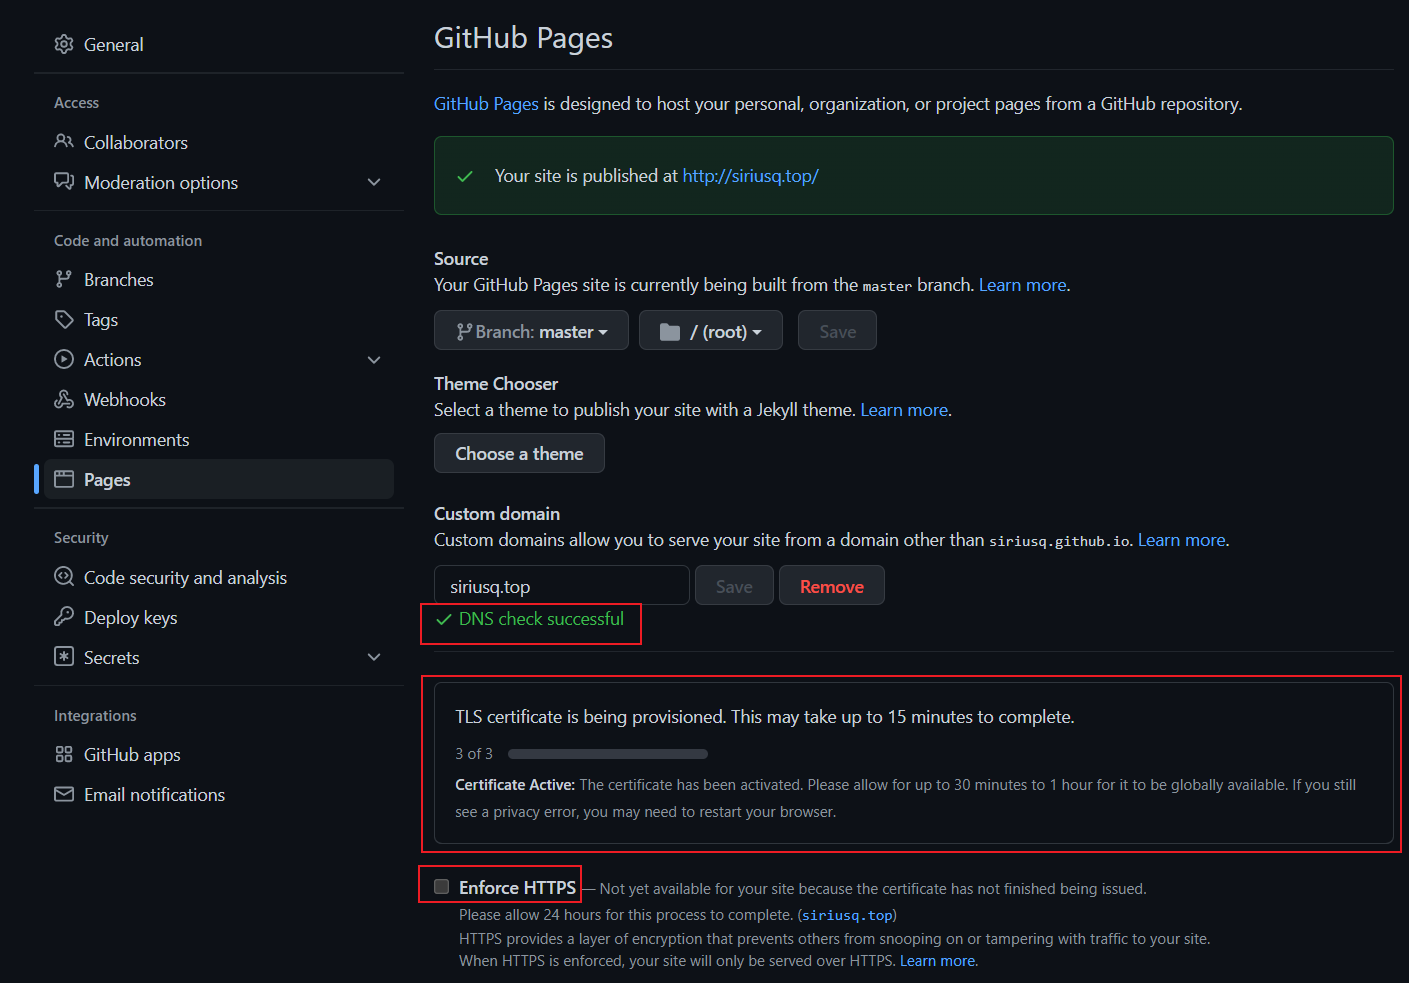
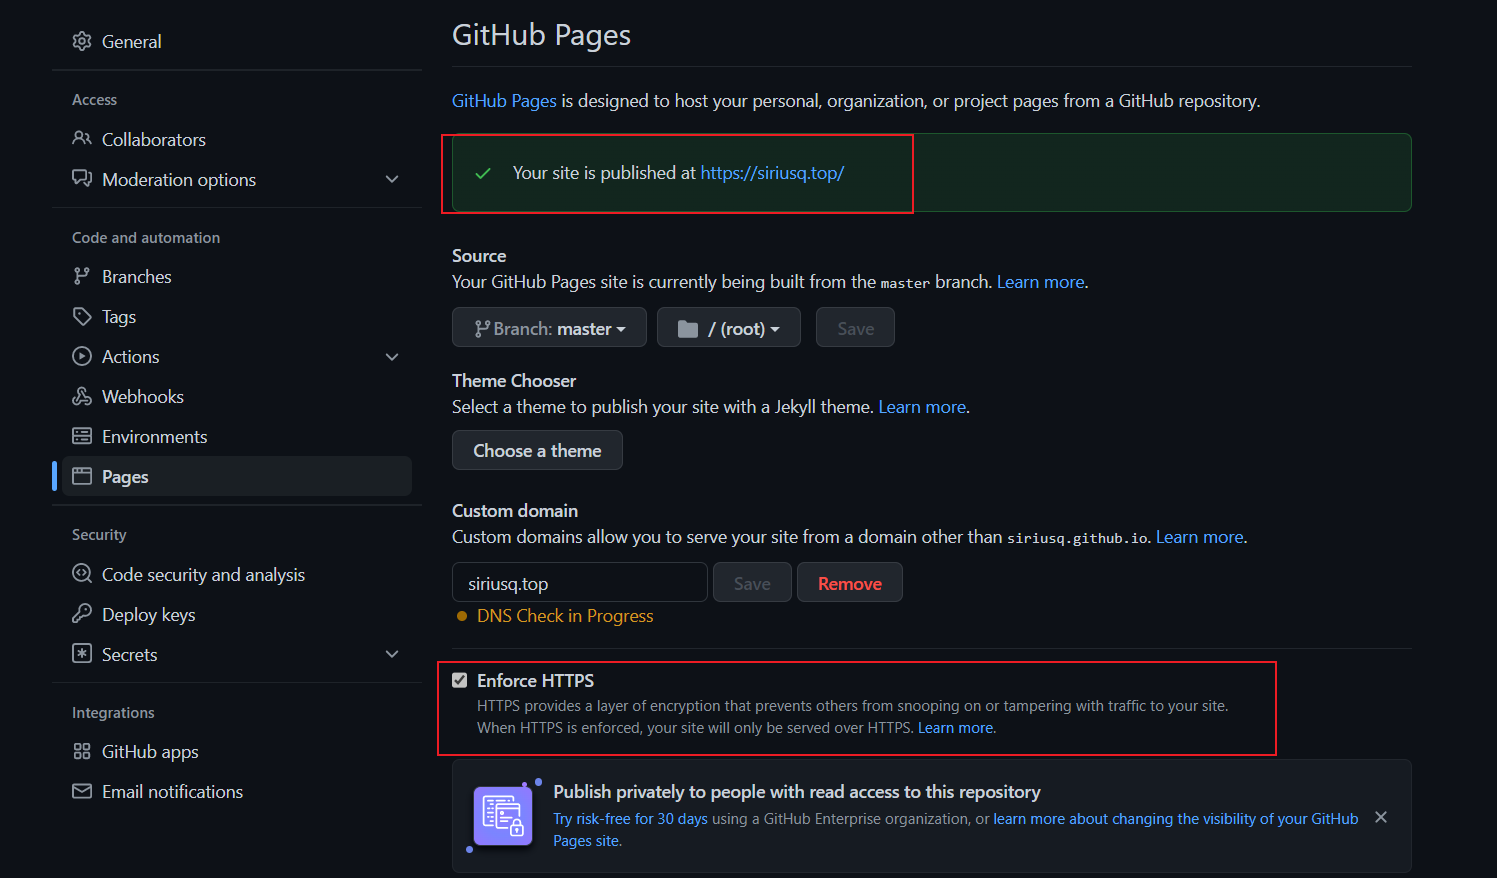
- Go back to your Pages settings and refresh the page. Now, you can check
Enforce HTTPS. - GitHub will automatically apply for an SSL certificate. Having this certificate enables you to enable Full (strict) mode in Cloudflare.
![https01.png]()
![https02.png]()
- After Pages’ HTTPS takes effect, return to Cloudflare and change the Proxy status for the records back to
Proxied, indicated by orange clouds. - In
SSL/TLSsettings, set the Encryption Mode toFull (strict).![https03.png]()

DNS Record Types Overview
Some content is sourced from Wikipedia.
A Record
An A record (Address record) is used to specify the IP address associated with a hostname (or domain name). Users can point the web server of their domain name to their own web server. It returns a 32-bit IPv4 address.
AAAA Record
An AAAA record (AAAA record) is used to resolve a domain name to an IPv6 address in DNS. Users can map a domain name to an IPv6 address and also resolve subdomains to IPv6 addresses. It returns a 128-bit IPv6 address.
CNAME Record
A CNAME record (Canonical Name Record) is used to map one domain name (alias) to another domain name (canonical name). When a DNS resolver encounters a CNAME record, it will restart the query process with the mapped target. CNAME records can be used for CDN acceleration by aliasing domain name resolution for websites.
NS Record
An NS (Name Server) record is a domain name server record used to specify which DNS server is responsible for resolving the domain. If you need to delegate subdomains to other DNS service providers, you should add NS records.
MX Record
An MX (Mail Exchanger) record is used to specify the mail server responsible for handling email sent to the recipient’s domain.
TXT Record
A TXT (Text) record is typically used to provide explanations or additional information for a hostname or domain name.
TTL
TTL (Time To Live) indicates the cache time for a DNS record on a DNS server, measured in seconds. When a local DNS server receives a resolution request for a specific domain name, it needs to send a resolution request to the authoritative DNS server specified by that domain name. The obtained resolution record will be stored in the local DNS server for a period. During this time, if the local DNS server receives another resolution request for the same domain name, it will not send a resolution request to the authoritative DNS server again. Instead, it will directly return the resolution record stored in the local DNS server.